• Home
  • Styles
  • Panels
  • Accessories
  • GO-BRICK®
  • Vendors
  • Technical Details
  • Contact
  • Shop
Native Custom Stone

Custom Stone Manufacturer

Questions? Call us at:   (888) 823-0745

  • Home
  • Stone
    • Country VillaCounty Villa Stone
    • Castle RockCastle Rock
    • Rubble StoneRubble Stone
    • Stack StoneStack Stone
    • Ledge Stoneledge stone
    • River Rockriver rock
    • Field Stonefield stone
  • Panels
    • CustomFit PanelsCustom-Fit DIY Stone Panels
    • Go-StoneGo-Stone DIY Stone Panels
    • AccessoriesStone Accessories
  • Brick
  • Find A Vendor
  • Technical
  • Contact
  • Shop
Home » Maintenance and Installation » DIY » Page 3

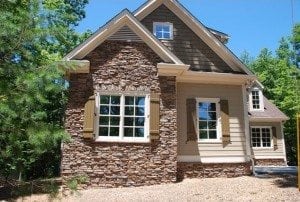
10 Steps to Install Custom Stone Veneer Around Windows

A custom stone veneer is a great way to add a little style to your home. It can make your house look like it was built entirely from stone but at a fraction of the cost of natural stone. To save a little money, homeowners with a do it yourself frame of mind have attempted to install their own custom stone veneer. As long as you’re careful, it is possible but you have to be sure and take extra precautions around your windows. If they are not sealed properly then you can leave yourself open to leaks and future water damage.

Before you get started on the steps below, you need to gather a few materials. For this project you will need:

  • Metal weep screed
  • Metal cap flashing
  • Silicone Adhesive

Step 1: On the plywood boards that form the outside of the house, known as the sheathing, you will find flashing tape installed. Squeeze out a beaded line of silicone adhesive in a zigzag pattern across that tape.

Step 2: Take your metal cap flashing and press it solidly against the flashing tape with the bottom edge against the top edge of the window.

Step 3: Now you will need to nail a metal weep screed into place over the top of the metal cap flashing. This will help to divert water away and act as a moisture guard.

Step 4: Starting at the bottom of the wall, begin installing the veneer and work your way up. When you get to the last piece of veneer, you have to measure the distance between it and the edge of the window and mark a line onto the back of the veneer.

Step 5: Cut along the line that you marked using an electric grinder but only cut about halfway through the veneer.

Step 6: Now place the veneer face down on a worktable with the line you cut running along the edge of the table.

Step 7: Using a hammer, gently tap on the part of the veneer sticking out past the table to break it along the line and remove excess material.

Step 8: Spread water over the back of the veneer piece to keep it from absorbing water from the mortar. If you don’t, it will cause the mortar to crack.

Step 9: Apply a half inch of mortar to the back of the piece and onto the wall where it will be placed. Then press the piece firmly into position.

Step 10: Repeat these steps as needed for the remaining windows.

Filed Under: Custom Stone Accents, DIY, Maintenance and Installation Tagged With: 10 easy steps, architecture, construction, custom stone, masonry, masonry veneer, stone veneer, stone window, stones, veneer, window accents, window stone

Seal Your Custom Stone Veneer in Just 4 Easy Steps

Adding a manufactured stone veneer to your home can go a long way toward improving its curb appeal and possibly its overall value as well. If you are trying to sell your house, a custom stone veneer can give it an upscale look that will set it apart from your neighbors. In order to keep costs down some homeowners have decided to tackle the project on their own instead of hiring an expert for the installation. The process is not too difficult and even inexperienced people can install it if they pay close attention to detail. However do it yourselfers often make the mistake of forgetting to seal their work.

Adding a sealant to your manufactured stone veneer is not expensive and can be done very easily if you follow these four steps:

  1. Do not try to add a sealant to your veneer for at least a month. If you seal the veneer too soon you will trap in the moisture and defeat the purpose of sealing it in the first place. Most stone veneers need 30 days to cure properly.
  2. Purchase sealant that is penetrating but can still breathe. If you are unsure about which to purchase, just ask the salesperson at your local hardware store and they should have no problem directing you to the right product. Use a paint brush to apply a thin coating of the sealant over the entire surface of the veneer.
  3. Read the sealant’s directions for how long it needs to dry and follow it exactly. You can really mess up the finish of your veneer if you try messing with your sealant before it has had time to dry all the way.
  4. After the first coat is completely dry, you need to apply a second coat the same way. Some sealants need another coat after that but unless the directions specifically call for it, never apply more than two coats.

Filed Under: DIY, Maintenance and Installation, Manufactured Stone, Tips and Advice Tagged With: custom stone, manufactured stone veneer, masonry, materials, sealant, sealing stone, stone sealing, stone veneer, veneer

4 Steps for Applying Manufactured Stone Siding

Adding manufactured stone veneer to your home is a great way to add value, and make your home more beautiful.  Stone has been a staple building material since the beginning of time. Manufactured, or custom stone veneer, has changed up the game a little bit though.  It is less expensive, and much easier to install.  In fact, this particular project can be completed over the weekend with little or no professional help.  There are many different styles of manufactured stone veneer to choose from, so make sure you choose one that perfectly accents your home.

When you have chosen your perfect manufactured stone veneer, you’re ready to get started:

  1. Prepare the surface that you will be applying the siding to. First you will need to create a moisture barrier by affixing house wrap or roofing felt to the area. If you are preparing a masonry wall you can skip the moisture guard. Next you will need to attach a metal lath to the wall with screws or nails to give the mortar a way to gain purchase on the wall.
  2. Start to apply the mortar mixture to the lath in a layer that is between 1/8 and 1/16 thick.
  3. Start applying the stones to the mortar by holding them in place for 5 to 10 seconds. Try to keep them as tightly spaced as possible because it will make filling in the gaps much easier later on.
  4. If you fit all of the stones tightly together then you may be able to just fill in the spaces between with an S type mortar. If not then you may have to cut small pieces of stone to put between the larger stones. The best way is to mark a stone using a pencil and then use a cut off grinder to give it the correct shape.
Native Custom Stone, a lead manufacturer of custom stone veneer has high quality stone in many varieties.  They are sure to have the perfect stone to accent your home, or commercial building.


Filed Under: DIY, Faux Stone Veneer, Maintenance and Installation, Manufactured Stone, manufactured stone Tagged With: building material, building materials, construction, custom stone, manufactured stone veneer, siding, stone veneer, stone veneer siding, stones, veneer, veneers

Back-Splash: Update Your Kitchen with Manufactured Stone Veneer

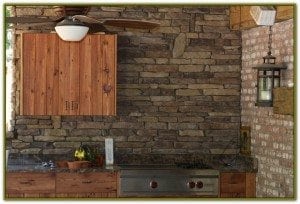
Manufactured stone veneer is an excellent way to renovate any part of your home.  We have already talked about how you can make a fireplace more beautiful with the use of custom stone veneer, and today we are going to talk about the steps for installing a great back-splash to update your kitchen.

Back-splashes are great for a few different areas in your kitchen such as behind the sink, stove, or counter space.  Here are the materials that you will need for your project:

  • Chalk line
  • Level
  • Trowel
  • Mortar

Step 1:  Find a great manufactured stone veneer for your project. Once you have all of your materials. Follow your mortar manufacturer’s instructions for mixing the proper mortar-to-water ratio. Spread the mortar compound on the space that you will be installing your back-splash.

Step 2:  Use your level and chalk line to ensure that you’re working in an even line. Be sure to check your work with the level periodically.

Step 3:  Start installing your manufactured stone veneer in the design that you want.  Make sure that your stone is sufficiently placed in the mortar, but doesn’t slide.  Also, make sure to clean off mortar on the stone as you go.  If mortar is seeping out from your stones in excess you might want to start again and use less on your initial application.

Step 4:  Once all of your stones are in place, use a piping bag to fill in gaps between your manufactured stones.  Clean up excess mortar with a small grout trowel.

Step 5:  Clean up any mortar on your stones and allow them to dry, this should take no less than 24 hours.  However it’s wise to follow your manufacturer’s instructions on dry time.  Clean up your stones once they are dry, and with a back-splash behind a stove or sink it is recommended that you seal your project to prevent staining and moisture damamge.

There you have it, a great kitchen back-splash.  Make sure you use a quality manufactured stone veneer to ensure that your new kitchen will stand the test of time.


Filed Under: Custom Stone Kitchen, DIY, Manufactured Stone Tagged With: custom stone, kitchen back splash, manufactured stone, manufactured stone veneer, stone kitchen, stone veneer, stone veneers

5 Steps to a D.I.Y. Custom Stone Veneer Fireplace

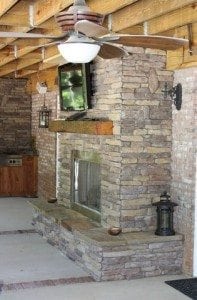
A GA custom stone veneer fireplace can give you the perfect place to gather with friends and family on cold nights. It also adds a lot of value to your home with a fraction of the cost in comparison to natural stone. If you have a DIY frame of mind then with a little preparation, you can tackle the project yourself. Or even better, you may want to recruit a friend to lend a hand.

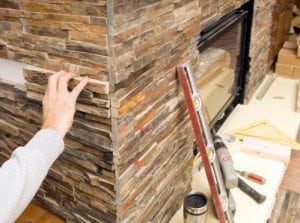
The following steps will help to illustrate the right way to install a custom stone fireplace:

  1. Measure twice, cut once – Go over your plans to see if they are simple enough for you to implement. Measure the wall and make sure that you have all the materials that you need on hand.
  2. Start sizing the stone – Whenever possible, let the stone merchant cut the stones to your specifications. They have the experience and tools to do a much better job than you would be able to do. If you do have to cut the stone yourself, make sure that you are using a diamond tipped drill.
  3. Time to mortar – Make sure that the mortar you are using was designed for the task at hand. Start assembling the fireplace according to your design and always remember to put the mortar on the sides of stones that can’t be easily seen. Let the mortar sit until it has fully dried.
  4. Final check – Once the mortar is dry, give the fireplace a close inspection to find any cracks that you may have missed. If you find one, seal it with more mortar.
  5. Clean Up – You can choose to seal your stone, but it’s not required. Now you’re ready to enjoy your new fireplace.

A great GA custom stone veneer manufacturer will have the perfect stone for your fireplace, or DIY project. Find a distributor near you and get started renovating your home today.

Filed Under: Custom Stone Fireplace, DIY, Faux Stone Paneling, Maintenance and Installation, Tips and Advice Tagged With: beautiful fireplace, beautiful homes, custom stone, custom stone fireplace, fireplaces, stone veneer, stone veneer manufacturer, veneer, veneer fireplaces, veneer manufacturer

Dress it up! 7 Steps to Install Faux Stone Veneer to Your Home!

Your local faux stone supplier wants to to show you how to make your home more appealing by applying faux stone veneer. Manufactured stone veneer can be used in so many do-it-yourself projects to accent your home. It gives off the impression of sturdy stone construction without the cost and time consuming installation. One of the many great places to install manufactured stone veneer is on an exposed exterior basement.

Steps to Installing Manufactured Stone Veneer:

  1. Your surface will need to be clean, unpainted, untreated, and unsealed. For brick, concrete, or block you can apply the veneer directly to the wall.
  2. Prepare your mortar. This is the best mix: 12 heaping shovels of sand to 1 bag of type S masonry mortar.
  3. Start with you straight edges first, so, right where your siding stops. Spread the mortar approximately ½” thick onto the exposed surface.
  4. Place your stone over and under by 3” from where you want to stone to rest. Push the stone into the mortar firmly and ‘twist it’ up and over to its resting place.
  5. Dressing the joints is a critical step, its also the slowest. When the joints are drying, at about 50%, fill the shallow areas and smooth them with a jointing tool.
  6. Brush the finished mortar with a handheld whisk broom to clean off excess. Also, clean off any mortar that is on the stone with a wet rag. Do not let it rest over night without completing this step.
  7. Finish up by cleaning your area. Let the mortar dry for 24 hours and wash with a simple water hose. Apply sealer according to manufactures instructions.

This is surprisingly simple installation that will have professional results. Your home will have the look of a sturdy stone construction. Native Custom Stone has a huge selection of manufactured stone veneer designed to make the interior or exterior of your home look timeless. If you’ve been considering adding stone to your home give them a call!

Filed Under: DIY, Faux Stone Veneer, Maintenance and Installation Tagged With: faux stone, faux stone veneer, home exterior, manufactured stone, manufactured stone veneer, stone veneer

Stone Veneer Panels Can Be A Weekend Project

You have started projects that promised to be weekend projects and found yourself with weeks of work to finish. One of the products that really can go up in a weekend of work is DIY stone veneer paneling. In short, it provides a solution to getting your walls covered with truly beautiful faux stone panels without the cost or the labor involved in the process that you normally would have when creating stone walls.

Here’s why stone veneer panels work as a great DIY project:

  • It does not require a great deal of time or physical labor to install – quite unlike installing traditional stone onto walls.
  • It is far more affordable than using traditional stone, often costing a fraction of the cost you would pay otherwise.
  • It is easy to install. You do not need to piece together stones and hope they fit. This product comes to you in a beautiful, easy to put up panel.
  • You can use it anywhere. The stone veneer paneling you want can often be used both indoors and outdoors, in any room of the house, even.
  • It has a long lifespan. It does not fade. It will not crack on you. It does not split and the sun will not damage it. It is even impact proof. This means it gives you years of beautiful looks without hassles.
  • It is lightweight. It does not require a great deal of support to be put on the wall safely.

For all of these reasons, individuals should consider the benefit of using stone veneer paneling throughout their home. It can hide any unsightly wall and add significant value to your home with just a weekend’s worth of work – really just a weekend to get it up and looking great is all it takes. For many homeowners, that is the perfect combination.

For more information on faux stone CustomFit panels available from Native Custom Stone please contact us directly!


Filed Under: Adhered Stone Veneer, DIY, Faux Stone Paneling, Maintenance and Installation Tagged With: do it yourself, faux stone panels, installing stone veneer, stone panel systems, stone veneer, stone veneer panels, stone veneers

  • « Previous Page
  • 1
  • 2
  • 3

Cart

Visit the Showroom

Visits to the Native Custom Stone Showroom are by appointment only. Call (888) 823-0745 today to schedule!
 

Find a Vendor

Filter by

No results found in this location. Please try again.

Get Directions

Add Waypoint
show options hide options
Print directions Reset directions
Fetching directions......
Reset directions
Print directions

Contact Us

Stone Types

  • Castle Rock
  • Country Villa
  • Field Stone
  • Ledge Stone
  • River Rock
  • Rubble Stone
  • Stack Stone

Tech Links

  • CAD & Installation Details
  • BIM | Revit | Autocad
  • Testing & ICC-ESR Report
  • 3-Part Spec & MSDS
  • Product Warranty
  • LEED Details
  • Cleaning Instructions
  • Product Data

Resources

Native Custom Stone Lunch and Learn | Stone Installation Information Download Our Brochure | Native Custom Stone Brochure Download

Contact Info

Native Custom Stone
236 Hightower Parkway
Dawsonville, Ga 30534
Phone: (888) 823-0745
Phone: (706) 216-5545

Follow Us!

Follow Us on FacebookFollow Us on LinkedInFollow Us on Blog

Actual stone colors may appear different in pictures due to pigments and lighting. Native recommends viewing actual samples prior to placing an order.
Website Designed by: Grater Digital |  Sitemap  |  Privacy Policy