• Home
  • Styles
  • Panels
  • Accessories
  • GO-BRICK®
  • Vendors
  • Technical Details
  • Contact
  • Shop
Native Custom Stone

Custom Stone Manufacturer

Questions? Call us at:   (888) 823-0745

  • Home
  • Stone
    • Country VillaCounty Villa Stone
    • Castle RockCastle Rock
    • Rubble StoneRubble Stone
    • Stack StoneStack Stone
    • Ledge Stoneledge stone
    • River Rockriver rock
    • Field Stonefield stone
  • Panels
    • CustomFit PanelsCustom-Fit DIY Stone Panels
    • Go-StoneGo-Stone DIY Stone Panels
    • AccessoriesStone Accessories
  • Cast
  • Brick
  • Find A Vendor
  • Technical
  • Contact
  • Shop
You are here: Home / Archives for Custom Stone Accents

Skills Required for a DIY Stone Veneer Project

The skills required for any DIY stone veneer project will depend on the materials and methods used for the job. For instance, if you opt to use natural stone cut for use as a veneer, you will need good building skills even if you don’t cut the stone to size yourself. If, on the other hand, you decide to use man-made stone veneer, it will be a lot easier and quicker to install. And if you choose to use Native Custom Stone’s ingenious Go-Stone Panels, you don’t need any special skills at all.

Generally, natural stone veneer is a job for the professionals. Because of the weight, it will require a foundation, and the cut-stone veneer units will have to be laid in mortar. Depending on the size of the stone used, it might even need steel reinforcing.

Manufactured stone is a lot easier to work with, and it doesn’t usually need any concrete foundation or base. Go-Stone panels are even lighter

Skills Needed for a Faux Stone Veneer Project

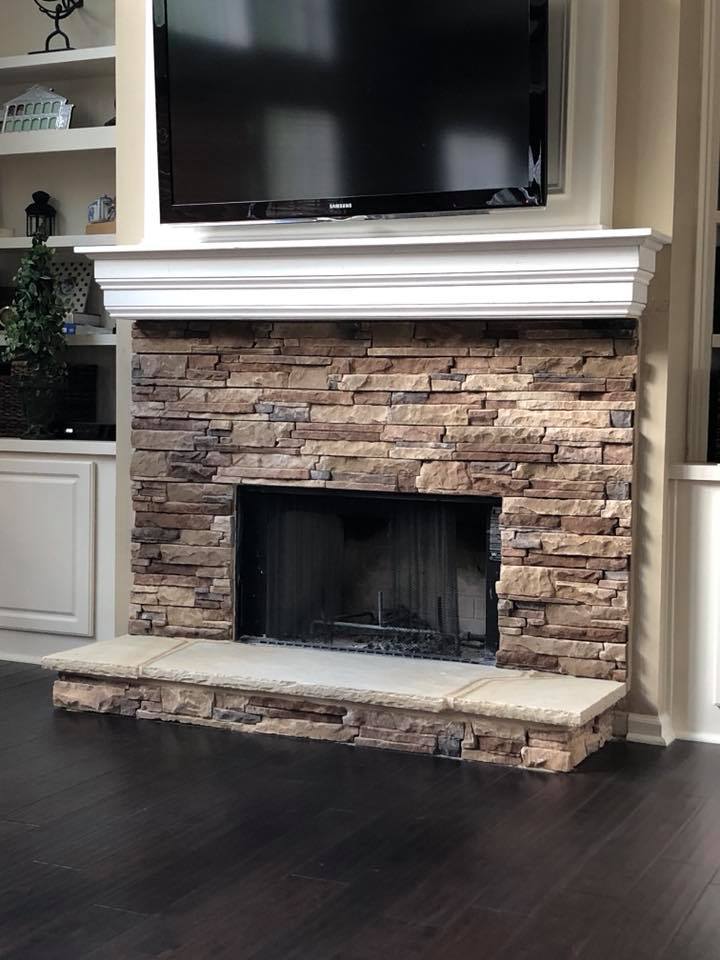
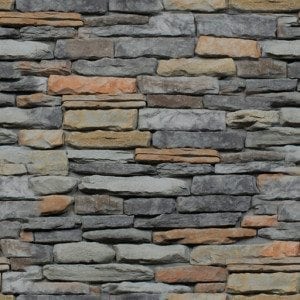
Our #21 Aspen Ridge CustomFit Panels

Most faux stone veneer projects require basic building skills including knowledge of how to ensure everything is straight and square, as well as level and plumb. In essence, for any structure to be square it must have right-angled corners, horizontal surfaces must be flat and level and vertical surface must be plumb. All this means is that you need to know how to measure correctly and how to use a torpedo or spirit level since these tools allow you to check both horizontal and vertical surfaces. A builders’ square is useful for testing that corners are at right-angles.

While some faux stone veneer products can be laid dry and stacked without mortar, it is often better to use mortar. You can buy a pre-mixed product that comes in one bag for this.

It might take a bit of practice using a trowel to lay the mortar on the stone veneer, but it isn’t particularly different. If you work systematically, checking your vertical and horizontal levels as you go, there is no reason why you can’t achieve a professional finish.

Go-Stone is a unique product made partially from rubber tires. Because it comes in panels, it is a quicker process than laying a faux stone veneer. Nevertheless, you will need the same basic skills that relate to ensuring the veneer is straight, level, and plumb. Instead of working with mortar, Go-Stone panels are laid using a ceramic tile and stone adhesive.

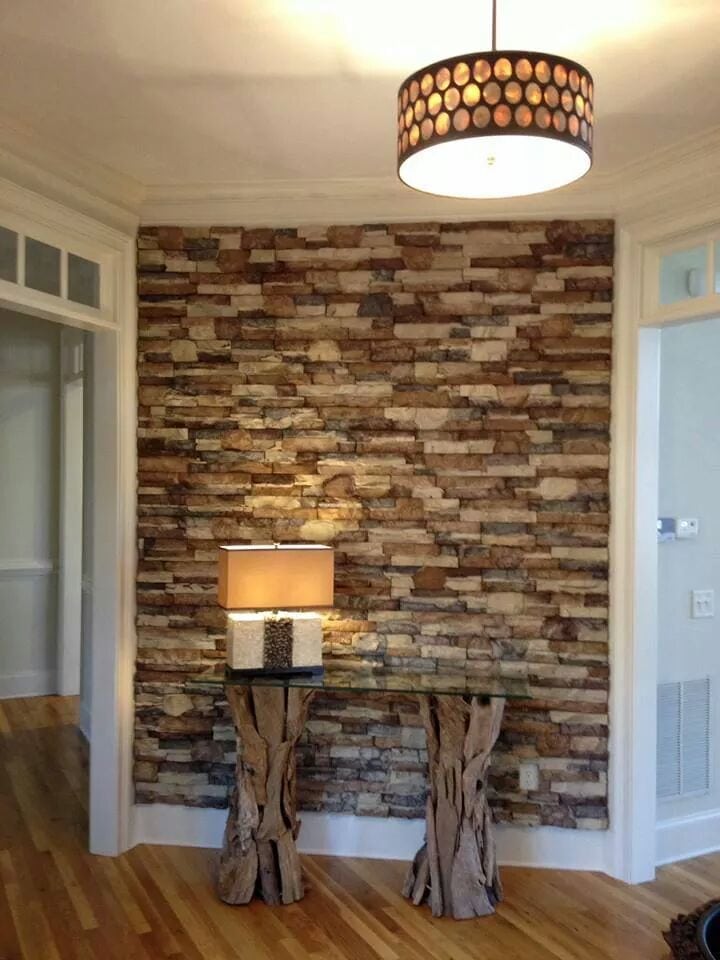
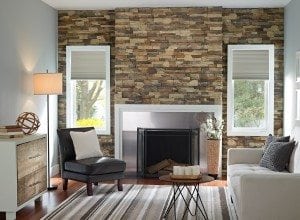
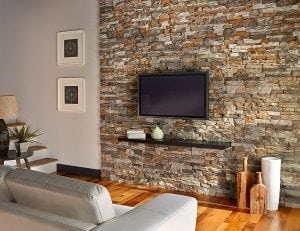
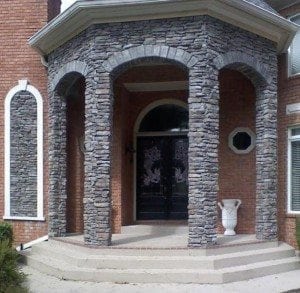
Whether you opt for a faux stone veneer or Go-Stone panels, Native Custom Stone has products that offer lots of choices of finish and color. You’ll wonder why you ever considered using natural stone!

Filed Under: Custom Stone Accents, Custom Stone Bathroom, Custom Stone Fireplace, Custom Stone Kitchen, Faux Stone Paneling, Go-Stone Panels, Maintenance and Installation, Manufactured Stone

Go DIY with Go-Stone Manufactured Stone for Interior Walls

Looking for a really exciting DIY project that will transform your living room walls? Well, here’s a challenge you won’t be able to resist: Go-Stone manufactured stone for walls. An ingenious faux stone veneer, the product is light, durable, realistic, and, best of all, it’s super-easy to install and relatively inexpensive.

Created with DIY enthusiasts in mind, Go-Stone is an environmentally friendly product manufactured by Native Custom Stone LLC. Supplied in the form of panels, it requires very few tools to install, and minimal preparation. Even though the finished surface will look like a hefty rock face, there is no need for any form of foundation to support the system. Unlike solid rock, it’s quick and easy to cut, and no special stonemasonry skills are needed to install it.

About Go-Stone Manufactured Stone for Walls

Launched in 2013, Native Custom Stone’s Go-Stone system is made primarily from recycled rubber tires using new age, crumb rubber technology, taking the concept of manufactured stone for walls to a completely new level. Not only is the product light in weight, it also helps to relieve the huge problem of discarded tires sent to landfills.

Go-Stone panels are supplied in boxes, each of which contains varied panels that will cover a total of five square feet, providing a total of 40 inches of vertical edging. Corner pieces are packaged with four linear feet in each box. Additionally, there are accessories in the form of surrounds that accommodate plug points and light switches.

Available in nine color combinations, it can be used to clad any interior wall, enabling you to create a feature and add a unique character to your room.

Installing Go-Stone is Easy

Go-Stone manufactured stone for walls is incredibly easy to install, and DIYers are sure to have all the tools required for the project:

  • Measuring tape (preferably a retractable steel type) to check the size of the area and to measure any cutting lines on panels
  • Torpedo or spirit level to make sure the panels are straight and level
  • Notched tiling trowel to apply the adhesive to the wall
  • Drywall or wet-cut saw to cut panels if necessary (to make them fit the area you are covering)
  • Painter’s drop cloth or rosin paper to protect your floor

In addition to the panels, you will need ceramic tile and stone adhesive. That’s it! No grout is needed!

And installation couldn’t be easier:

  • Prepare the work area by covering the floor with cloth or paper, and wiping the wall surface down to ensure it is clean. Allow it to dry thoroughly before proceeding.
  • Starting at a corner and from the floor, use the notched trowel to apply adhesive to the wall. Don’t try and cover the entire wall, rather work in small sections.
  • Position the first panel and push it firmly into place, moving it gently from side to side. Use the level along the upper horizontal surface, and on the vertical edges, to check that it is level. Never rely on existing floor and wall surfaces for this.
  • The packaging shows how you should alternate the different sized panels to achieve a natural look. Lay a full row along the base of your wall first.
  • When you install the second and subsequent rows, make sure you stagger the different sized panels for a natural appearance and to avoid the impression of seams. Keep checking your levels.

Go-Stone manufactured stone for walls is available throughout the state of Georgia as well as from select Home Depot stores, and online from BuildDirect.com

Filed Under: Custom Stone Accents, Go-Stone Panels, Maintenance and Installation

Is Manufactured Stone Cheaper than Natural Stone Veneer?

Brick and stone have always been popular with home buyers because it gives a feeling of security and safety to a house. After all, it’s made out of stone so it will be around a long time and stand up to almost anything that’s thrown at it. Since it adds so much value to a home, why do you think that more people don’t use it? Mainly the price! Manufactured stone shares many of the same benefits as natural stone but you will find that it costs one third to one half less to install it.

Why is natural stone so much more expensive to install than a manufactured stone veneer?

The three biggest reasons are:

  • Manufactured Stone | Go Stone | Native Custom StonePerception – Everyone knows about natural stone because it has been used in housing for hundreds of years. It has created its own demand. Manufactured stone has improved a lot over time and it has just recently been coming into its own as a design choice. Even though manufactured stone looks exactly the same as natural stone, lasts as long if not longer and is easier to clean, it is just not as well known yet.
  • Complexity – When you are installing natural stone as an element in a home you are dealing with a very heavy material. You need a skilled craftsman like a mason to install it properly. Plus, you will need a builder to ensure that the underlying structure can bear up under the added weight of the natural stone. With all of those things to consider, it is just not the right project for a beginner. The downside is that all of that skilled labor does not come cheaply.
  • Safety – As mentioned above, natural stone is extremely heavy unlike manufactured stone. Even if you tried to install it yourself which is not recommended, you will need a team of very helpful friends. If any piece of the building materials slips or falls then it will injure and possibly kill anyone that is not fast enough to get out of the way. Without the free labor, you will need to rent or buy machinery to move the stone and that is never a cheap option.

Manufactured stone is the best choice when starting your DIY stone project.  Visit our Find a Distributor page at Native Custom Stone to find out where you can order our manufactured stone today.

Filed Under: Custom Stone Accents, Manufactured Stone, Tips and Advice

Go Stone Makes DIY Stone Projects Easier

Have you heard of Go-Stone yet? If you are planning any DIY projects with stone elements in them then you owe it to yourself to read more at www.HomeDepot.com. It is an Eco friendly stone panel system that was created specifically for the “Do it Yourself” crowd.

Go-Stone requires very few tools to install and it is created almost entirely from recycled materials. It is not recommended for outdoor use but Go-Stone is perfect for projects like:

  • Kitchen back splashes
  • Fireplaces
  • Accent walls
  • Bathrooms

Go-Stone is:

  • Cherokee Go Stone | Native Custom StoneLight weight – Compared to standard building materials of its type, Go-Stone is incredibly light. This makes it very safe to work with and a lot easier for a single person to install.
  • Easy to install – Some building materials like natural stone require a hefty investment just to get the tools you will need for installation. Go-Stone doesn’t require any mortar to keep it in place or grout to fill in the cracks. A quick trip to your local hardware store will get you the few simple tools you need to create a finished professional look.
  • Environment friendly – The material is made from a special blend of crumbled rubber that started life as a tire. For every five squares of Go-Stone that you purchase you will be removing one old tire from an overburdened landfill. Considering that 242 million tires are thrown away per year in the United States and fewer the 7% are recycled, it is a great way to make a difference in your environment. Plus, you get a really professionally looking new design element for your home.

This innovative stone panel system will be available in three colors and it will have compliments like electrical surrounds and water table. With a product like this, even people with no experience in home repair will have the ability to improve the look of their home with stone.  Go-Stone is available online at HomeDepot.com nationwide, contact Native Custom Stone today to find out more about this revolutionary new product.

Filed Under: Adhered Stone Veneer, Custom Stone Accents, Go-Stone Panels

How to Create a Beautiful Custom Stone Patio

Most of the patios on older southern homes are just a flat slab of concrete. They are not very interesting and they definitely don’t make you want to invite friends over for a backyard cookout. The problem is that it is often too expensive to tear it out and have a new patio built. With the growing popularity of Native Custom Stone, many people have found a way around that particular problem. When you are laying down a Manufactured Stone Patio you need to have a concrete slab in place anyway so you can just build on what’s already there and a Custom Stone Patio will definitely add a little visual flair to your next get together.

If you would like to transform your eyesore of a patio into a Custom Stone Patio then you will need to gather a few materials:

  • manufactured stone patio | native custom stoneCement trowel
  • Flat ended shovel
  • Wheelbarrow
  • Concrete mix
  • Flat pacing stones
  • Masonry saw
  • Garden hose
  • Dish soap
  • Brush
  • Broom
  1. Sweep off the patio to clear all debris then clean it thoroughly. You need a spotless surface to build on. Once you are finished let it dry out.
  2. Place your stones down where you want them to go leaving about an inch between them. If they won’t fit correctly you may need to make alterations with your masonry saw.
  3. Use the shovel to mix up the cement in your wheelbarrow. Start at one end and lift up a stone. Smear about a half inch of cement on the stone and another half inch on the patio where it will go. Press it firmly back into place until it starts to squirt up through the spaces.
  4. Continue doing that with every stone. Once you have done a few go back and trowel extra cement into the spaces where needed and scrap off any excess cement.
  5. Mist the patio with your garden hose and then let it dry over night. Do it again every morning and evening for the next 2 days. After that you are finished.

Filed Under: Custom Stone Accents, DIY, Faux Stone Veneer, Maintenance and Installation

How to Install a Cultured Stone Interior Wall with Mastic

Cultured stone can add an element of luxury to any home by installing it on an interior wall. It’s an affordable alternative to having natural stone installed…plus it’s easy to do it yourself.

What You Will Need to Install Cultured Stone:

  • Native Custom Stone’s Cultured Stone
  • Mastic
  • Wire Mesh
  • Trowel
  • Wire Cutters 
  • Work Gloves
  • Goggles
  • Tape Measure
  • Tarp (Floor Protector)
  • Staple Gun
  • You may also need a Wet Tile Saw
  • Prestige Brown LedgeStep 1 – Prepare your interior wall. Measure your wall area and cut your wire mesh to fit. Ensure that your wire mesh doesn’t overlap. Staple the mesh to the wall using a staple gun every 4 to 6 inches by 4 – 6 inches.
  • Step 2 – Cover you wire meshed wall with a layer of mastic before beginning installation. Using your flat trowel ensure that you cover the wire mesh enough to fill all voids between the mesh and existing wall. Check to make sure that it is bonded well to it’s surface. Allow the mastic to dry for 24 hours before you get started with your stone.
  • Step 3 – Begin installing your cultured stone from the bottom working up. Apply mastic to the back of the stone and apply to the surface. The stone, just like a natural stone will vary in size, so you may find that you need to cut it to fit using a wet tile saw. If you have to use the wet saw ensure that you’ve dried the stone before applying mastic.

TIP: You want enough mastic to ooze a bit when you press the stone to the surface, but not so much that it oozes beyond the joints of two stone pieces.

  • Step 4 – Allow your stone to dry for 72 hours before sealing the stone. Use this guide to learn how to clean your stone once installation is complete. Enjoy!

Native Custom Stone can create a custom stone color and style based on your needs. Contact a Native Custom Stone vendor near you to find our more about their beautiful cultured stone products.

Filed Under: Custom Stone Accents, DIY, Maintenance and Installation Tagged With: DIY Stone Wall, interior cultured stone, interior design, manufactured stone interior

How to Install Your Own Manufactured Stone Arch

It’s kind of funny when you think about it. Our earliest ancestors built stone arches and various other architectural elements because stones were plentiful and cheap. Then once we became civilized, stone became more and more expensive until people had to stop using it just because of the high price. Luckily manufactured stone was invented and now we can add a little style and substance to our outdoor projects without breaking the bank.

Before you begin to install your manufactured stone onto your arch you will have to gather a few items.

You will need:

  • Tile sealant
  • Buckets
  • Sponge
  • Grout bag
  • Four inch grinder
  • Chipping hammer
  • Acrylic modified thin set
  • Measuring tape
  • Pencil
  • Pointing trowel
  • Mason’s Trowel
  • Nylon brush
  • Safety goggles
  • Ladder

Once you have everything together you can start going through these steps:

  1. Manufactured Stone Arch | Native Custom StoneLay out all of the manufactured stone pieces under the arch. Check your manufactured stone corner pieces to make sure they have fully dried or “cured”. The corner pieces are always installed before the rest because they act as an anchor for them to tie into.
  2. Mark the center of the arch with a straight line using your pencil. Make sure your first piece is centered on that line and stagger the corner pieces with your first installation piece. Mark an outline of where the piece will go.
  3. Mix the acrylic modified thin set until it is stiff. It should remain sticky and reasonably hard to smear with a trowel. Give the back of the piece a thick coating and make sure it is consistent to fill in gaps. Lightly coat the place where you will be putting the piece for extra adhesion. Take care not to get any of the mixture onto the surface of your manufactured stones.
  4. Using the ladder put the piece into place under the arch. Lean into the piece as you apply it so that your body weight will help hold it in place. Keep pressure on the piece if you need to slide it from side to side so you don’t accidentally drop it. Step back and look at the piece for a few moments to make sure it is not sagging.
  5. Keep going through the 4th step until all the pieces are in place. Start cutting the pieces using a chipping hammer or the 4 inch grinder. Once you are finished you should let the stones sit for about 24 hours.
  6. Get your sponges and nylon brush along with a bucket of water. Start cleaning the pieces but be careful not to accidentally mark the surface. Once the pieces are clean you will have to wait for them to completely dry before continuing.
  7. Use the grout bag to start putting grout into the cracks between the stones. The grout should easily come out of the grout back but be thick enough to adhere to the underside of the arch. Avoid getting grout onto the surface of the stone as much as possible and wipe it off with a wet cloth when you do. Wait for the grout to dry before you start tooling it with trowels. When you have finished, wait 24 more hours before starting the next step.
  8. Seal the stones with masonry or tile sealant. The best way to apply the sealant is with a spray bottle. Keep applying the sealant until the sealant is no longer able to get through to the stone.

Filed Under: Custom Stone Accents, DIY, Maintenance and Installation, Manufactured Stone Tagged With: arch way stone, custom stone veneer, dawsonville ga stone, diy manufactured stone, diy manufactured stone entry, manufactured stone, native custom stone, stone arch

How to Remove Mortar from Manufactured Stone Veneer

Manufactured stone veneers have become a very popular project for do it yourself homeowners. The stone adds elegance and rustic charm to everything from your fireplace to the outside of your home. Since it basically amounts to sticking rocks in mortar, building a manufactured stone veneer seems like it would be very easy but it can go wrong quickly. A veneer can be ruined by things as simple as:

  • Accidentally wiping mortar that’s still wet
  • Getting excess mortar onto the stones surface
  • Overly humid conditions
  • Incorrect stone placement

Once the stones are in place, it can be a chore to remove mortar from them without damaging the stones. However, if you do make a mistake and need to remove your mortar, it can be done in seven easy steps:

  1. Manufactured Stone Veneer | Custom Stone | MortarGather the equipment that you will need for the job: water, dish detergent, two stiff brushes that are not wire and rags.
  2. If the mortar is still fresh then you must wait for it to dry completely. In most situations a full day and night will be needed to thoroughly dry fresh mortar.
  3. Mix up a warm water and dish detergent solution. The only trick to this step is that you cannot have bubbles in the mixture so keep mixing until all the bubbles disappear. Set it aside for now.
  4. Using one of your stiff brushes, start wiping it across the mortar that you need to remove from your manufactured stone. It may help to put the brush at an angle so you are wiping at the contact point between the mortar and the manufactured stone. Try to get as much of the mortar off as possible during this step.
  5. Use one of the rags to remove all the dust that has been accumulated on the stones surface.
  6. Take your second brush and dip this one into your water and dish detergent mixture. Use the same technique as before to remove the rest of the mortar and give the other parts of the exposed stone a good scrub while you are there.
  7. Now give the stone another once over with regular water and look for any residual mortar. It has probably all been removed at this point but if you can still see some just repeat step five again.

Filed Under: Adhered Stone Veneer, Custom Stone Accents, DIY, Faux Stone Paneling, Faux Stone Veneer, Maintenance and Installation, manufactured stone, Tips and Advice Tagged With: brush, custom stone, detergent solution, manufactured stone, manufactured stone veneer, masonry, mortar, stone mortar, stone surfaces, stone veneer, stones, veneer

10 Steps to Install Custom Stone Veneer Around Windows

A custom stone veneer is a great way to add a little style to your home. It can make your house look like it was built entirely from stone but at a fraction of the cost of natural stone. To save a little money, homeowners with a do it yourself frame of mind have attempted to install their own custom stone veneer. As long as you’re careful, it is possible but you have to be sure and take extra precautions around your windows. If they are not sealed properly then you can leave yourself open to leaks and future water damage.

Before you get started on the steps below, you need to gather a few materials. For this project you will need:

  • Metal weep screed
  • Metal cap flashing
  • Silicone Adhesive

Step 1: On the plywood boards that form the outside of the house, known as the sheathing, you will find flashing tape installed. Squeeze out a beaded line of silicone adhesive in a zigzag pattern across that tape.

Step 2: Take your metal cap flashing and press it solidly against the flashing tape with the bottom edge against the top edge of the window.

Step 3: Now you will need to nail a metal weep screed into place over the top of the metal cap flashing. This will help to divert water away and act as a moisture guard.

Step 4: Starting at the bottom of the wall, begin installing the veneer and work your way up. When you get to the last piece of veneer, you have to measure the distance between it and the edge of the window and mark a line onto the back of the veneer.

Step 5: Cut along the line that you marked using an electric grinder but only cut about halfway through the veneer.

Step 6: Now place the veneer face down on a worktable with the line you cut running along the edge of the table.

Step 7: Using a hammer, gently tap on the part of the veneer sticking out past the table to break it along the line and remove excess material.

Step 8: Spread water over the back of the veneer piece to keep it from absorbing water from the mortar. If you don’t, it will cause the mortar to crack.

Step 9: Apply a half inch of mortar to the back of the piece and onto the wall where it will be placed. Then press the piece firmly into position.

Step 10: Repeat these steps as needed for the remaining windows.

Filed Under: Custom Stone Accents, DIY, Maintenance and Installation Tagged With: 10 easy steps, architecture, construction, custom stone, masonry, masonry veneer, stone veneer, stone window, stones, veneer, window accents, window stone

5 Steps for Creating a Custom Stone Veneer Accent Wall

Manufactured Stone  has always been a popular building material because it gives a home a natural look and is more cost effective than natural stone. If you have the budget it is always best to let a professional construct your veneer for you but if you are comfortable working with your hands, it is possible to just do it yourself as well.

Before you get started you will need to gather up a few tools and materials like a trowel, mortar mix, metal lathe, 2 inch galvanized nails, plastic moisture barrier, stone veneer, hand rake, wire brush, a hammer and sand.

Custom Stone Veneer Accent WallOnce you have everything gathered up you are ready to start with step one:

  1. Secure a plastic moisture barrier over the surface of the wall that will be your veneer. It is best to use painters tape in case you need to make adjustments or move the barrier. Next you will need to use the galvanized nails to secure the metal lathe to the moisture barrier. Try to keep the nails 6 inches apart and try to hit the wall studs as much as possible.
  2. Read the mortar package then mix the sand and mortar accordingly. This will create a cement mixture that you will begin applying to the lathe. Use the trowel to spread a thin layer of the mixture over all of the exposed lathe.
  3. While the cement mixture is still wet you need to use the hand rake to either make scratches in the cement or just rake it. This will help your stone to adhere to the surface more securely. After you have finished you need to let it set undisturbed for forty eight hours.
  4. Take one of your stone veneer pieces and apply a layer of mortar across the back about a half inch thick. Then press it into place on the wall near the top. Press firmly enough that some of the mortar squeezes out from beneath it. Keep placing pieces until you reach the bottom and try to keep the pieces as tightly spaced as possible. It will reduce the amount of mortaring you will have to do later. Let everything dry for about an hour or two.
  5. Go back across the surface and press mortar into any cracks that you see between the pieces. Use a wire brush to clean the excess cement of off the stone pieces.

Filed Under: Adhered Stone Veneer, Custom Stone Accents, Manufactured Stone Tagged With: accent wall, accent walls, building materials, construction, custom stone, manufactured stone, masonry, stone veneer, stone veneers, stones, veneer, veneers, wall

Cart

Find a Vendor

No results found in this location. Please try again.

No results found in this location. Please try again.

Get Directions

  show options hide options
Remove
Add Waypoint
Fetching directions......
Reset directions
Print directions

Contact Us

Stone Types

  • Castle Rock
  • Country Villa
  • Field Stone
  • Ledge Stone
  • River Rock
  • Rubble Stone
  • Stack Stone

Tech Links

  • CAD & Installation Details
  • BIM | Revit | Autocad
  • Testing & ICC-ESR Report
  • 3-Part Spec & MSDS
  • Product Warranty
  • LEED Details
  • Cleaning Instructions
  • Product Data

Resources

Native Custom Stone Lunch and Learn | Stone Installation Information Download Our Brochure | Native Custom Stone Brochure Download

Contact Info

Native Custom Stone
236 Hightower Parkway
Dawsonville, Ga 30534
Phone: (888) 823-0745
Phone: (706) 216-5545

Follow Us!

Follow Us on FacebookFollow Us on LinkedInFollow Us on Blog

Native Custom Stone, 236 Hightower Parkway, Dawsonville, Georgia 30534
Website Designed by: Interactive Search Marketing |  Sitemap  |  Privacy Policy