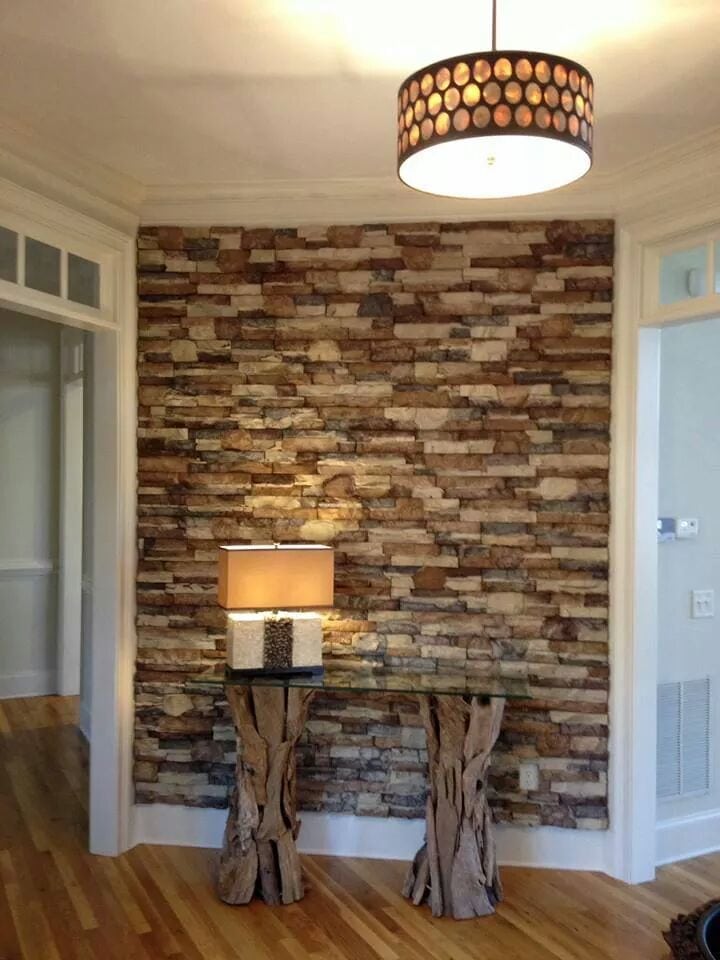
Looking for a really exciting DIY project that will transform your living room walls? Well, here’s a challenge you won’t be able to resist: Go-Stone manufactured stone for walls. An ingenious faux stone veneer, the product is light, durable, realistic, and, best of all, it’s super-easy to install and relatively inexpensive.

Created with DIY enthusiasts in mind, Go-Stone is an environmentally friendly product manufactured by Native Custom Stone LLC. Supplied in the form of panels, it requires very few tools to install, and minimal preparation. Even though the finished surface will look like a hefty rock face, there is no need for any form of foundation to support the system. Unlike solid rock, it’s quick and easy to cut, and no special stonemasonry skills are needed to install it.
About Go-Stone Manufactured Stone for Walls
Launched in 2013, Native Custom Stone’s Go-Stone system is made primarily from recycled rubber tires using new age, crumb rubber technology, taking the concept of manufactured stone for walls to a completely new level. Not only is the product light in weight, it also helps to relieve the huge problem of discarded tires sent to landfills.
Go-Stone panels are supplied in boxes, each of which contains varied panels that will cover a total of five square feet, providing a total of 40 inches of vertical edging. Corner pieces are packaged with four linear feet in each box. Additionally, there are accessories in the form of surrounds that accommodate plug points and light switches.
Available in nine color combinations, it can be used to clad any interior wall, enabling you to create a feature and add a unique character to your room.
Installing Go-Stone is Easy
Go-Stone manufactured stone for walls is incredibly easy to install, and DIYers are sure to have all the tools required for the project:
- Measuring tape (preferably a retractable steel type) to check the size of the area and to measure any cutting lines on panels
- Torpedo or spirit level to make sure the panels are straight and level
- Notched tiling trowel to apply the adhesive to the wall
- Drywall or wet-cut saw to cut panels if necessary (to make them fit the area you are covering)
- Painter’s drop cloth or rosin paper to protect your floor
In addition to the panels, you will need ceramic tile and stone adhesive. That’s it! No grout is needed!
And installation couldn’t be easier:
- Prepare the work area by covering the floor with cloth or paper, and wiping the wall surface down to ensure it is clean. Allow it to dry thoroughly before proceeding.
- Starting at a corner and from the floor, use the notched trowel to apply adhesive to the wall. Don’t try and cover the entire wall, rather work in small sections.
- Position the first panel and push it firmly into place, moving it gently from side to side. Use the level along the upper horizontal surface, and on the vertical edges, to check that it is level. Never rely on existing floor and wall surfaces for this.
- The packaging shows how you should alternate the different sized panels to achieve a natural look. Lay a full row along the base of your wall first.
- When you install the second and subsequent rows, make sure you stagger the different sized panels for a natural appearance and to avoid the impression of seams. Keep checking your levels.
Go-Stone manufactured stone for walls is available throughout the state of Georgia as well as from select Home Depot stores, and online from BuildDirect.com


Follow Us!