• Home
  • Styles
  • Panels
  • Accessories
  • GO-BRICK®
  • Vendors
  • Technical Details
  • Contact
  • Shop
Native Custom Stone

Custom Stone Manufacturer

Questions? Call us at:   (888) 823-0745

  • Home
  • Stone
    • Country VillaCounty Villa Stone
    • Castle RockCastle Rock
    • Rubble StoneRubble Stone
    • Stack StoneStack Stone
    • Ledge Stoneledge stone
    • River Rockriver rock
    • Field Stonefield stone
  • Panels
    • CustomFit PanelsCustom-Fit DIY Stone Panels
    • Go-StoneGo-Stone DIY Stone Panels
    • AccessoriesStone Accessories
  • Brick
  • Find A Vendor
  • Technical
  • Contact
  • Shop
Home » 10 Steps to Install Custom Stone Veneer Around Windows

10 Steps to Install Custom Stone Veneer Around Windows

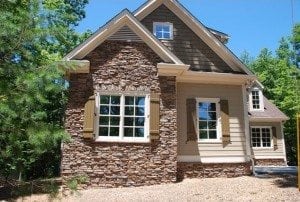
A custom stone veneer is a great way to add a little style to your home. It can make your house look like it was built entirely from stone but at a fraction of the cost of natural stone. To save a little money, homeowners with a do it yourself frame of mind have attempted to install their own custom stone veneer. As long as you’re careful, it is possible but you have to be sure and take extra precautions around your windows. If they are not sealed properly then you can leave yourself open to leaks and future water damage.

Before you get started on the steps below, you need to gather a few materials. For this project you will need:

  • Metal weep screed
  • Metal cap flashing
  • Silicone Adhesive

Step 1: On the plywood boards that form the outside of the house, known as the sheathing, you will find flashing tape installed. Squeeze out a beaded line of silicone adhesive in a zigzag pattern across that tape.

Step 2: Take your metal cap flashing and press it solidly against the flashing tape with the bottom edge against the top edge of the window.

Step 3: Now you will need to nail a metal weep screed into place over the top of the metal cap flashing. This will help to divert water away and act as a moisture guard.

Step 4: Starting at the bottom of the wall, begin installing the veneer and work your way up. When you get to the last piece of veneer, you have to measure the distance between it and the edge of the window and mark a line onto the back of the veneer.

Step 5: Cut along the line that you marked using an electric grinder but only cut about halfway through the veneer.

Step 6: Now place the veneer face down on a worktable with the line you cut running along the edge of the table.

Step 7: Using a hammer, gently tap on the part of the veneer sticking out past the table to break it along the line and remove excess material.

Step 8: Spread water over the back of the veneer piece to keep it from absorbing water from the mortar. If you don’t, it will cause the mortar to crack.

Step 9: Apply a half inch of mortar to the back of the piece and onto the wall where it will be placed. Then press the piece firmly into position.

Step 10: Repeat these steps as needed for the remaining windows.

Filed Under: Custom Stone Accents, DIY, Maintenance and Installation Tagged With: 10 easy steps, architecture, construction, custom stone, masonry, masonry veneer, stone veneer, stone window, stones, veneer, window accents, window stone

« Seal Your Custom Stone Veneer in Just 4 Easy Steps
How to Repair Cracked Manufactured Stone Veneer »

Search This Site

Technical

  • Download Our Brochure
  • Go-Stone Panels
  • CustomFit® Stone Panels
  • Stone Installation
  • Cleaning Instructions
  • Technical Details

Testimonials

We had the complete exterior of our home re-done by Native Custom Stone 2 years ago and are STILL in love with the results!! They took a very plain-looking wooden exterior and made it into something that is striking and eye-catching.

Visit the Showroom

Visits to the Native Custom Stone Showroom are by appointment only. Call (888) 823-0745 today to schedule!
 

Find a Vendor

Filter by

No results found in this location. Please try again.

Get Directions

Add Waypoint
show options hide options
Print directions Reset directions
Fetching directions......
Reset directions
Print directions

Contact Us

Stone Types

  • Castle Rock
  • Country Villa
  • Field Stone
  • Ledge Stone
  • River Rock
  • Rubble Stone
  • Stack Stone

Tech Links

  • CAD & Installation Details
  • BIM | Revit | Autocad
  • Testing & ICC-ESR Report
  • 3-Part Spec & MSDS
  • Product Warranty
  • LEED Details
  • Cleaning Instructions
  • Product Data

Resources

Native Custom Stone Lunch and Learn | Stone Installation Information Download Our Brochure | Native Custom Stone Brochure Download

Contact Info

Native Custom Stone
236 Hightower Parkway
Dawsonville, Ga 30534
Phone: (888) 823-0745
Phone: (706) 216-5545

Follow Us!

Follow Us on FacebookFollow Us on LinkedInFollow Us on Blog

Actual stone colors may appear different in pictures due to pigments and lighting. Native recommends viewing actual samples prior to placing an order.
Website Designed by: Grater Digital |  Sitemap  |  Privacy Policy