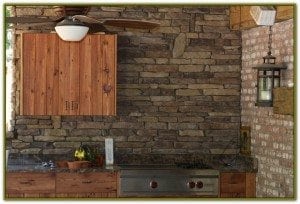
Manufactured stone veneer is an excellent way to renovate any part of your home. We have already talked about how you can make a fireplace more beautiful with the use of custom stone veneer, and today we are going to talk about the steps for installing a great back-splash to update your kitchen.
Back-splashes are great for a few different areas in your kitchen such as behind the sink, stove, or counter space. Here are the materials that you will need for your project:
- Chalk line
- Level
- Trowel
- Mortar
Step 1: Find a great manufactured stone veneer for your project. Once you have all of your materials. Follow your mortar manufacturer’s instructions for mixing the proper mortar-to-water ratio. Spread the mortar compound on the space that you will be installing your back-splash.
Step 2: Use your level and chalk line to ensure that you’re working in an even line. Be sure to check your work with the level periodically.
Step 3: Start installing your manufactured stone veneer in the design that you want. Make sure that your stone is sufficiently placed in the mortar, but doesn’t slide. Also, make sure to clean off mortar on the stone as you go. If mortar is seeping out from your stones in excess you might want to start again and use less on your initial application.
Step 4: Once all of your stones are in place, use a piping bag to fill in gaps between your manufactured stones. Clean up excess mortar with a small grout trowel.
Step 5: Clean up any mortar on your stones and allow them to dry, this should take no less than 24 hours. However it’s wise to follow your manufacturer’s instructions on dry time. Clean up your stones once they are dry, and with a back-splash behind a stove or sink it is recommended that you seal your project to prevent staining and moisture damamge.
There you have it, a great kitchen back-splash. Make sure you use a quality manufactured stone veneer to ensure that your new kitchen will stand the test of time.


Follow Us!