• Home
  • Styles
  • Panels
  • Accessories
  • GO-BRICK®
  • Vendors
  • Technical Details
  • Contact
  • Shop
Native Custom Stone

Custom Stone Manufacturer

Questions? Call us at:   (888) 823-0745

  • Home
  • Stone
    • Country VillaCounty Villa Stone
    • Castle RockCastle Rock
    • Rubble StoneRubble Stone
    • Stack StoneStack Stone
    • Ledge Stoneledge stone
    • River Rockriver rock
    • Field Stonefield stone
  • Panels
    • CustomFit PanelsCustom-Fit DIY Stone Panels
    • Go-StoneGo-Stone DIY Stone Panels
    • AccessoriesStone Accessories
  • Brick
  • Find A Vendor
  • Technical
  • Contact
  • Shop
Home » Blog

Increase Your Home’s Value with Stone Veneer (Inside and Out)

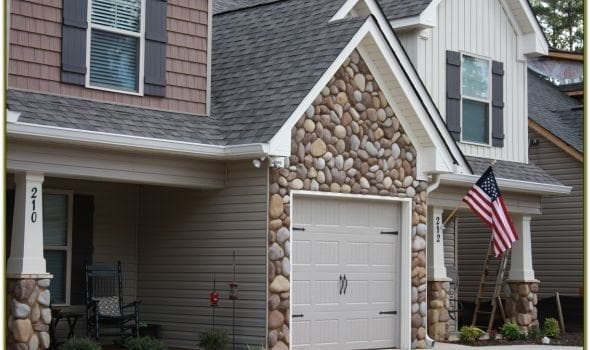
Improving the look of your home with a fashionable stone veneer will not only make it more beautiful, it will also increase the value of the property.

Better still, this type of makeover is relatively simple, and a lot less expensive than you might think. It will change the entire look and character of your home and also make it more marketable should you decide to sell.

A Good Quality Stone Veneer is an Investment

Any home improvements may be considered an investment, but the dramatic difference a new stone veneer can make this one of the best investments possible.

Manufactured Stone FireplaceWhether you want to revamp the entire exterior of your home, or remodel your kitchen, bathroom or parts of your indoor or outdoor living space, a stone veneer offers numerous options. It’s lighter than real stone, easier to install, and because you don’t have to rely on locally quarried stone, there is a lot more variety. Bearing this in mind, you’ll realize that working with quarried stone is not easy, which is why you would need the services of an experienced stonemason. It is also a considerably more expensive option.

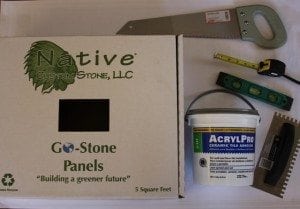
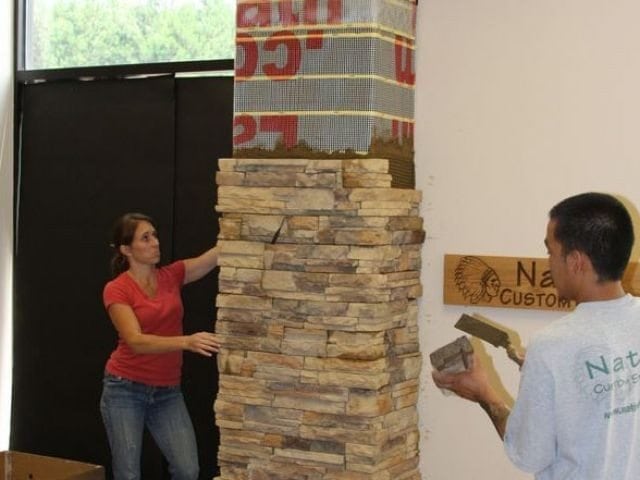
In striking contrast, installing a stone veneer can be tackled as a do-it-yourself project by anyone who is vaguely handy.

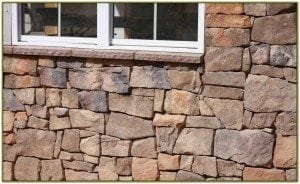
Native Custom Stone offers a number of stone veneer variations in an enormous palette of colors. You can choose something that will make your home look like a castle or a country villa, or give it the appearance that stack stone, rubble (or ashlar), field or ledge stone, or even river rocks were used to build it. You don’t need any form of foundation to support the veneer units, and you don’t need special skills or tools to cut or lay the “stone”.

In addition to improve the appearance of your exterior or interior walls, a good quality stone veneer that has been correctly installed will also help to protect your home by repelling water and preventing moisture from seeping into the framework.

Here are some tips to ensure that get the maximum return on investment (ROI) from your stone veneer investment.

Get the Best ROI When You Remodel Your Home

Whether you’re remodeling your house inside and out, or just tackling a simpler home improvement project, there are proven ways to ensure you increase the value of your home. For example:

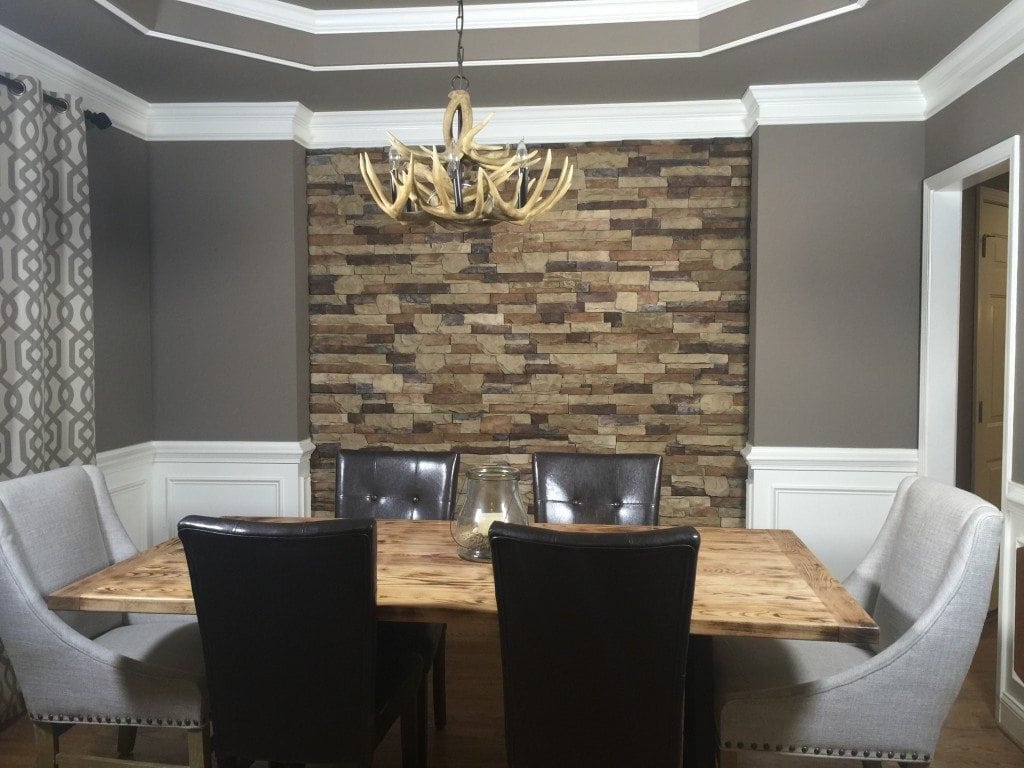
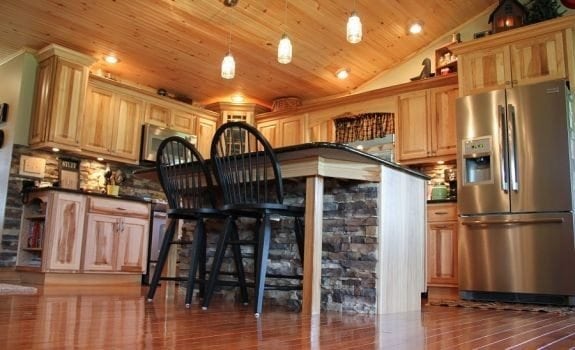
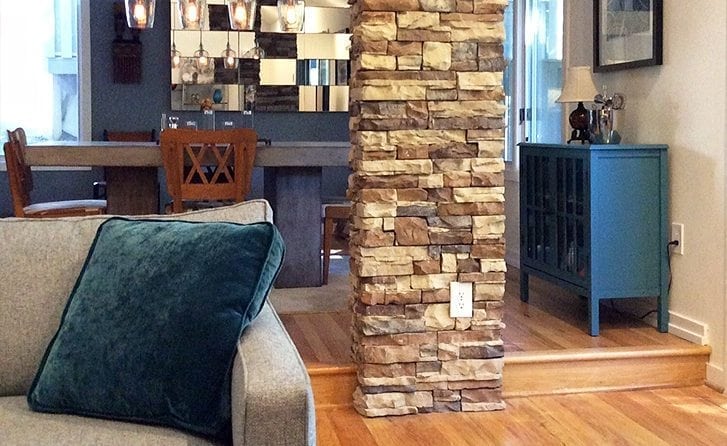
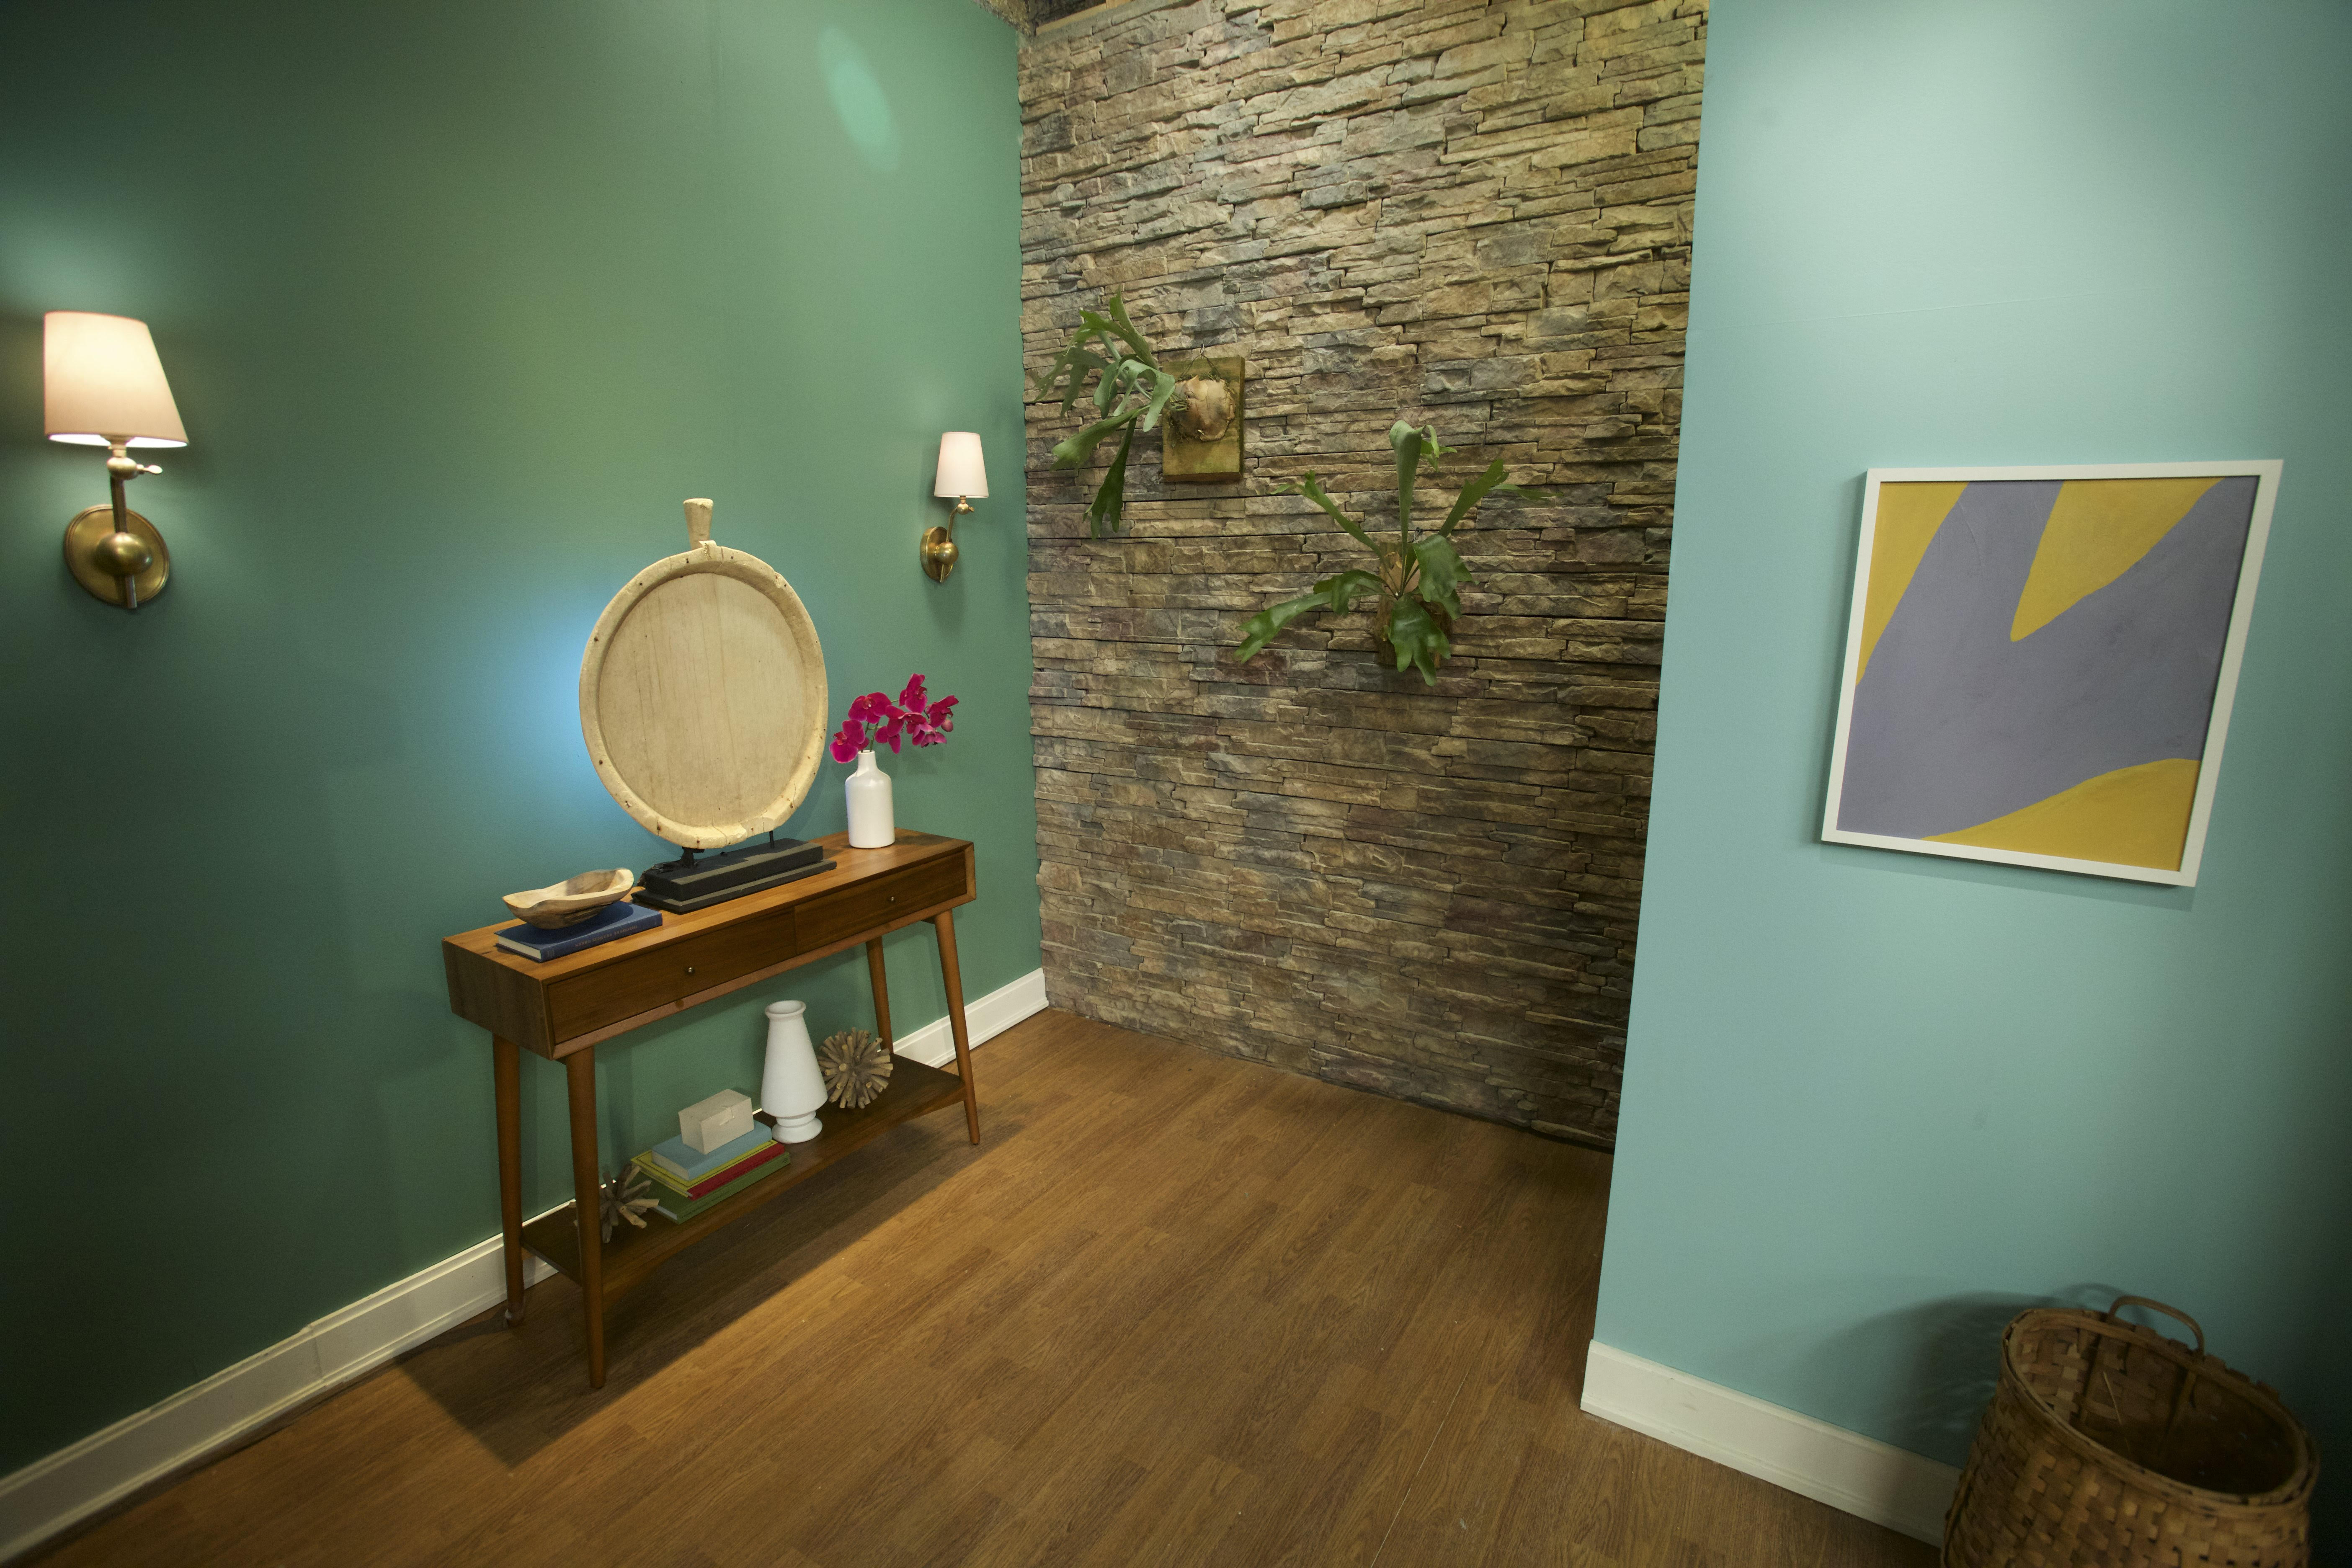
  • Money spent on bathroom and kitchens offer maximum ROI. You don’t even have to clad the whole room with stone veneer; often a feature wall will have even more impact.
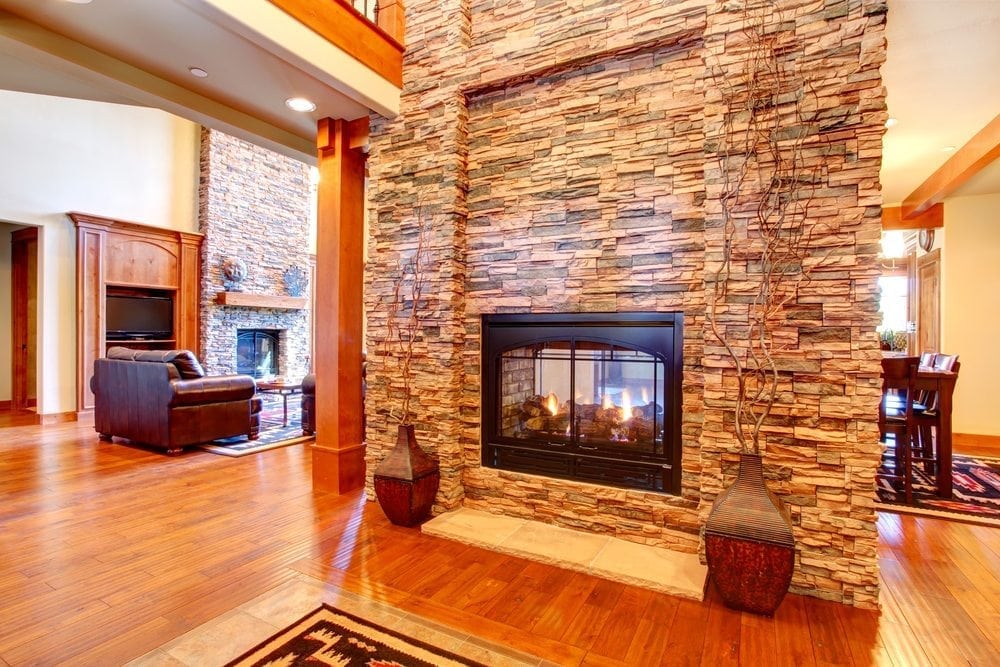
  • Installing stone veneer around a fireplace or as a backdrop to a bar or conversation nook will give the area special appeal.
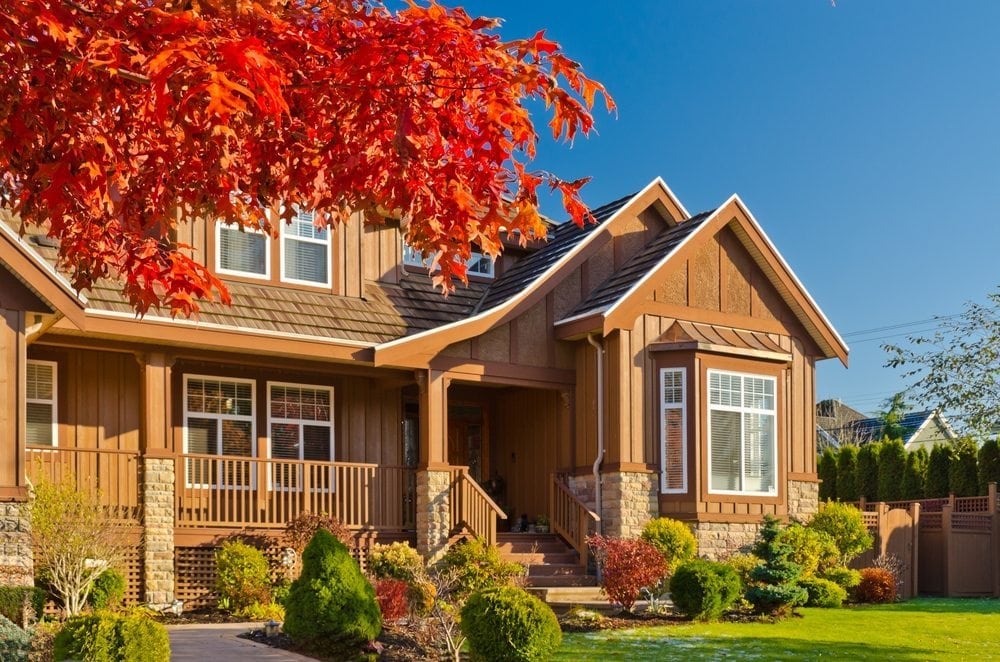
  • It’s going to cost you more than simply painting the outside of your home, but you can be sure that installing stone veneer over the exterior will increase resale value by a large percentage more – some surveys indicate a new stone veneer could double your ROI. To increase your ROI even more, be sure to clean and tart up doors and windows frames too (with paint or a wood sealer). If exterior light fittings are looking tatty, replace them; and plant outside the house or introduce potted plants to add color and interest.
  • On a smaller scale you could install a stone veneer around the front door, or clad your porch with veneer to make it stand out. Pot plants and other finishes work well in this environment too.

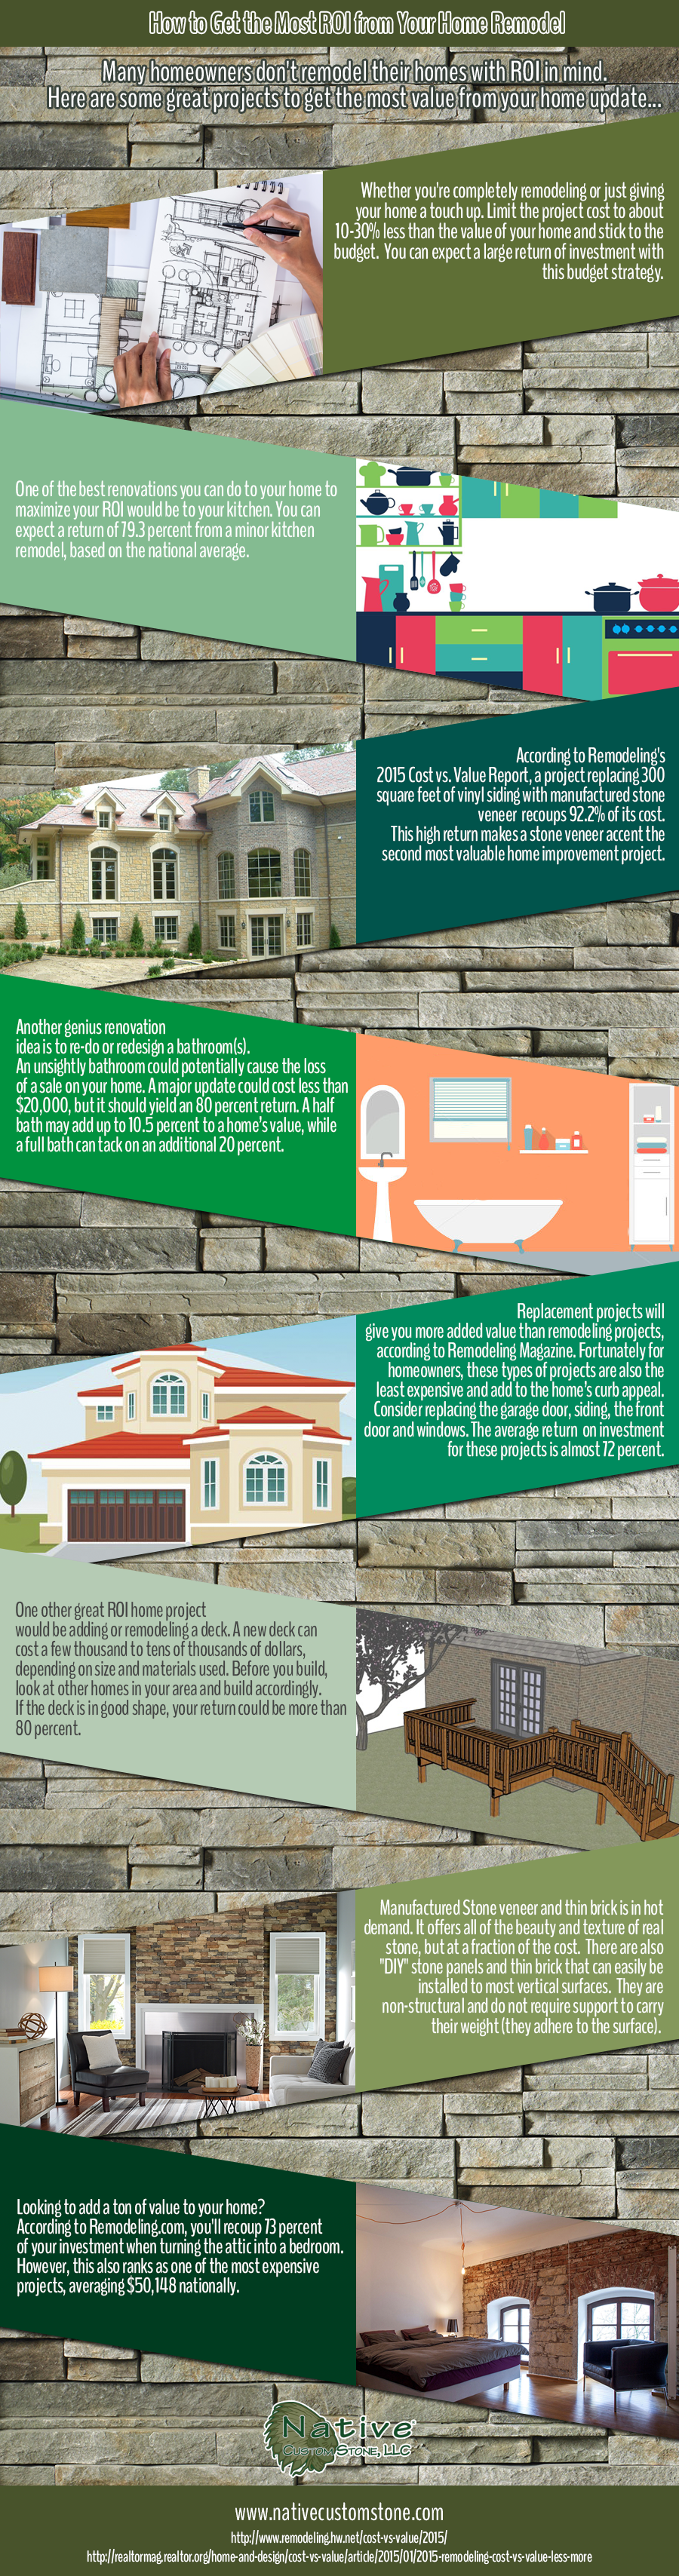
While installing a stone veneer isn’t difficult, it’s important to do it correctly. Check out one of our latest infographics on Remodeling ROI. If you need more advice, contact us today.

Filed Under: Uncategorized

Ways to Incorporate Stone into Your Home’s Interior Design

Whether stone is old, newly quarried, synthetic, or made from cast concrete, it can be incorporated into the interior design of any home.

Of course you can build with stone, or use a stone veneer for walls or panels. Alternatively, you can use stone to create features and add style to any room in your home.

The Advantages of Stone Walls

There are so many stone products to choose from you’ll be spoilt for choice. But generally stone will add a natural, earthy vibe and a gorgeous texture other materials can’t provide. They help with the absorption of sound and also provide a unique pallet for adding pattern, color and texture to interior design. Better still, stone surfaces are generally exceptionally durable and easy to maintain.

Whatever you decide to use to incorporate stone into your home’s interior design scheme, you will find there is a wide range of stone types in a variety of price ranges. Some require professional installation while others are easily installed by competent DIY enthusiasts, using minimal tools.

GO-Stone Cedar Creek

Top Ten Interior Design Ideas for Incorporating Stone into Your Home

  1. Use stone around a fireplace, but don’t cover the whole wall. It will enable you to add both color and texture to the room, creating your own unique character. This is a particularly easy project using lightweight manufactured stone veneer.
  2. Build a kitchen island out of stone, or build a frame and add simulated stone cladding to make it look as if it is solid stone. Top the island with a slab of marble or granite, or tile the top with matching simulated stone tiles.
  3. Tactile stone used on a bathroom wall can be the perfect foil to high-sheen tiles or even rustic stone tiles.
  4. A conventional bath may be boxed in above ground and the sides tiled to match or contrast with the wall.
  5. For something completely different, leave a gap between tiles in your entrance hall or even your bathroom floor, and lay river stones in mortar to create a handmade pattern. Push them into the soft mortar so that they don’t protrude too much and allow the mortar to set properly before walking on it.
  6. Create the effect of exposed stone by cladding a feature wall with stone or stone veneer. It’s the perfect way to add the character of age, and will also add pattern and texture to the interior design scheme. For vivid contrast paint adjacent walls white or a very pale creamy stone color. Imaginatively done, there will be people who mistake this for original stonework.
  7. If there are pillars in your home, cladding these with stone can create the most amazing effect. If you restrict the use of stone to the pillars alone, you will benefit from visual impact.
  8. Clad the walls of a stairwell in stone and use lighting to highlight its texture. The stairs themselves may be tiled in a sympathetically matching color, or finished so that they create a contrasting effect.
  9. If there’s sufficient light inside your home, build a stone planter and introduce plants that will thrive indoors.
  10. Define a home bar area using stone both on the walls and on the bar itself. Manufactured Go-Stone panels will be ideal for this project.


Filed Under: Go-Stone Panels, installation and care

Building a Bar from Scratch and Finishing With DIY Go-Stone Panels

A home bar is a great place for entertaining. You can plan it so that it becomes the hub of your home, or so that it can be used as a hideaway where the guys (or girls) can escape out of sight and sound.

The location you choose depends on the space you have available in your home, as well as the function you want this special entertainment area to fulfill. If you don’t have much space you can tuck it in a corner; but if you want to incorporate a games area, perhaps with a pool table or home theater, you will need a dedicated room or a basement.

Go Stone

Designing a Bar From Scratch

While the dimensions of a bar are variable in terms of length, height and width are standard for practical reasons. Generally a bar top shouldn’t be wider than 16 to 20 inches (400 to 500 mm), which is about the width of a standard desk. Anything more than this is simply a waste, both in terms of materials and space, though the top should overhang the bar structure by at least eight inches (200 mm.) A bar molding will finish the top off nicely, and will help to keep drips and spills from dribbling onto the laps of those sitting at the bar.

While not all home bars incorporate a drinks rail on one side, for you or the barman to mix drinks, it’s a very useful feature. It should be separated from the rest of the bar top by a drip lip in the form of a thin strip of wood that will keep any spills from splashing on the bar top itself. Additionally, a lower counter on the barman’s side is great for preparation and also a good place to keep unwanted bits and pieces out of sight. If you want to incorporate a bar sink, this is where it should go.

The height needs to accommodate the bar stools you plan to use. Most are 30 inches (about 760 mm) tall, which is perfect for the standard bar height of 42 inches (just over a meter.)

While space might be the deciding factor in terms of the length of your home bar, you should allow 24 to 30 inches (600 to 760 mm) for each bar stool.

Foot rails should be seven to nine inches (177 to 228 mm) off the floor; these can be in the form of a metal railing (either brass or stainless steel) or timber.

Then there is the question of finishes, which of course depends partly on what you use to build the bar structure. If it’s solid wood and you’re going to leave the top wood, then you’ll need to give it a few coats of tough, hardwearing varnish. Tiles are another option; or, if it fits your budget, a good solid surface like marble, quartz or granite would be even better. Tiles and solid stone are ideal options if the bar is constructed with a material like chipboard.

You can use Go-Stone panels to finish vertical surfaces – and if there is a suitable wall behind the bar, to finish this too and create a good-looking feature wall that matches your bar.

Installing Go-Stone Panels

Go-Stone panels are ideal for any DIY build-your-own bar project. Manufactured for interior use, it is lightweight and super-easy to install. You don’t need specialized tools, masonry skills or experience, and the system is quick and clean.

Native Custom Stone

The product, which is manufactured by Native Custom Stone from 87 percent eco-friendly materials, is sold in DIY kit form. There are three finishes, Cedar Creek, Cherokee, and Coastal Blend, each of which looks just like real stone. There is enough to cover an area of five square feet (0.465 square meters) in each box. Corner pieces are packed separately, with four linear feet (1,2 meters) in a box.

The only equipment you need to install these simulated stone panels is a:

  • Steel measuring tape
  • 12 inch (about 300 mm) spirit level
  • ¼ inch notched floor trowel
  • Drywall or wet-cut saw. You can use a circular saw if you have one.

You will also need a good quality ceramic tile and stone adhesive to stick the panels onto the wall and/or bar structure.

Installation instructions start with ensuring the surface is clean and dry. It’s a good idea to cover the floor adjacent to the bar and wall you are cladding for protection. You can use cloth or rosin paper to do this.

Then start installing the panels at the bottom corner of the wall or structure. Apply the adhesive to the back of the first stone panel and set it in place, moving it firmly from side to side to ensure there are no air bubbles. The kit contains three different sized panels: alternate these for a realistic effect. The horizontal edge of the panels must be level, so use the level after setting every third stone to check that they are in fact level. You may need to cut one of the panels to ensure that the panels fit perfectly; you will need to measure the exact length. Be sure to wear safety glasses when cutting.

When you start on the second “course” of stone, make sure you stagger the panels so that you don’t end up with obvious seams running vertically up the wall or bar structure. So, if for instance you started with a 16-inch (406 mm) panel, use either an eight-inch (203 mm) or a 12-inch (305 mm) panel above it.

It really is that easy!


Filed Under: Faux Stone Paneling, Faux Stone Veneer, Go-Stone Panels, Maintenance and Installation

Inspecting Your Home and Manufactured Stone Veneer for Moisture Damage

If the manufactured stone veneer in your home was installed correctly, it’s unlikely that you will find moisture damage, even in the wettest winter. However if precast simulated stone is not installed properly, and flashing is inadequate, water can quickly cause extensive structural damage.

Even if you can’t see any form of damage on wall surfaces, it’s essential to inspect your home and manufactured stone veneer for moisture damage. The reality is that most homeowners (and inspectors for that matter) don’t recognize moisture problems until it has set in and caused costly damage. Often they only realize that there is damage when telltale signs of leaking water become visible.

Building codes do set standards for the installation of manufactured stone veneer, including water-restricting barriers, flashing, and metal weep screeds. These are, though, minimal standards, and inexperienced or unscrupulous contractors don’t always follow them. Unfortunately construction is difficult to police because the building process is quick and the window for inspection is short. For example, barriers inside the structure that restrict water and vapor cannot be inspected once the house is complete unless the wall is opened up.

Ideally contractors should be forced to allow a certified InterNACH (International Association of Certified Home Inspectors) inspector to inspect the structure prior to completion.

About Manufactured Stone Veneer

Chattahoochee Blend Country Villa

Unlike cast stone that is normally used to build load-bearing walls on concrete foundations, manufactured stone veneer is a relatively lightweight product that does not require a foundation. It can be applied to most structures including wood and metal frames, enabling builders to achieve the aesthetic effect of real stone quickly and cost effectively.

While easy to install, if installation is not done correctly, serious water damage can occur over quite short periods of time – as little as two years. Because there is no air space between framed walls and cladding, the need for well-designed flashing is critical. If water cannot drain, even a seasonal rainstorm could cause damage.

Of course the ideal is to ensure that installation is done the right way. This checklist may be used for a thorough inspection:

  • Generally, if only mortar is visible between the veneer units, the veneer has been correctly installed. However design must include the specifications outlined in the building codes.
  • There should be weep screeds at the base of all wood-frame walls and at the tops of windows and doors.
  • Seams and joints around windows and doors, and where the manufactured veneer meets other cladding must be sealed. Manufactured stone windowsills that slope away from the building will aid drainage.
  • Flashing that is corrosion-resistant should be installed with a bedding seal under the flashing and with a drip edge. Water-resistant barriers should also lap over the flashing’s back edge for water to drain.
  • Veneer should not be in contact with ground surfaces or any part of the roof. This is a common fault that leads to water damage.
  • Kick-out flashing should divert water away from the building (and the veneer) to prevent water from penetrating the cladding and causing the structure to rot, or in the case of a metal frame, rust.

For additional protection, a good quality stone-sealing product like Natural Shield should be used. This will prime the surface and help to prevent water from penetrating. It will also reduce and minimize the possibility of freeze and thaw damage, cracking and stains.

How to Inspect Your Home and Manufactured Stone Veneer for Water Damage

Once you have inspected the installation of flashing and so on, look for evidence of water damage. Moisture inside walls will often cause efflorescence that shows up on the surface in the form of chalky powder. Check inside wall surface carefully for signs of mold or discoloration. Also run your hand over wall surfaces; if they feel cold and damp you can be sure you have water damage inside the wall structure.

If there is any evidence of moisture inside walls, they will have to be opened up, cleaned, and any damaged material replaced. The longer you leave it, the worse the problem will become, and the more repairs are likely to cost you.

If you do have to open up and repair walls, ensure that flashing and other water-repellent installations are done correctly second time around. Also be sure to coat all manufactured stone veneer surfaces with Natural Shield for maximum protection.


Filed Under: installation and care, Maintenance and Installation

Get Your Home Ready for Winter with These Maintenance Tips

If you haven’t got your home ready for winter yet, there is still time to do some maintenance to protect your home from the freezing conditions predicted from late December.

home maintenance fallIn Georgia the snowiest periods are likely to be mid to late December, and then more snow is predicted for early February. Most of January is also likely to be icy cold.

Ice, snow, and wind can all cause damage, but if you are prepared, by taking steps to minimize possible damage, you won’t face the possible prospect of dealing with winter-related disasters. Apart from anything else, if maintenance is found to be lacking, there’s a good chance that any insurance claims you make will be rejected.

Maintenance Tips for the Outside of Your Home

Essential winter-proofing maintenance includes cleaning and clearing gutters, trimming dead branches from trees, repairing damaged steps and handrails, sealing holes and cracks in foundations and walls, and coating manufactured stone surfaces to protect them from the elements.

  • Clean gutters It is really important to ensure all gutters are clean and not blocked with sticks, dead leaves, and other wind-borne debris. If not, rain, and melting ice and snow will dam up because the water has nowhere to drain away. This can cause water to seep into the house and damage walls and ceilings. You might also consider fitting gutter guards to stop debris getting into the gutters in the first place. Ultimately, you need to make sure that water runs freely through gutters and downpipes.
  • Trim trees This is not the time to be landscaping, but if there are dead branches or trees that could break in strong winds, cut them off or trim them back. If they do break, they could damage vehicles, walls, your home itself, or even hurt people who may be on our near your property.
  • Repair steps and rails If any part of a stairway is broken or showing signs of rot it must be repaired. You don’t want people falling and risking injury. Remember too that in any case, ice and water make steps more treacherous so it’s important to make them as safe as possible.
  • Seal holes and cracks Check all exterior walls and visible parts of foundation footings for cracks. If you find damage, fix it or call in a contractor to do it for you. Also check around skylights and other openings in the roof (if there are any) and seal these too. Protect exterior water pipes with caulking. Also check roof tiles because if these are broken or missing, you’re asking for water damage to occur during winter storms.
  • Protect manufactured stone, brick and stucco surfaces A good quality concrete and masonry sealer like Natural Shield from Native Custom Stone should be used to protect natural and manufactured stone surfaces as well as pavers, stucco, and any exterior brickwork. Natural Shield is ideal for achieving the level of water repellency required to prevent freeze and thaw damage, as well as to reduce the risks of unwanted stains, cracking, biological growth, chalky efflorescence and any form of chemical degradation. So seal now to prevent water from penetrating your home this winter.

Maintenance Tips for the Inside of Your Home

You want to be warm throughout winter, no matter how cold it gets outside. There are several maintenance tips for achieving a warm interior, ranging from servicing your heating system to ensuring there is adequate insulation, not only in the house itself, but in basements, attics, lofts and crawl spaces as well. Other elements to consider include pipes and plumbing, as well as fire and smoke alarms.

  • Keep the interior of your home warm If you haven’t had the heating system in your home serviced recently, do it now. As a rule of thumb, these systems should be serviced at least once a year to prevent smoke or fire damage. Boilers should also be serviced, and if radiators are colder at the top they usually need bleeding, which releases any trapped air. Also make sure that thermostats are set at 65 °F (about 18 °C) to prevent pipes from freezing.
  • Add insulation A properly insulated house will help to reduce heat loss in winter, not only keeping you warm, but also conserving energy and in this way cutting bills. This includes walls, ceilings, water tanks and pipes. Well-insulated crawl spaces and basements will also keep pipes from freezing when temperatures drop dramatically. Also be sure that there is adequate insulation in the loft or attic roof (if there is one) because heat from an inadequately insulated attic often causes ice and snow to melt. Then if it re-freezes this could add to a build-up that might eventually cause the roof to collapse. Rather be safe than sorry and spend a bit on additional insulation.
  • Pipes and plumbing Check pipes for cracks and leaks and fix them or call in a qualified plumber to do it for you. Also make sure you know where all pipes are located and where to shut off the water if the pipes do freeze. If you don’t you might end up with burst pipes. Consider installing an emergency pressure release valve as a precaution against the damage an increase in pressure can have if pipes freeze.
  • Smoke and fire alarms Check that these are working properly. If they aren’t, have them repaired as a matter or urgency. It is also a good idea to install a carbon dioxide detector because a well-sealed home has the potential to trap toxic gas from fires.

Forewarned is forearmed, so do yourself a favor and do some basic maintenance both inside and outside before it’s too late.

Filed Under: Tips and Tricks Tagged With: fall, home, maintenance, tips

Check Out How This DIYer Used Go-Stone to Bring the Outdoors In

We recently stumbled upon an awesome DIY blog, zigzoe.com. The tagline of this personal blog is, “Doer of projects big and small. Lover of well balanced and beautiful design.”

Finished Project. Photo credit to ZigZoe.com (DIY Blog)

Finished Project. Photo credit to ZigZoe.com (DIY Blog)

The author recently used Go-Stone to create a beautiful space inspired by Frank Lloyd Wright’s Fallingwater. Her goal, as mentioned in her blog:

I knew I wanted to bring natural components into our modern space. Modern spaces can quickly become cold. So it was obvious this white support column between the living room and dining room would be perfect covered in stone.

She details how she set out to find the right products for the job, and found our Go-Stone DIY panels in her local Home Depot. She also outlines how she completed the project, step-by-step, and has beautiful before and after photos.

Check out “Building on a Theme” at ZigZoe.com to read about her inspiration and this DIY how-to!

Filed Under: Uncategorized

Using Custom Stone Veneer vs. Natural Stone for Your Project

Natural stone creates an amazing effect in homes and gardens, for walls and for feature structures including fireplaces, outdoor kitchens, water features and planters. But there’s a certain irony about this statement because you can create exactly the same effect using a custom stone veneer, and you’ll find it’s generally easier, cheaper, and much more manageable to maintain.

River Rock

While there is a certain mystique about natural stone, largely based on tradition and the age-old skills of practiced stonemasons, modern technology has enabled us to manufacture faux stone in various forms, including veneer. Custom stone veneer and other faux stone products are perfect for both construction and finishing projects. Stone veneer is also a great tool for revamping and renovating walls and other indoor and outdoor features.

Effects You Can Create Using Custom Stone Veneer

Here’s another irony: unless you have an unlimited budget for natural stone, you have many more choices in terms of the effects created by using faux stone and veneers than you do when using natural stone. The reason is simple. When you use the natural stone from the area where you live, you are limited to what stone occurs naturally. If you opt for faux stone blocks or custom stone veneer you are limited only by the range produced by an accessible manufacturer like Native Custom Stone.

The reality is that manufacturers offering manufactured stone veneer products have dozens of styles and colors. There are also numerous different finishes and sizes that will give you the opportunity to copy any effect from an elegant castle stone finish to a typical rubble effect like the traditional ashlar, commonly used in southern USA.

Alternatively, you might want something that looks as if it was built using genuine fieldstone or perhaps river rocks. No need to go into the field or seek out a river, a good quality custom stone veneer or manufactured stone will provide you with the materials you need.

Working With Stone Veneer Rather Than Natural Stone

Custom Fit Stone

Traditional stonemasons didn’t need university degrees to do their work, but they did need incredible skills that were generally passed down through the generations.

While stone can be used in the form of boulders or random blocks, unless you are building a rockery or irregular dry-stone structure, the stone will need to be cut into blocks or slabs that will slot together or enable them to be laid neatly and effectively. Natural stone is heavy and can be challenging to cut.

Stone veneer, on the other hand, is available in the form of individual units or simple panels. Interlocking panels in particular, are very easy to install without any skills at all, other than the ability to use a spirit level to ensure they are laid level. They are also lightweight and easy to handle. Furthermore, no foundations or additional structural support is required and they can be used to clad a variety of frame types, both metal and wood, or even a masonry structure.

Typically natural stone walls vary in size from about 2 to 30 ins (or 51 to 762 mm). Manufactured stone veneer, on the other hand, is substantially thinner than natural stone blocks, varying in size from about 1 to 3 ins (or 25 to no more than 76 mm), partly dependent on the texture chosen.

So if you like the effect of natural stone, explore the options offered by the Native Custom Stone range of veneer products.


Filed Under: Custom Stone Bathroom, Custom Stone Fireplace, Custom Stone Kitchen, DIY, Faux Stone Veneer, Go-Stone Panels, installation and care, Maintenance and Installation, Manufactured Stone, Tips and Advice Tagged With: building materials, custom stone, manufactured stone, manufactured stone veneer, stone veneer

Manufactured Stone Fireplace Installation and Care

A fireplace is often the hub of the home in winter: a place to sit and relax or socialize, and get warm. But it is more than just a useful adjunct to a home’s heating system, and is also often a focal point in terms of décor.

Whether you already have a fireplace in your home, or are Manufactured Stone Fireplaceconsidering installing a new one, type and style will be important considerations. There are many options both traditional and contemporary; with manufactured stone taking its rightful place alongside other more banal finishes including brick and paint.

If you are building a fireplace from scratch, manufactured stone can easily be incorporated in the design of the unit. If you are renovating or changing an existing fireplace, faux stone may be used as a finish to completely revamp the unit and give it a new and exciting lease of life.

Benefits of Using Manufactured Stone for a Fireplace

If you like the idea of a fireplace made of stone, you’ll be happy to learn that good quality manufactured stone is both easier to work with (because it isn’t so heavy) and less expensive than quarried stone. You may also be surprised to discover that faux stone is generally more durable than natural stone, certainly stronger and more hardwearing than softer stone types including sandstone and certain types of limestone.

When using natural stone you are generally limited by what is available in the area in which you live – unless of course your budget can withstand the high costs of bringing quarried stone in from other regions. Manufactured stone mimics a myriad of natural stone types and you will find a multitude of colors and styles to meet personal and décor needs.

Quality faux stone is stain-resistant and easy to clean, whereas unpolished natural stone tends to be porous and is vulnerable to staining. This minimizes maintenance and makes a fireplace built with manufactured stone particularly easy to care for.

Basics of Installing a Manufactured Stone Fireplace

Manufactured stone (also called cultured stone) is available in different forms including:

  • Solid block units, which are laid the same way as concrete bricks and blocks
  • Veneer that is available in various sizes and depths that can be mixed and matched for an authentic finish, with the option of mortar joints
  • Interlocking panels that are perfect for DIY applications

All types are manufactured in a factory and molded into authentic shapes and finishes, usually from concrete, although Native Custom Stone manufactures a veneer interior panel range from discarded rubber tires.

While you will need to lay a concrete plinth if you are using solid faux stone blocks, veneer and panels from Native Custom Stone don’t need any form of foundation, even if you choose to add mortar joints to the veneer.

Caring for a Manufactured Stone Fireplace

The faux stone façade of a manufactured stone fireplace is easy to clean and take care of. However, like everything else in your home, if it does get grubby, clean it as soon as possible as dirt of any sort will generally become ingrained if it is left for any length of time. For example, if a fire smokes badly for some reason, you might find that the smoke discolors the surface around the firebox or alongside the hearth. Or house dust might accumulate on an uneven surface on a very windy day. A quick, immediate cleanup will help avoid extra elbow grease at a later stage.

So from time to time when you vacuum your home, also vacuum the fireplace façade. Use the brush attachment to loosen dust, gently manipulating it out of crevices and cracks. Then use a damp cloth (with a little household cleaner if the surface is in any way discolored) to wipe off any remaining dirt.

Generally you won’t need to clean your fireplace more than once a month, although if it is in constant use during the winter months, you might need to increase this to once a week.

Filed Under: Manufactured Stone Fireplace Tagged With: fireplace, installation and care, manufactured, stone

See Native Custom Stone’s CustomFit Panels on Food Network’s ‘The Kitchen’

Updated 9/11/2015: The Kitchen Revealed episode aired on 8/29/2015 featuring a whole new look for the set! See Native Custom Stone’s CustomFit panels on the new set below!

The Kitchen, a Food Network talk show airing on Saturday mornings at 11a|10c, is based on everything cooking, dining, and eating.  Host Sunny Anderson along with co-hosts Katie Lee, Jeff Mauro, Marcela Valladolid and Geoffrey Zakarian try out new recipes, talk food and show us awesome new tools and utensils to use in the kitchen.

Recently, they reached out to us at Native Custom Stone to help them create a beautiful new set featuring our CustomFit Panels in the color “Mountain Ridge”.

The episode featuring our product will air on August 29th at 11 am – be sure to check it out!

FN-ShowLogo-TheKitchen-1920x1080

Also, be sure to check back after the episode airs for some great photos of our CustomFit panels installed!


Update: The episode has aired revealing a stunning new set for The Kitchen – Check out the new set below, including our CustomFit Panels in the color Mountain Ridge! We’ve been told that the “Living Room” set of the show will be used for many of the episodes airing in the Fall months, so check out the show Saturday mornings at 11am to see more!

customfit-fn-thekitchen

To see the entire set of The Kitchen and more photos of our CustomFir panels check out “Welcome to The Kitchen” on FoodNetwork.com, and for more information about the colors used Behr has an excellent piece on the makeover!

To learn more about our CustomFit Panels, contact us at Native Custom Stone today.


Filed Under: Custom Stone Kitchen

How to Get the Most ROI from Your Home Remodel (Infographic)

When making the decision to remodel your home, or certain rooms in your home, you’re often concerned with the most appeal for the best cost. This infographic covers some of the best ways to get the best return on investment for your renovation from kitchens, to home exteriors. The 2015 Cost VS. Value report lists manufactured stone veneer as one of the number one ways to renovate your home and increase the value. When you replace some, or all of your exterior siding with custom stone veneer you could be looking at a 92% ROI!

remodel-roi-infographic-ncs


Share this Image On Your Site

Filed Under: DIY, Tips and Advice

  • « Previous Page
  • 1
  • …
  • 3
  • 4
  • 5
  • 6
  • 7
  • …
  • 11
  • Next Page »

Search This Site

Technical

  • Download Our Brochure
  • Go-Stone Panels
  • CustomFit® Stone Panels
  • Stone Installation
  • Cleaning Instructions
  • Technical Details

Testimonials

We had the complete exterior of our home re-done by Native Custom Stone 2 years ago and are STILL in love with the results!! They took a very plain-looking wooden exterior and made it into something that is striking and eye-catching.

Visit the Showroom

Visits to the Native Custom Stone Showroom are by appointment only. Call (888) 823-0745 today to schedule!
 

Find a Vendor

Filter by

No results found in this location. Please try again.

Get Directions

Add Waypoint
show options hide options
Print directions Reset directions
Fetching directions......
Reset directions
Print directions

Contact Us

Stone Types

  • Castle Rock
  • Country Villa
  • Field Stone
  • Ledge Stone
  • River Rock
  • Rubble Stone
  • Stack Stone

Tech Links

  • CAD & Installation Details
  • BIM | Revit | Autocad
  • Testing & ICC-ESR Report
  • 3-Part Spec & MSDS
  • Product Warranty
  • LEED Details
  • Cleaning Instructions
  • Product Data

Resources

Native Custom Stone Lunch and Learn | Stone Installation Information Download Our Brochure | Native Custom Stone Brochure Download

Contact Info

Native Custom Stone
236 Hightower Parkway
Dawsonville, Ga 30534
Phone: (888) 823-0745
Phone: (706) 216-5545

Follow Us!

Follow Us on FacebookFollow Us on LinkedInFollow Us on Blog

Actual stone colors may appear different in pictures due to pigments and lighting. Native recommends viewing actual samples prior to placing an order.
Website Designed by: Grater Digital |  Sitemap  |  Privacy Policy