• Home
  • Styles
  • Panels
  • Accessories
  • GO-BRICK®
  • Vendors
  • Technical Details
  • Contact
  • Shop
Native Custom Stone

Custom Stone Manufacturer

Questions? Call us at:   (888) 823-0745

  • Home
  • Stone
    • Country VillaCounty Villa Stone
    • Castle RockCastle Rock
    • Rubble StoneRubble Stone
    • Stack StoneStack Stone
    • Ledge Stoneledge stone
    • River Rockriver rock
    • Field Stonefield stone
  • Panels
    • CustomFit PanelsCustom-Fit DIY Stone Panels
    • Go-StoneGo-Stone DIY Stone Panels
    • AccessoriesStone Accessories
  • Brick
  • Find A Vendor
  • Technical
  • Contact
  • Shop
Home » Blog

Go-Brick and Go-Stone for DIY Projects

A Georgia-based company, Native Custom Stone has developed brick and stone veneer products for the DIY market. Both Go-Brick and Go-Stone products are easy to install and both are available online from BuildDirect.com, and from select Home Depot stores in a number of US states.

As their names suggest, Go-Brick looks like brick, and Go-Stone looks like stone. Both simulated ranges have a number of different finishes and colors, and both are installed using with minimal tools and tile adhesive rather than mortar. Both the brick and manufactured stone veneer products are lightweight, and both will transform walls from drab to fab in just a few hours!

Go-Brick

DIY Projects
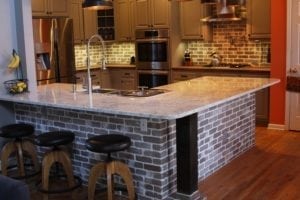
A thin, tumbled brick veneer that can be installed on most vertical surfaces, both interior and exterior, Go-Brick is available in a wide range of standard colors, and can be custom-colored to order. Several grout colors are also available to match the color of mortar that is normally used to lay full sized clay bricks or concrete blocks.

On average, the molded bricks are half an inch thick, and 7⅝ x 2¼ inches in size. Each box contains 58 Go-Bricks that will cover 8½ square feet with ⅜ inch joints. One box weighs about 24 lbs; and each square foot weights between 4-6 lbs. Accessories include corner pieces, 18 x 2 x 3⅜ inch window sills, and boxes that are designed to accommodate light switches and electric plug points.

When laying Go-Brick veneer it is best to mix units from different boxes to maximize variation.

Essential tools required to install Go-Brick include a measuring tape and a notched trowel to apply the tile adhesive. If tile grout is used, you will need a grout applicator; if regular mortar is used for grouting, you will need a small pointed trowel or pointing tool.

No form of foundation is required for Go-Brick veneer, but it is vital that the first (and all subsequent courses) are level. It is recommended that a chalk line is used to ensure that each course of Go-Brick is laid straight and level. But to do this you will need to start with two points that are level, so you will also need a spirit level to mark these points. Don’t ever rely on an existing floor level when tiling, laying bricks, or installing any form of veneer. Floors are not always completely level!

Sealing of the brick veneer isn’t necessary unless the surface is going to be exposed to a lot of water. Native Custom Stone has a Natural Shield Sealer that repels water and oil. It is effective for three to five years, and won’t change the natural appearance of the brick veneer.
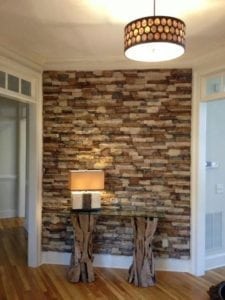
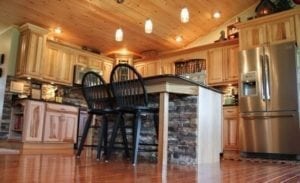
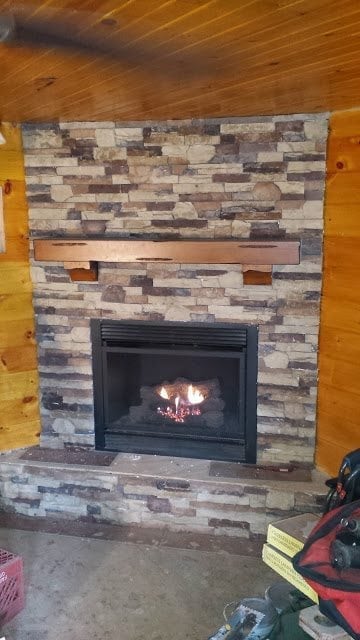
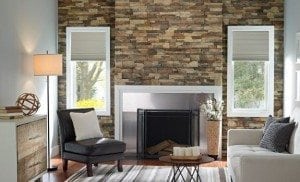
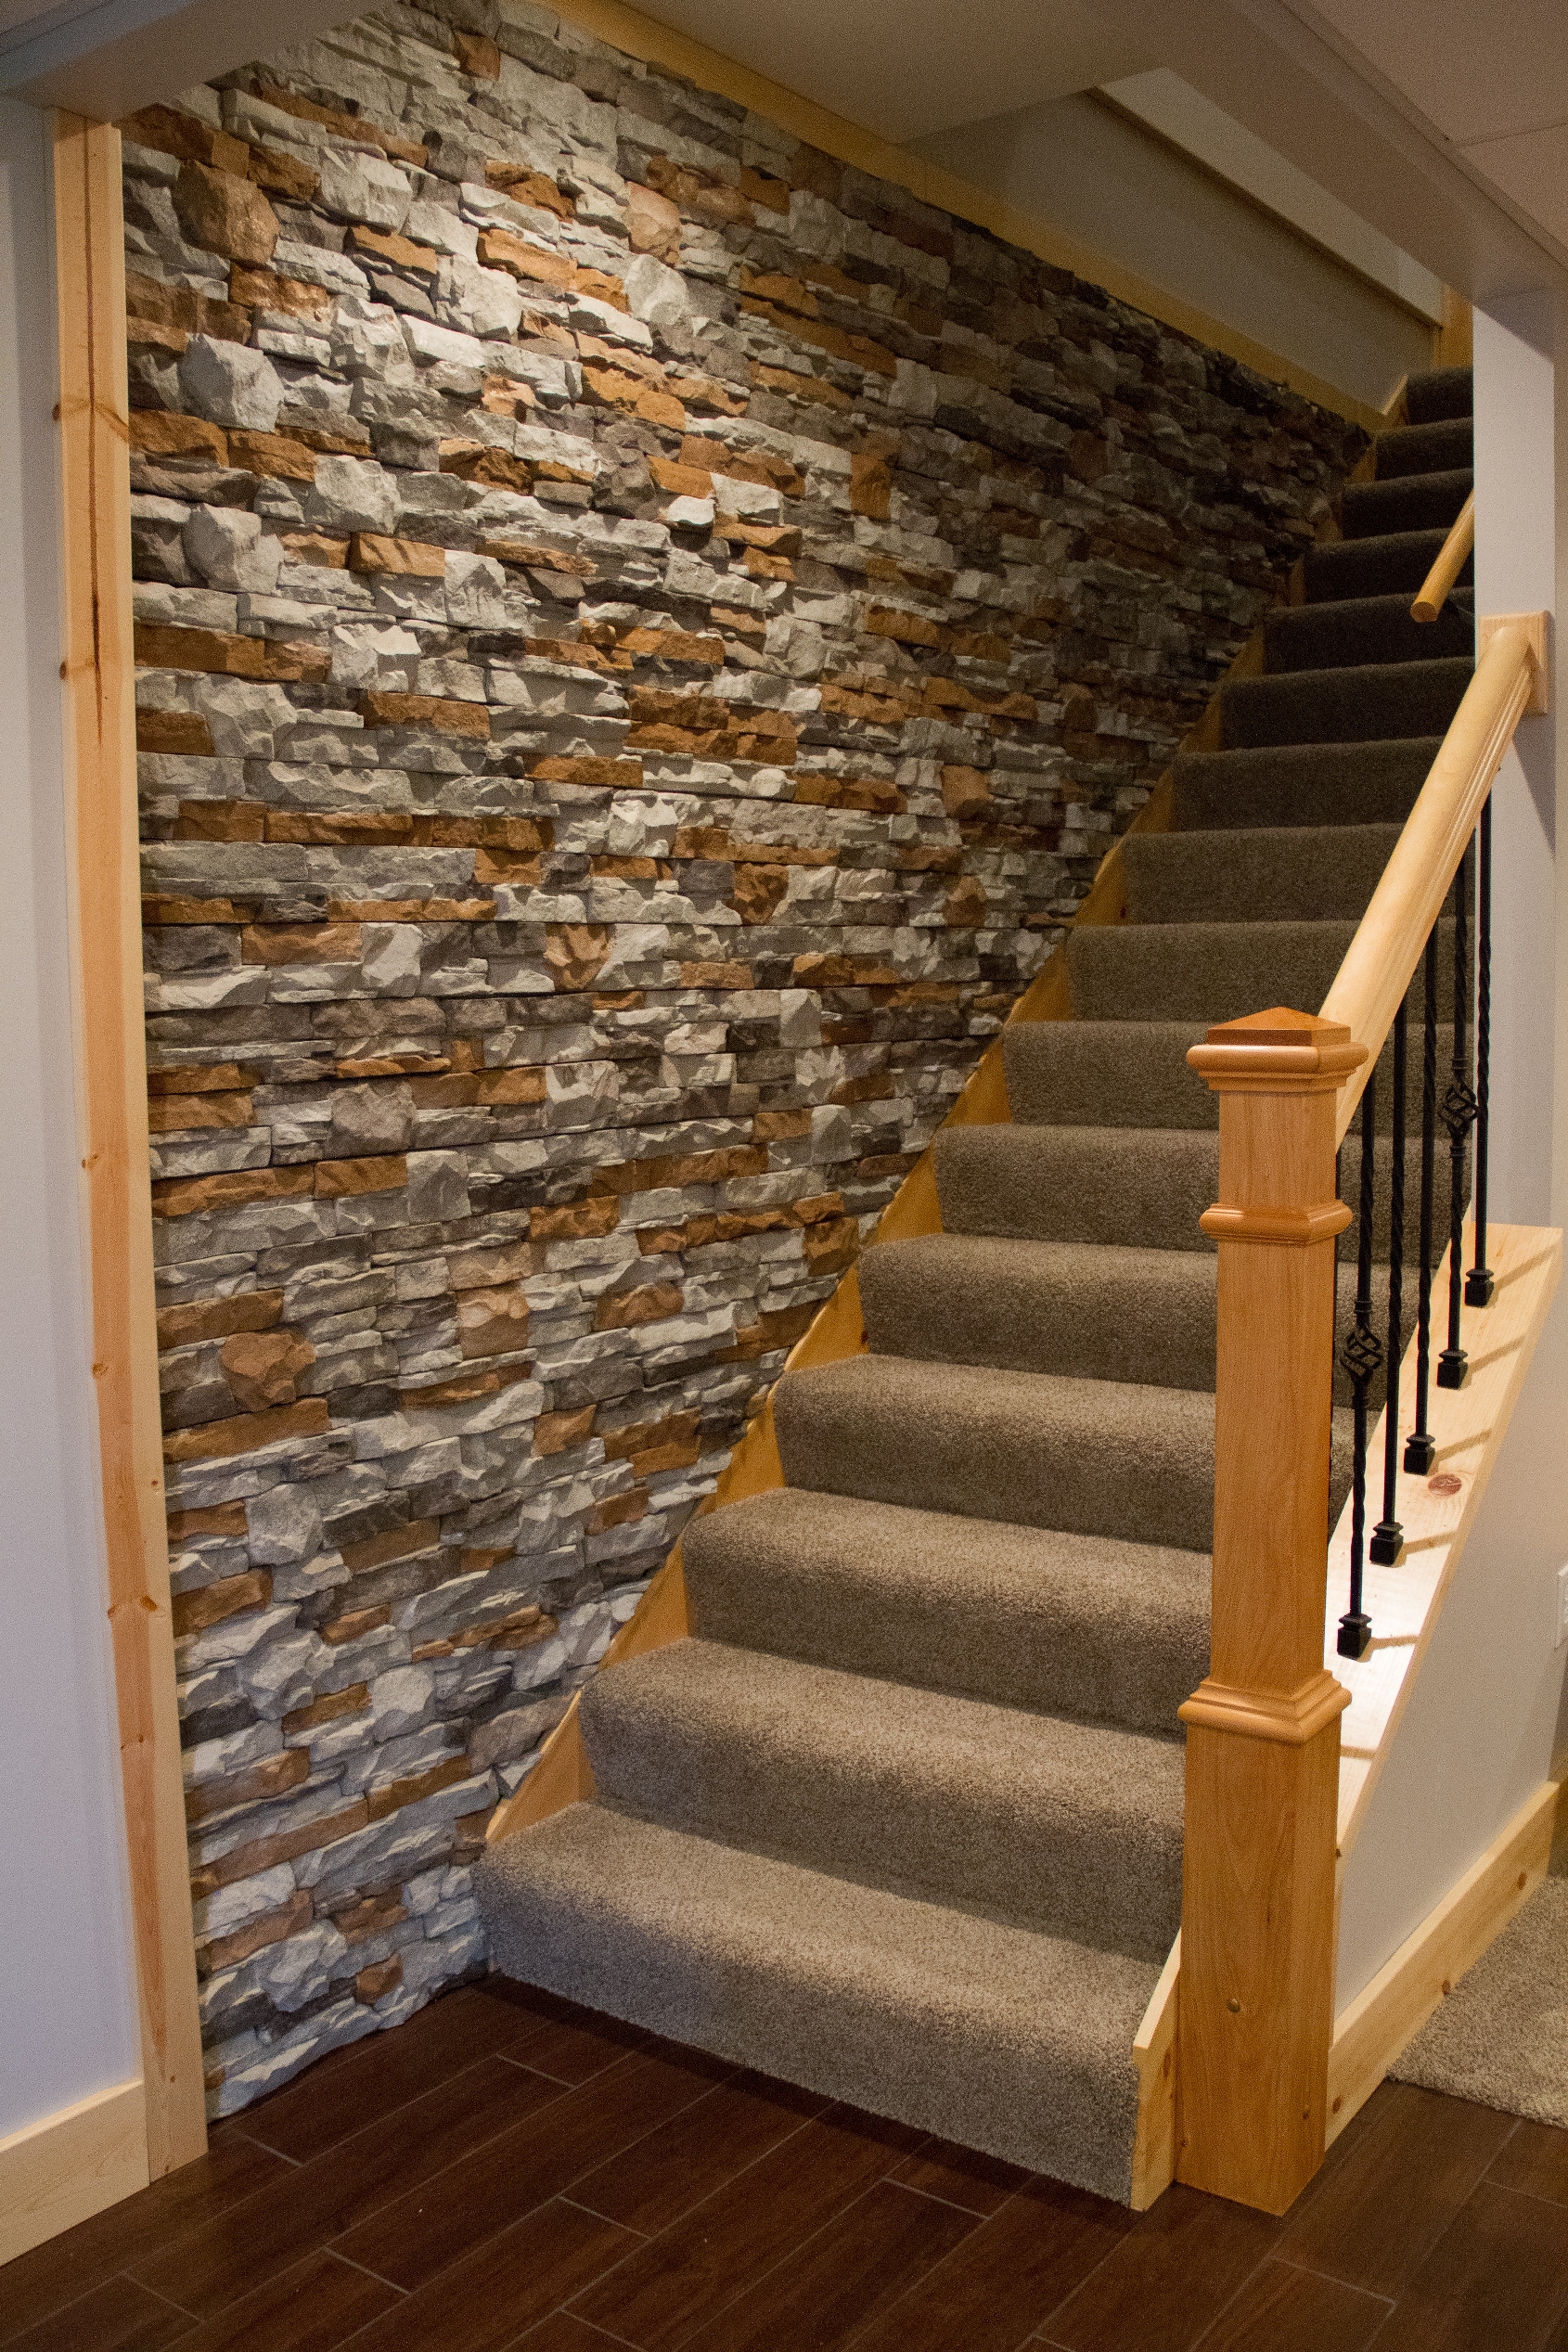
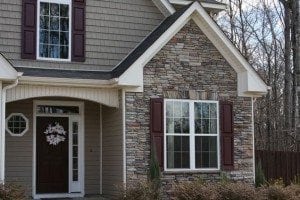
Go-Stone

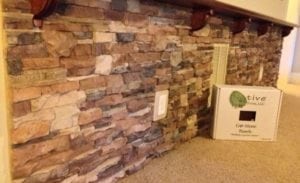
An innovative stone veneer made using recycled materials in the form of crumb rubber from discarded tires, Go-Stone is intended primarily for use on interior vertical surfaces. There are three ranges that give the appearance of different stone types, all of which are supplied in panel form.

Go-Stone is supplied in boxes of 15 panels that will cover five square feet. There are 40 vertical inches of flat edges in each box, and five each of three different panel sizes: 16 x 4 inches; 12 x 4 inches; and 8 x 4 inches. Corner pieces are packaged separately. Like Go-Brick, accessories designed to accommodate light switches and electric plug points are also available.

The essential tools needed to install Go-Stone include a measuring tape, spirit or torpedo level, and a notched trowel, as well as a wet-cut or drywall saw to cut ends to size as necessary.

Like Go-Brick, Go-Stone panels don’t require and form of foundation, and panel courses must be kept level for authenticity. The different sized panels should be alternated to prevent identical panels being installed next to or above one another. Since the panels are different sizes, this will also prevent the appearance of seams.

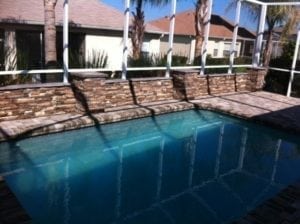
If Go-Stone manufactured stone veneer is going to be used on an exterior wall (perhaps on a covered patio wall), it’s advisable to use an exterior tile adhesive and the panels should be sealed.

For more information about Go-Stone and Go-Brick and suitable DIY projects, contact Native Custom Stone or an authorized distributor.

Filed Under: DIY, Go-Brick Brick Veneer, Go-Stone Panels

Top Tips and Tricks for Successful Go-Stone Panel Installation

Go-Stone manufactured stone veneer panels have opened up new possibilities for DIY enthusiasts who really do want to do home improvement projects themselves.

Available from a number of Home Depot stores, or online from BuildDirect.com, Go-Stone panels are lightweight, incredibly easy to install, and they look just like natural stone. Better still, they are made from 87 percent eco-friendly recycled materials – mostly discarded rubber tires that would otherwise end up in landfill. You don’t need any masonry or building experience to install these innovative panels, and hardly any tools.

Go-Stone manufactured stone veneer panels are available in three different colors, named according to look:

  1. Cedar Creek
  2. Coastal Blend
  3. Cherokee

The results produce a realistic stone finish and will be sure to add a warm, upscale look to any interior.

So what tips and tricks do you need to know to successfully install Go-Stone panels?

Make Sure You Have the Right Tools and Materials for the Job

If you have done any DIY home projects, chances are you will already have all the tools needed to install Native Custom Stone Go-Stone panels. But be sure to do a check before you start.

You will need a:

  • measuring tape and a pencil
  • spirit or torpedo level (a 12” is perfect)
  • notched floor trowel (a ¼” will do the job well)
  • drywall, wet-cut saw, or an angle grinder
  • rosin paper to protect the floor and painter’s tape to keep it in place (you could also use an old sheet or plastic)
  • personal safety equipment including eye and ear protection for when you cut panels to size

Of course you will also need Go-Stone panels and a suitable tile and stone adhesive to stick them to the walls.

While Go-Stone panels are primarily intended for indoor use, they can be used in some outdoor environments, for instance on the wall of a covered patio that is attached to the house. In this case, it’s important to use a suitable exterior adhesive to install the panels, and it’s best to seal the surface of the panels as well.

Tips and Tricks for Successful Installation of Go-Stone Panels

Go-Stone accent wallInstallation of Go-Stone manufactured stone veneer is so simple anyone can do it without learning any special skills. The only building principle you need to be aware of is the need to keep the top of the panels level.

Before you start work, make sure you have everything you need, and cover the floor surface adjacent to the wall to be clad with rosin paper or an old sheet. Then wipe the wall down thoroughly with a damp cloth to get rid of dust and dirt. If there is grease or grime on the surface, it must be removed. Allow the surface to dry thoroughly before you start laying the panels.

Start laying your panels from an edge. Apply the adhesive to the back of the first panel using a notched trowel. Push the panel into place and move gently from side to side to get rid of any trapped air. Use your level to check that the top of the panel is level. This means it should be parallel with the floor, unless the floor isn’t completely flat and level, which does happen! If you haven’t used a level before, all you do is place it on the upper horizontal edge of the panel and look at the bubble in the vial set in the center of the level. It should be right in the middle, and perfectly balanced. If it isn’t, shift the panel slightly until it is.

Each package of Go-Stone panels has three different sizes, and these should be alternated both vertically and horizontally, as you lay each course. To ensure a totally realistic stone appearance, you need to avoid creating the appearance of seams, or using identical panels next to each other. Keep checking your horizontal levels regularly – at least check after laying every third panel.

When you get to the end of the first row, you might have to cut the last panel to fit the space left. Measure the space and mark this dimension on a panel so that you can cut it accurately. Don’t forget to wear eye and ear protection when using cutting tools.

If you are using corner pieces, install these before cutting panels to fit the space at the end of a row.

How to Work Out How Many Go-Stone Panels You Need

Native Custom Stone’s Go-Stone panels contain five pieces of three different sized panels – 15 in all. The sizes are 8” x 4”, 12“ x 4”, and 16” x 4“, so that each course will be four inches high. The ends of the two longer panels, and one end of the shorter one, have notches that allow the next panel to slot in neatly. Each box contains sufficient panels to cover 5 ft2, with a total of 40 vertical inches of flat, finished edges.

Corner pieces are packaged separately, with four linear feet in each box.

Go-Stone also supplies accessory pieces, including electrical surrounds for light switches, separately, to ensure a professional finish for every project.

Filed Under: Go-Stone Panels, Tips and Tricks

Choose Manufactured Stone Veneer That Looks Like Local Stone

Good quality manufactured stone veneer provides an amazing alternative to real stone, particularly when it looks exactly as if it was quarried or even just found in your area.

There are a number of different types of manufactured stone veneer that use a variety of materials including lightweight aggregates, Portland cement, and iron oxide pigments that help to create the impression of real stone.

Manufactured Stone Veneer - Go-BrickGenerally manufactured stone veneer is not a structural product, and so therefore isn’t used to build with. Instead it is used to clad a variety of wall-type structures made from blocks or bricks and mortar, or those that are metal- or wood-framed.

One of the most attractive advantages of using manufactured stone veneer to achieve a natural stone finish on walls is the fact that no concrete foundation or other type of structural support is needed. It is quick and easy to install, and costs considerably less than a natural stone wall does to build.

While most manufactured stone veneer is intended for both indoor and outdoor use, an innovative Go-Stone panel version manufactured by Native Custom Stone, primarily from rubber tires, is a product used mostly to clad walls and other indoor surfaces.

How Manufactured Stone Veneer is Made

Whatever materials are used to make manufactured stone veneer, these products are cast in molds that enable manufacturers to replicate the texture and look of natural stone. Pigments are used to simulate colors, include those produced on Go-Stone panels.

Molds are usually made from rocks that have been quarried in a particular area, making it possible to choose a finish that could quite conceivably have been found nearby. Of course because the veneer is manufactured in a factory, it is also possible to choose finishes that replicate stone that isn’t found in your area, and would be extremely costly to transport to where you live.

Manufactured Stone Veneer Finishes and Textures

The finishes and textures simulated during the manufacture of stone veneer products are intended to reproduce different types of stone as well as a variety of ways stonemasons cut natural stone. Furthermore, these finishes can be used to effectively mimic different wall structures, a dry stone wall for example.

Native Custom Stone has a range of styles and finishes ranging from what look like large chunks of cut stone, to rugged ledge stone, and smooth river rocks. All are available in a wide range of color palettes that add to their visual versatility.

  • Castle Rock simulates neatly cut stone of various sizes that can be laid to replicate an architecturally elegant building – or a castle.
  • Country Villa also comprises cut stone of different sizes, but the look is less formal and suits a range of architectural styles. It is available in 24 color variations that replicate a variety of rock types including sandstone.
  • Rubble Stone or Ashlar mimics a finely dressed stone that can be dry stacked or installed using mortar to achieve joints that add to the walls realistic appearance. It’s a good option for those wishing to create a traditional look from the old south using manufactured stone veneer.
  • Stack Stone that, as its name suggests, is ideal for copying the effect of stone that has been dry stacked. Thinner than Rubble Stone, it produces a clean and contemporary effect.
  • Ledge Stone is also thin, but it is has a much rougher texture than Stack Stone and is available in more shapes and sizes. This is a great choice for anyone who wants to create the impression that every stone was hand selected.
  • River Rock comes in various sizes and a wide range of shapes, just as smooth river rocks do in nature. Installed using mortar, River Rock looks exactly as if you’ve spent hours selecting the right stones from a local river bed.
  • Field Stone has a rugged texture intended to replicate the appearance of walls built from local stone found on site. It can be used to create the look of a dry stacked wall in the country, or combined with other types of stone for a completely different effect.
  • Go-Stone panels look like cut stone once installed. Although there are fewer color and texture combinations when compared to Native Custom Stone’s other manufactured stone veneer products, these innovative faux stone panels are three times faster to lay than other types.

The choice is yours. Contact Native Custom Stone for more information.

Filed Under: Manufactured Stone

The Difference Between DIY Stone Panels (Go-Stone) and Natural Stone

Stone is one of the most imposing building materials there is. Used to construct the earliest fortresses walls and buildings, it is beautiful and durable. But it is also heavy and difficult to work with and generally one needs a skilled stonemason to cut and lay the stone. Because it has to be quarried and transported, natural stone is also expensive.

The Difference Between DIY Stone Panels (Go-Stone) and Natural StoneFor decades companies have been making faux stone products, including synthetic veneer that can be used to clad timber frame homes inside and outside. Available in a wide range of styles that copy different types of natural stone, these products are made from cement that is combined with very fine crushed stone, or with lightweight fillers. They are fixed to prepared wall surfaces using mortar, either in imitation of a dry-stacked wall, or grouted with mortar so they look as if natural stone was laid the conventional way.

While a competent handyman (or woman) can work with faux veneer, particularly the kind that is made using lightweight, pumice-stone type fillers, it’s a relatively messy process that requires skills similar to those used when laying bricks. Truly DIY stone panels (Go-Stone), on the other hand, are very light and ultra-easy to install with minimal tools and no masonry skills.

How DIY Stone Panels (Go-Stone) Are Different

The DIY stone panels (Go-Stone), manufactured by Native Custom Stone are made using recycled tires that would otherwise be destined for landfills. With less than 7 percent of the 242 million tires discarded in the US every year being recycled, this sets them apart as the most environmentally friendly faux stone veneer product on the market. The panels are sold in multiples of five square feet, and each box contains the equivalent rubber content from one 12 lb. tire.

The company utilizes contemporary crumb rubber technology that enables them to mold the material into panels that look exactly like stone. They are also incredibly light – about 50 percent lighter than other types of simulated stone veneer.

Unlike cement-based simulated stone veneers, these DIY stone panels (Go-Stone) don’t require any mortar to fix them in place. Instead, they are fixed in position using a regular tile adhesive. The only tools required are a notched floor trowel, a measuring tape and either a spirit or torpedo level to ensure the panels are laid level. If panels need to be cut to fit a specific space, a drywall or wet-cut saw will also be required.

Go-Stone panels are available in several different colors to create different effects. Corner pieces are also available for use on pillars and stand-alone features. Accessory pieces include different sizes “stones” that are made to accommodate light switches and plug holes.

Synthetic Stone Veneer Products From Native Custom Stone

Native Custom Stone’s DIY stone Panels (Go-Stone) are intended for indoor use only, however Native Custom Stone also has a range of simulated stone veneer products that can be used externally. The latter products come in a range of styles to mimic rugged field stone, ledge stone and stack stone, rounded river rock, Ashlar that looks like a rubble stone, and larger rocks styles that look like old stone walls built with large rocks and natural stone.

All products are available from select Home Depot stores, www.homedepot.com, or from BuildDirect.com

Filed Under: DIY, Go-Stone Panels

How to Install DIY Stone Panels (Go-Stone) the Easy Way

DIY home improvement projects can be challenging, rewarding, and if you can do relatively simple makeovers easily and quickly, they can be a lot of fun too.

The use of faux stone as cladding inside the house is one of the most effective makeover ideas. You can use it on feature walls in living areas; between counters and cupboards to transform kitchens; as a backdrop for fireplaces, bars and other special areas; and to add character to stairwells, lobbies and entrance halls, however big or small they may be.

But until relatively recently, working with faux stone has required basic masonry skills because it was molded from concrete and laid using mortar. Doing it this way is incredibly effective, but does take time, and can be messy.

DIY stone panels (Go-Stone) are just as effective, but quite different. A truly DIY product launched by Native Custom Stone in 2013, Go-Stone panels are made with recycled tires, making them lightweight and environmentally friendly. They are also incredibly easy to install with no formal skills, and it’ll take you about a fraction of the time it would to install traditional faux stone panels.

DIY stone panels (Go-Stone) can be used in a multitude of different ways, to create lots of different effects, but the installation process remains the same – and the bonus is that anyone can do it!

The Installation Process for DIY Stone Panels (Go-Stone)

Easy to Install Go-Stone DIY Project The first step is to measure the surfaces you are planning to transform using DIY stone panels (Go-Stone). The next is to order what you need from Native Custom Stone, select Home Depot stores, or from BuildDirect.com

There will be three different sized panels in each pack; these measure 16, 12 and 8 inches. They should be alternated according to the illustration on the packaging, for example, with a 12- or 8-inch panel above a 16-inch panel. Note that corner pieces are packaged separately. You will need these if you are working on pillars or any areas that don’t end at the corner of a wall.

The second step is to ensure that you have everything you need to do the installation work.

There are so few tools and equipment needed, if you’re already into DIY there’s an excellent chance you will have it all already. You’ll need:

  • Measuring tape to measure the surfaces as well as to check where the panels will go.
  • Drywall or wet-cut saw to cut some of the panels to ensure end pieces fit perfectly.
  • Torpedo or spirit level to make sure the panels are level and plumb.
  • Notched floor trowel.
  • Ceramic tile and stone adhesive, preferably ready mixed.

Now you’re ready to get started.

  1. Make sure the surface to be clad is clean and dry.
  2. Cover the floor in and around the work area with canvas tarpaulin or plastic sheeting.
  3. If you have corner pieces, it’s important to start working from a corner.
  4. Apply adhesive to the first panel using the trowel. Make sure it covers the whole surface.
  5. Push the first panel firmly into place and use the level to make sure it really is level. Never rely on existing surfaces for this – not even the existing floor.
  6. Lay all the panels along the baseline.
  7. You may have to cut the last panel to fit. If you have corners at both ends, you will have a cut panel in the middle, in which case it’s best to cut two of the panels and butt them together for a neat fit.
  8. When you lay the second row of panels, make sure you don’t lay identical ones on top of one another. If you do this you are likely to create a visual seam.
  9. Continue to check your levels as you work.
  10. And that’s all there is to it. Simply keep laying your new simulated stone cladding until you’re done.

Contact Native Custom Stone for more information about the different stone types and colors for your next project using DIY stone panels (Go-Stone).

Filed Under: DIY, Go-Stone Panels, Tips and Tricks

Design Your New Kitchen Using DIY Stone Panels (Go-Stone)

Kitchens are an integral part of our daily lives, and whether you want to upgrade your kitchen because you plan to sell, or because you need it to work better, a well designed kitchen will always impact positively on your property investment.

Kitchen Design

Designing a new kitchen can be a challenge, but it can also be a lot of fun, particularly when you introduce special features that make it unique, like Go-Stone panels or walls.

But first of all you need to consider the basics:Custom Go-Stone Kitchen Island

  • The work triangle Where will you position your stove or hob and oven, your sink and refrigerator? Remember that these appliances should never be placed adjacent to one another and should always form a work triangle.
  • Appliances If you’re upgrading your kitchen, chances are you’ll be buying new appliances. Make sure you know exactly what these measure otherwise your new kitchen layout isn’t going to work.
  • Storage and work surfaces Cupboards and counter-tops are vital for a kitchen to work efficiently. Generally tall units, including broom cupboards, should be located at the ends of counters, and it is essential that work surfaces are positioned between appliances.
  • Plumbing Whether yours is a new kitchen or a remake, you’re going to need to ensure that water supply and drainage are connected to the sink in the most practical manner. Changing pipes and drains can be very expensive, so get a qualified plumber on board in the early stages to advise you.
  • Lighting and ventilation You need to be able to see what you are doing when you’re preparing food and cooking, and so you will need to consider both general overhead and more focused lighting that will illuminate working surfaces. In terms of ventilation, you need to take steps to ensure that the room doesn’t smell bad because the odor of past meals lingers in the air.
  • Wall and floor surfaces Whether you’re building and installing a new kitchen, or renovating and old one, the wall and floor surfaces will be paramount. Even installing new kitchen units could mean that you have to retile the floor and resurface, paint or tile walls. But you’ll also have the opportunity to introduce DIY stone panels on walls between floor and wall-hung units, on pillars, or on a feature wall elsewhere in the kitchen.

Where to Use Go-Stone DIY Stone Panels in a Kitchen

The design and style of you kitchen will determine largely where and how you can use stone panels in your kitchen effectively. A feature wall will add interest to most kitchens. Used throughout the room, you can achieve a warm, rustic look, particularly if you install characterful wooden cupboards and cabinet units. If you have space for a center island, perhaps fitted with a prep sink or hob, these fabulous faux stone panels may be used to achieve a fantastic finishing touch around the base.

Many kitchens today are open-plan, sometimes incorporating a living area that might have a fireplace or even a pub. Go-Stone panels are ideal for both these features, and will help to tie the rustic theme together.

And because there’s a choice in terms of stone finish, color and stone size, you’ll be able to achieve your own unique design without professional help.

Installing Go-Stone DIY Stone Panels in a Kitchen

Designed specifically for interior walls, Go-Stone panels are lightweight and so easy to install you’ll wonder why you’ve waited so long. You don’t need any special skills or building experience, and the tools required are minimal. Intended for DIY use, no mortar is needed, just a suitable tile adhesive.

Contact us today to place an order or get a sample.


Filed Under: Go-Stone Panels

Bigger in Real Life Fireplace Installation Using Go-Stone

Even a country cabin with no running water can benefit from Go-Stone, adding color, texture and creating an unforgettable ambiance. In fact for Tim Streisel, the “bigger in real life” fireplace he’s built in his small self-constructed wooden cabin on a wooded lake lot in Missouri is a pivotal feature, and one that he and his wife Kelly are extremely proud of. Check out his entire blog covering his project here.

An electrical engineer, Tim bought the lot in July 2012, and instead of using a camper at weekends, he decided to build a barn-type shed. He could buy a shell for $6500, but realized he would cut costs dramatically by doing it himself, with a little help from some friends.

The bedroom would be upstairs, and an open-plan living area downstairs. There would be a fireplace in one corner, finished with rock veneer.

Building began a year later, in July 2013, while they camped on the lot at weekends and over holidays, always relying on good weather.

Tim admits in his blog that he stressed for about two years about how to do the fireplace. He even had nightmares that it would turn out badly. “I didn’t know if I would be able to pull it off.”

From the start his original idea was to cover the timber framework of the fireplace surround with cement board and a rock veneer – preferably using suitable rocks from the property. But all basic construction work would have be completed before real decisions could be made about the feature fireplace.

The Fireplace

bigger-in-real-life-go-stone-installationTim already had a propane, vent-free unit that slotted neatly into the fireplace, and the first fire was lit that November. Because it produced too much heat, the couple decided to use it for “a quick heat-up and for ambiance.” Ceramic heaters would be used as the main heat source. But in the meantime, the living room remained unfinished, with lawn chairs serving seating needs. While rock wool turned out to be a good way to simulate glowing embers, the fireplace was still a largely hollow skeleton.

By the end of December Tim was ready to get started on laying his rock veneer. He declared to Kelly that he wanted it to look like stacked stone rather than field stone, to meet the “modern rustic” aesthetic he was aiming for throughout the cabin.

Acknowledging the fact that he had no stone masonry skills, he soon abandoned the idea of using stone off the lot, and started looking for faux stone options.

The first product he found incorporated mounting wires cast into the manufactured stone. It seemed simple to install, though Tim felt it looked a little “flat” without the variations of genuine stone. Two negatives were:

  • The price – it was going to cost him close to $700 to complete the fireplace.
  • He discovered that inadvertently pressing the stone too much, tended to move it enough to spoil the illusion.

That’s when he found Native Custom Stone’s Go-Stone. Lightweight, effective, and easy to stick on cement board or drywall using a mastic tile adhesive, he was delighted to find it was a “green” product made from recycled rubber tires. Better still it wouldn’t cost him more than about $300 to complete the project.

So the first cabin project scheduled for 2016 was the Go-Stone fireplace installation, and Tim only has praise for the product. For instance he says:

  • Bought from Home Depot, the packaging is excellent.
  • The stones feel just like stone, in spite of being made of rubber.
  • The variations in depth are incredibly realistic.
  • Shading and color variations are impressive.
  • No one piece of “stone” looks like another.
  • Texture on the back of each unit maximizes adhesion.

Installation is shown step-by-step on his blog, together with comments and advice for others wanting achieve the same awesome effect:

  • The stone is easy to cut but does create a lot of dust. So wear safety glasses.
  • Measuring and cutting takes “a bit of time,” but they are quick and easy to lay.
  • Keeping the stone level is vital; check every row.
  • Painting the board a dark color prior to installation will help hide gaps.
  • If you use mortar to fill gaps, let it dry and harden and chip the excess off. Wiping it gets messy.

While Tim had lots of help building the shell of their country cabin, the fireplace was a dual effort between him and Kelly.

“I feel a strange sense of pride in knowing that we did it ourselves.”

Filed Under: Uncategorized

Native Custom Stone Partners With BuildDirect to Distribute Products

Architectural-grade simulated stone panels and thin brick veneer from Native Custom Stone now available online from BuildDirect.com

Go Stone

Dawsonville, GA, March 14, 2016 – ​Georgia’s leading manufacturer of cultured stone products has partnered with one of America’s biggest online home improvement retailers to provide companies, and home owners, with easy access to their exciting eco-friendly product, Go-Stone®.

Engineered to make installation extremely easy and seamless, Native Custom Stone’s affordable Go-Stone® panels were created with the do-it-yourself market in mind. They are popular in kitchens and bathrooms, and for feature surfaces and accent walls in living areas. All you have to do is keep the panels level and stagger them for a realistic effect. No foundation required, the panels adhere to almost any substrate using the proper thin-set for interior applications, and type S mortar for exterior applications.

We are excited to partner with one of the nation’s largest online home improvement retailers. BuildDirect will open several new markets nationwide for distribution of our products.

BILLY BENNETT, OWNER OF NATIVE CUSTOM STONE

Whether you are a committed DIY enthusiast or a total novice who has never tackled a building or decorating project before, the new partnership between Native Custom Stone and BuildDirect.com will enable you to plan your project, and order the tools and materials needed, from the comfort of your living room. BuildDirect.com offers free shipping of samples if you aren’t sure what you want; and once you’ve decided, they will deliver your order to your front door.

Launched just over two years ago, Go-Stone® is made from waste rubber extracted from discarded tires, and transformed into look-alike stone panels using the latest “crumb rubber” technology. Since a large percentage (around 78) of the more than 242 million tires discarded in the US every year are illegally dumped or thrown onto landfills, this makes the product one of the most environmentally friendly options on earth.

Go-Stone® panels are packaged in units of five, totaling five square feet and with 40 vertical inches of flat finished edges. Corner pieces are packaged with four linear feet in a box. Accessory pieces intended for use around plug points, light switches and so on are also available. All may be cut to size with a drywall or wet-cut saw if required.

Installation of panels requires minimal tools and no specialist skills. In addition to a saw you’ll need a torpedo or small spirit level, a ¼” notched trowel, a tape measure, and tile adhesive. All these items are also available from BuildDirect.

The environmental bonus is that every box of Go-Stone® you purchase represents a tire that would likely have ended up in landfill.

Native Custom Stone is located in Dawsonville, Georgia. For more information about the company and Go-Stone, visit their website, http://www.nativecustomstone.com. You can pick up Go-Stone today from BuildDirect.com, HomeDepot.com and at select Home Depot locations.

Go Stone
Go Stone
Go Stone
Go Stone
Go Stone


Filed Under: Go-Stone Panels Tagged With: go-stone

The Advantages of Using Go-Stone Panels for Your Home

Update 3/11/2016 – Native Custom Stone’s Go-Stone Panels are now also available online at BuildDirect.com

Faux stone paneling has been gaining popularity for years as a great alternative to natural stone. When considering updating your home with the look of stone, consider these downfalls of natural stone:

  1. Simply put, it’s heavy. For this reason, natural stone is not one of the most DIY-friendly materials to work with. It’s difficult and expensive to transport, and even more difficult to install without help.
  2. You will need specialized tools and masonry skills to cut natural stone into pieces that fit together properly. You could rent the tools, but you would probably waste time and money by making mistakes and wasting material.
  3. Since natural stone is so heavy, it must be installed correctly. If not installed properly, it could pull away from its anchors causing serious damage to your home.
  4. Natural stone is very expensive, mostly because of the high cost of shipping. Bringing in natural stone from other locations is cost prohibitive, therefore, you may be limited to the stone that is quarried locally and isn’t exactly the style you’re looking for.

Faux stone veneers, like Go-Stone Panels, are a growing trend because they don’t have any of these disadvantages.

We developed Go-Stone as an innovative product specifically for Do-It-Yourself projects. It is:

  • gostone cherokee stairwellFifty percent lighter than natural stone making it easier and more cost-effective to purchase, ship and install.
  • Very easy to install without expensive tools or years of masonry experience. Click here to learn more about the tools and installation needed for Go-Stone Panels.
  • Environmentally friendly. Unlike many other faux stone veneers, Go-Stone is made from 87% recycled materials. Learn more in our brochure.

Go-Stone panels are perfect for updating the interior of your home. They can be used on fireplaces, in kitchens or as wall accents. Go-Stone Panels are sold exclusively at select Home Depot locations or online at HomeDepot.com.

Filed Under: DIY, Go-Stone Panels, Maintenance and Installation, manufactured stone

Choosing the Best Custom Stone Veneer Style for Your Home

Stone is a beautifully natural finish for the inside and outside of any home, but it can be very expensive and it requires specialist skills to lay – even though it is one of the oldest building materials used by man. But the good news is that modern technology has made stone much more accessible in the form of new-age “stone” veneer. It looks real, feels real, is lighter than the real thing, and it’s both cheaper and easier to install.

If you like the idea of stone veneer rather than using heavy, expensive quarried stone, and you start shopping around, you will find that not all manufactured stone is created equal. Simulated stone has been made from relatively lightweight precast concrete for decades. It’s relatively inexpensive and can look stunning, however, it’s much easier to lay than standard blocks or bricks. In addition to these traditional precast manufactured stone products, there is now another lighter, simpler, easier option that is suitable for interior projects, both big and small.

A Georgia-based company, Native Custom Stone, manufactures architectural stone and stone lookalike veneer that can be used to clad just about any surface. Interior products don’t need a concrete foundation or base to support the manufactured stone products, and you don’t need any mortar or special tools to install it. It’s lightweight, incredibly easy to work with, indistinguishable visibly from natural stone, and effortless to maintain. Easy-to-lay using tile adhesive, Go-Stone interior panels from Native Custom Stone are manufactured from discarded rubber tires that have been shredded. Similarly, their Go-Brick range mimics tumbled and face brick surfaces. All panels are supplied in boxes and are assembled easily, almost like a 3D jigsaw puzzle.

Additionally, the company has more traditional products that are suitable for outdoor cladding and siding, enabling you to transform even the plainest little house. These may also be used for retaining walls and other garden features, including freestanding pillars, flower boxes, and even firepits.

Overall, custom stone products provide an ideal solution for homeowners who want to upgrade their homes, particularly those who want to do it themselves. The greatest challenge is deciding which stone veneer will suit your home best.

Types of Manufactured Stone for Your Home

Dawson County Ledge

There are as many types of manufactured stone as there are types of natural stone; the difference though is that you don’t only have access to stone that occurs locally. With manufactured stone, the choice is much, much greater, depending of course on the stone sourced for molds. You can choose to have a randomly laid stone effect, a split-stone effect, or traditionally laid brick. There are so many color options and “stone” sizes you’ll be spoilt for choice. Really, it just depends on the type of interior accent you are looking for.

Native Custom Stone Offers the Following Styles to Create a Custom Look

  • Country Villa creates a rustic random effect that mimics the work of ageless stone masonry. It’s slightly uneven on the finished face, and shows no sign of mortar being used to bond the units.
  • Castle Rock is also random in terms of size and color, but it has a smoother and more regular finish. This one is perfect for the DIYer who wants to make his home his castle.
  • Rubble Stone (Ashlar) will achieve a lovely traditional effect. It can be used with or without the addition of mortar joints.
  • Stack Stone is a clean, contemporary option that typifies a well executive split stone finish. Even though it combines a number of different sizes, it has absolute authenticity.
  • Ledge Stone is very similar to Stack Stone, but with defined texture. Shapes and sizes are also more irregular, and the effect more rugged overall.
  • Field Stone is the look you might choose for garden walls and other outdoor features. It may be used to achieve a relatively rugged effect, either dry-stacking it or laying it with a mortar joint. It also works well combined with other types, including ledge stone.
  • River Rock typifies the effect you would achieve by using a mix of water-worn stones pressed into mortar.

Whatever appeals to you, one thing is for certain: there is a synthetic stone veneer that you can use to improve the look of your home from Native Custom Stone. And if you want to, you can do-it-yourself with their options like Go-Stone and Go-Brick!


Filed Under: Manufactured Stone, Tips and Advice

  • « Previous Page
  • 1
  • 2
  • 3
  • 4
  • 5
  • 6
  • …
  • 11
  • Next Page »

Search This Site

Technical

  • Download Our Brochure
  • Go-Stone Panels
  • CustomFit® Stone Panels
  • Stone Installation
  • Cleaning Instructions
  • Technical Details

Testimonials

We had the complete exterior of our home re-done by Native Custom Stone 2 years ago and are STILL in love with the results!! They took a very plain-looking wooden exterior and made it into something that is striking and eye-catching.

Visit the Showroom

Visits to the Native Custom Stone Showroom are by appointment only. Call (888) 823-0745 today to schedule!
 

Find a Vendor

Filter by

No results found in this location. Please try again.

Get Directions

Add Waypoint
show options hide options
Print directions Reset directions
Fetching directions......
Reset directions
Print directions

Contact Us

Stone Types

  • Castle Rock
  • Country Villa
  • Field Stone
  • Ledge Stone
  • River Rock
  • Rubble Stone
  • Stack Stone

Tech Links

  • CAD & Installation Details
  • BIM | Revit | Autocad
  • Testing & ICC-ESR Report
  • 3-Part Spec & MSDS
  • Product Warranty
  • LEED Details
  • Cleaning Instructions
  • Product Data

Resources

Native Custom Stone Lunch and Learn | Stone Installation Information Download Our Brochure | Native Custom Stone Brochure Download

Contact Info

Native Custom Stone
236 Hightower Parkway
Dawsonville, Ga 30534
Phone: (888) 823-0745
Phone: (706) 216-5545

Follow Us!

Follow Us on FacebookFollow Us on LinkedInFollow Us on Blog

Actual stone colors may appear different in pictures due to pigments and lighting. Native recommends viewing actual samples prior to placing an order.
Website Designed by: Grater Digital |  Sitemap  |  Privacy Policy