• Home
  • Styles
  • Panels
  • Accessories
  • GO-BRICK®
  • Vendors
  • Technical Details
  • Contact
  • Shop
Native Custom Stone

Custom Stone Manufacturer

Questions? Call us at:   (888) 823-0745

  • Home
  • Stone
    • Country VillaCounty Villa Stone
    • Castle RockCastle Rock
    • Rubble StoneRubble Stone
    • Stack StoneStack Stone
    • Ledge Stoneledge stone
    • River Rockriver rock
    • Field Stonefield stone
  • Panels
    • CustomFit PanelsCustom-Fit DIY Stone Panels
    • Go-StoneGo-Stone DIY Stone Panels
    • AccessoriesStone Accessories
  • Cast
  • Brick
  • Find A Vendor
  • Technical
  • Contact
  • Shop
You are here: Home / Archives for Go-Stone Panels

How to Install DIY Stone Panels (Go-Stone) the Easy Way

DIY home improvement projects can be challenging, rewarding, and if you can do relatively simple makeovers easily and quickly, they can be a lot of fun too.

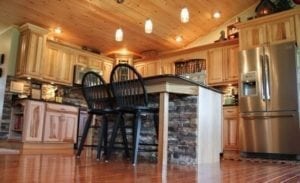
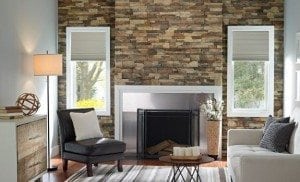
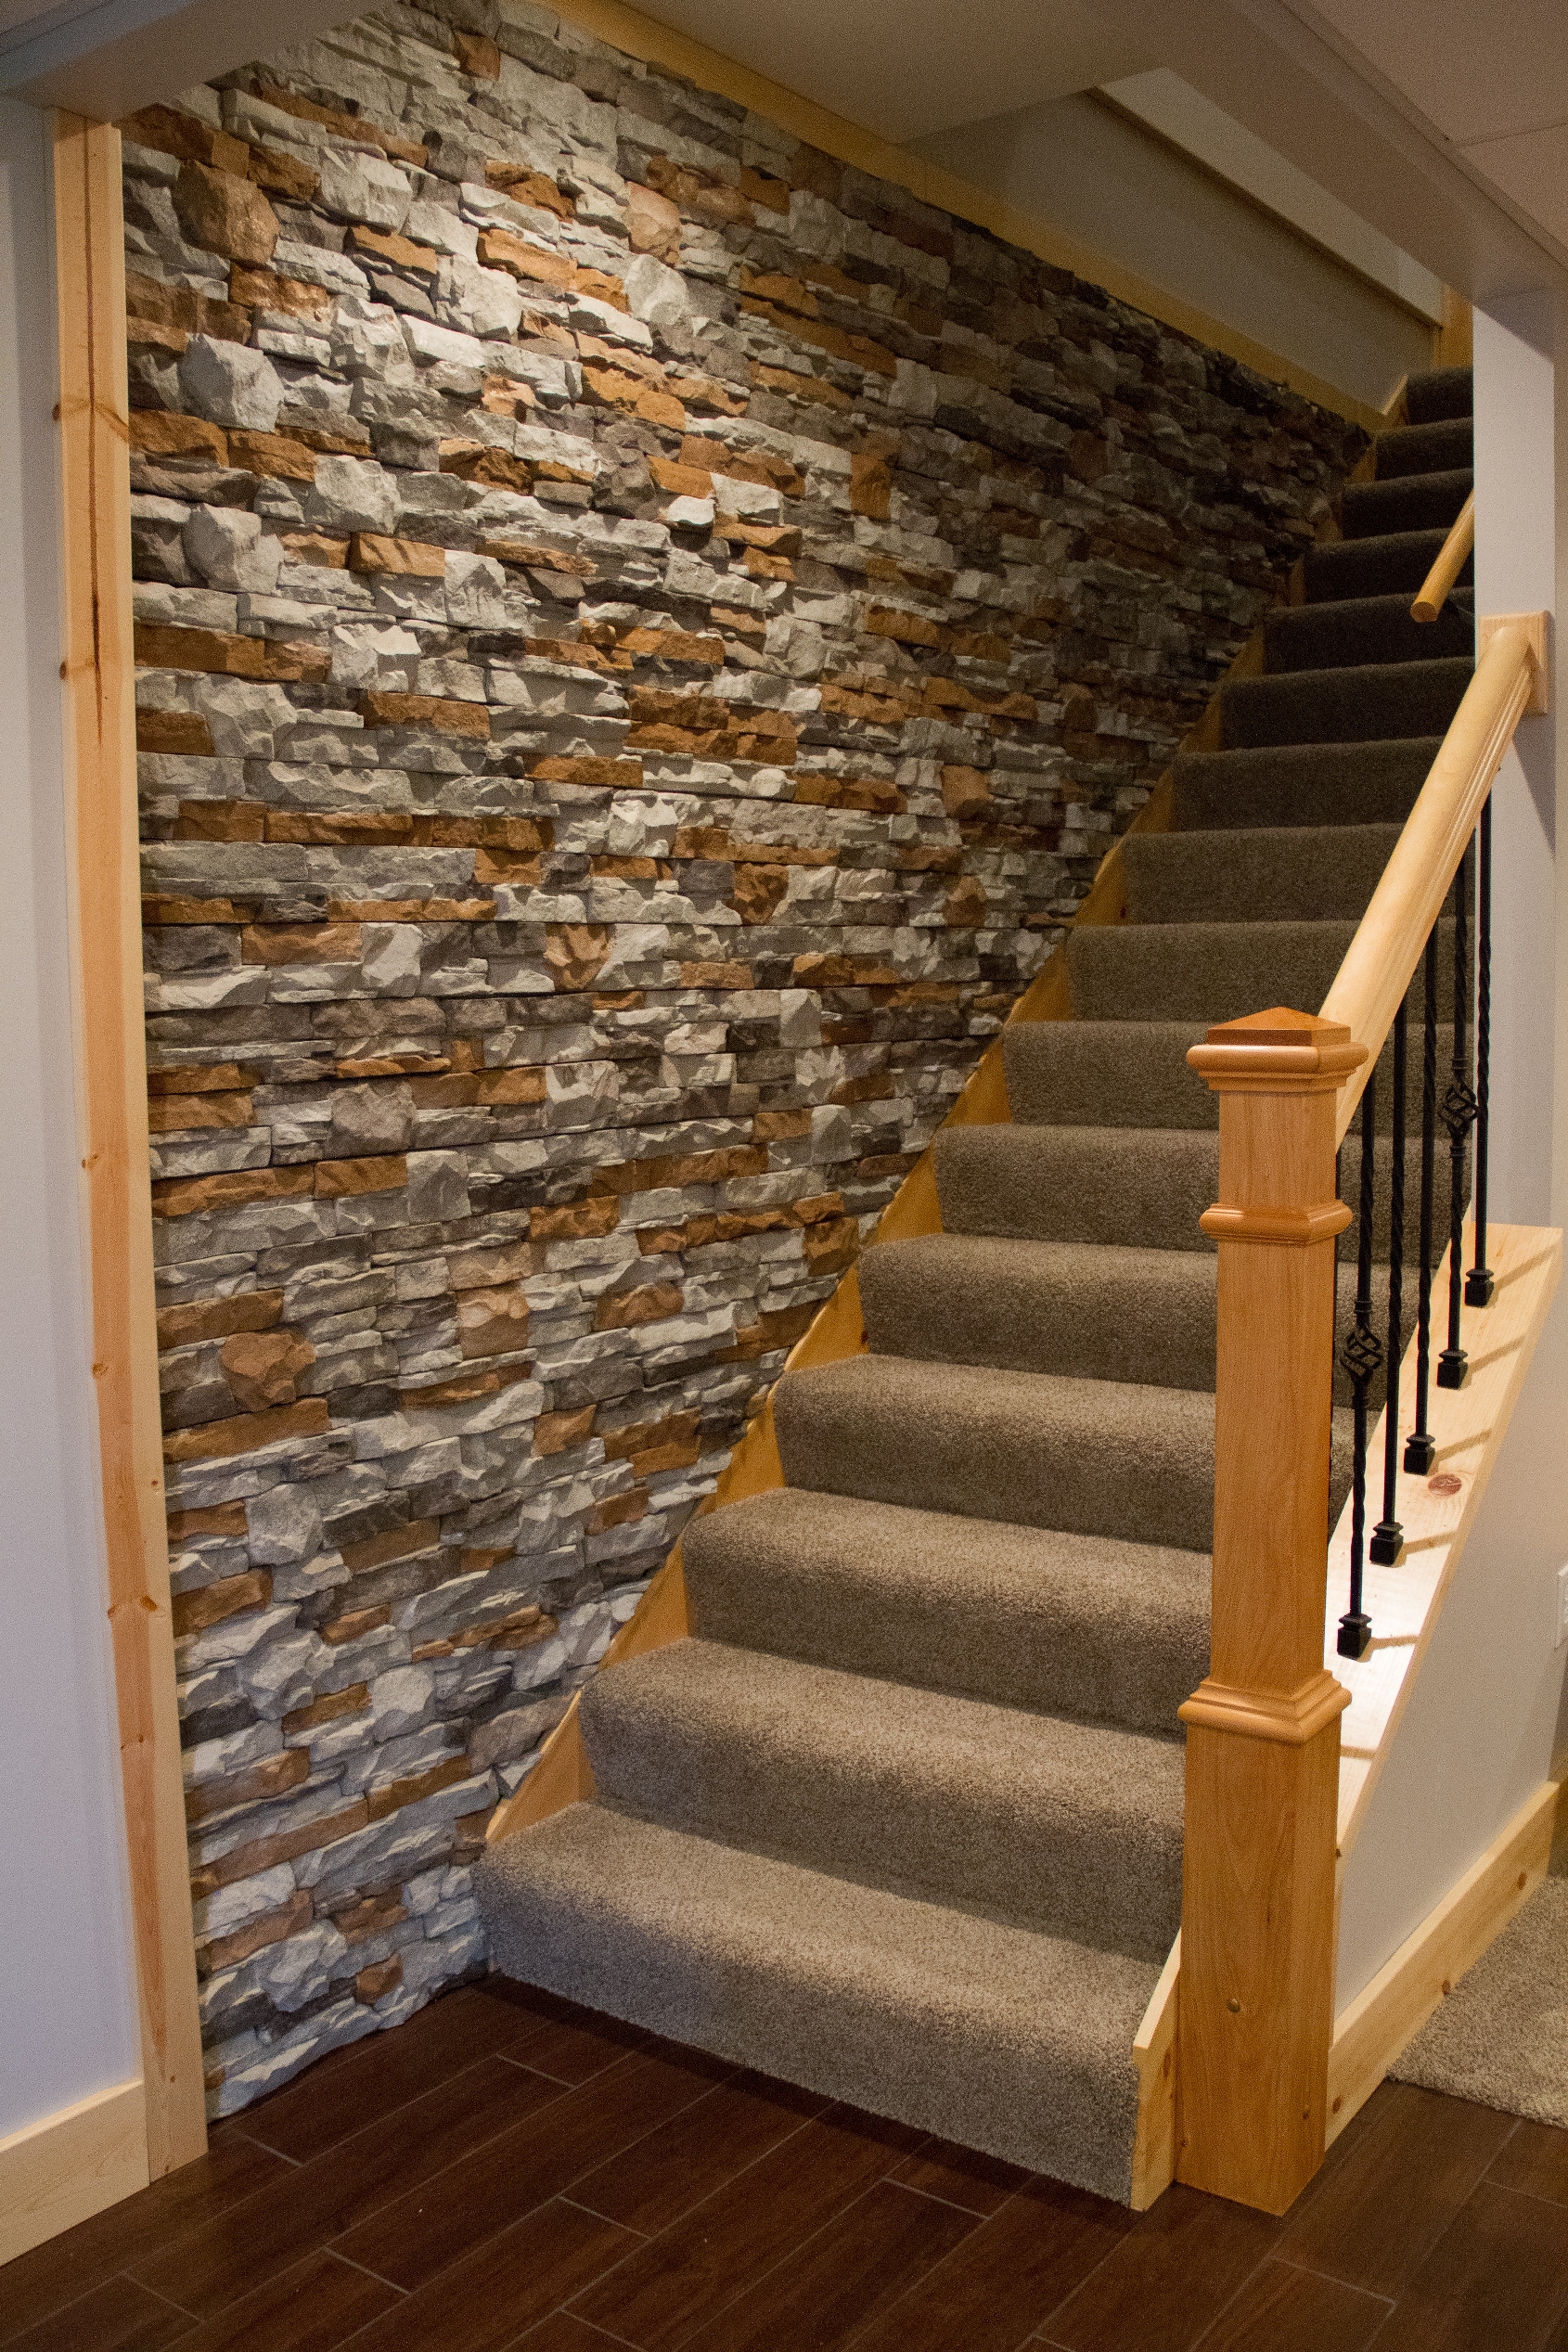
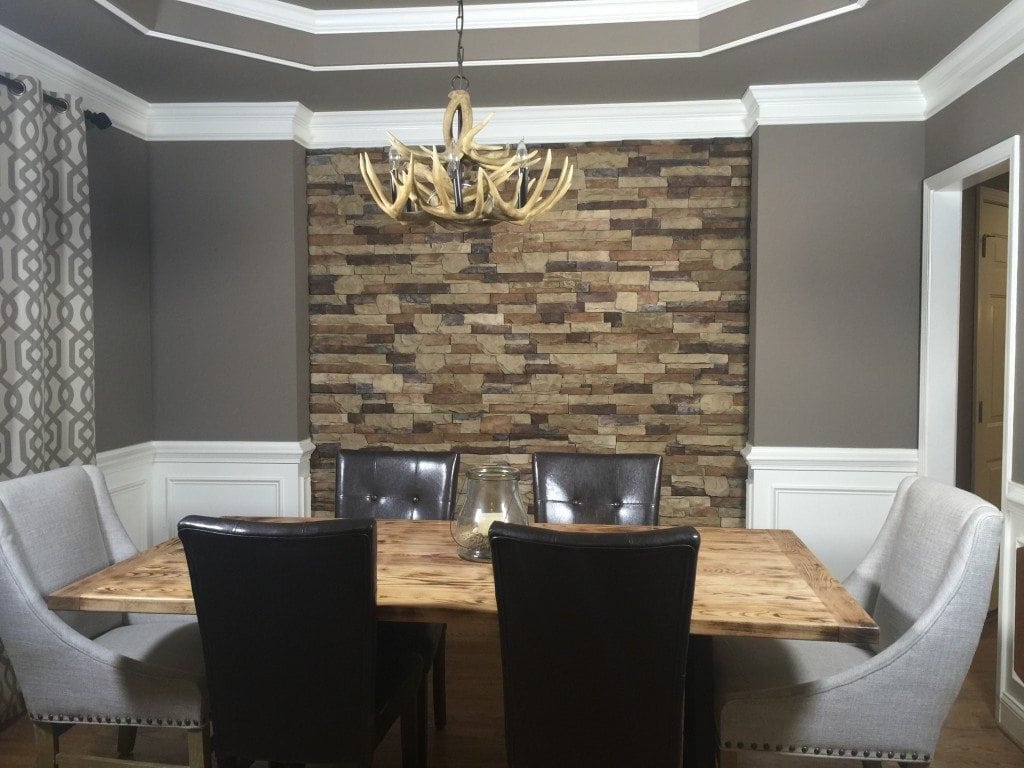
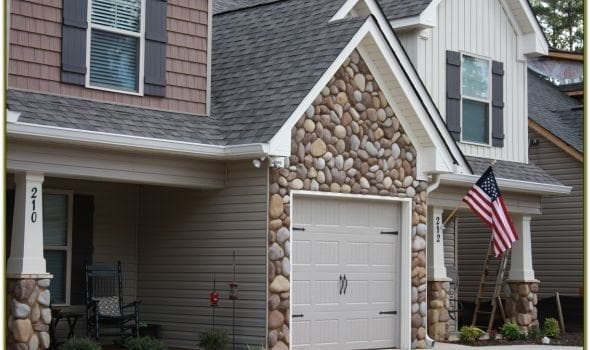
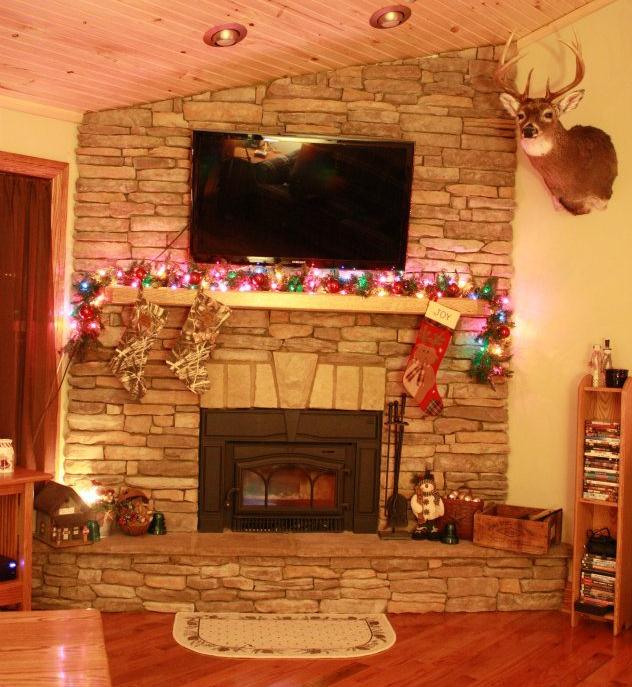
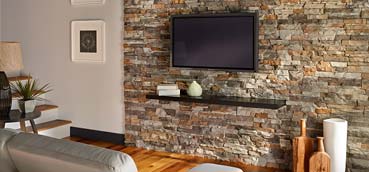
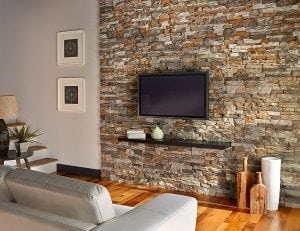
The use of faux stone as cladding inside the house is one of the most effective makeover ideas. You can use it on feature walls in living areas; between counters and cupboards to transform kitchens; as a backdrop for fireplaces, bars and other special areas; and to add character to stairwells, lobbies and entrance halls, however big or small they may be.

But until relatively recently, working with faux stone has required basic masonry skills because it was molded from concrete and laid using mortar. Doing it this way is incredibly effective, but does take time, and can be messy.

DIY stone panels (Go-Stone) are just as effective, but quite different. A truly DIY product launched by Native Custom Stone in 2013, Go-Stone panels are made with recycled tires, making them lightweight and environmentally friendly. They are also incredibly easy to install with no formal skills, and it’ll take you about a fraction of the time it would to install traditional faux stone panels.

DIY stone panels (Go-Stone) can be used in a multitude of different ways, to create lots of different effects, but the installation process remains the same – and the bonus is that anyone can do it!

The Installation Process for DIY Stone Panels (Go-Stone)

Easy to Install Go-Stone DIY Project 
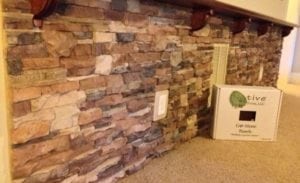
The first step is to measure the surfaces you are planning to transform using DIY stone panels (Go-Stone). The next is to order what you need from Native Custom Stone, select Home Depot stores, or from BuildDirect.com

There will be three different sized panels in each pack; these measure 16, 12 and 8 inches. They should be alternated according to the illustration on the packaging, for example, with a 12- or 8-inch panel above a 16-inch panel. Note that corner pieces are packaged separately. You will need these if you are working on pillars or any areas that don’t end at the corner of a wall.

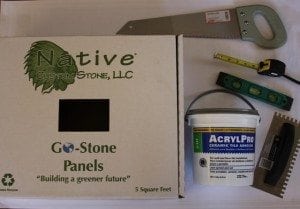
The second step is to ensure that you have everything you need to do the installation work.

There are so few tools and equipment needed, if you’re already into DIY there’s an excellent chance you will have it all already. You’ll need:

  • Measuring tape to measure the surfaces as well as to check where the panels will go.
  • Drywall or wet-cut saw to cut some of the panels to ensure end pieces fit perfectly.
  • Torpedo or spirit level to make sure the panels are level and plumb.
  • Notched floor trowel.
  • Ceramic tile and stone adhesive, preferably ready mixed.

Now you’re ready to get started.

  1. Make sure the surface to be clad is clean and dry.
  2. Cover the floor in and around the work area with canvas tarpaulin or plastic sheeting.
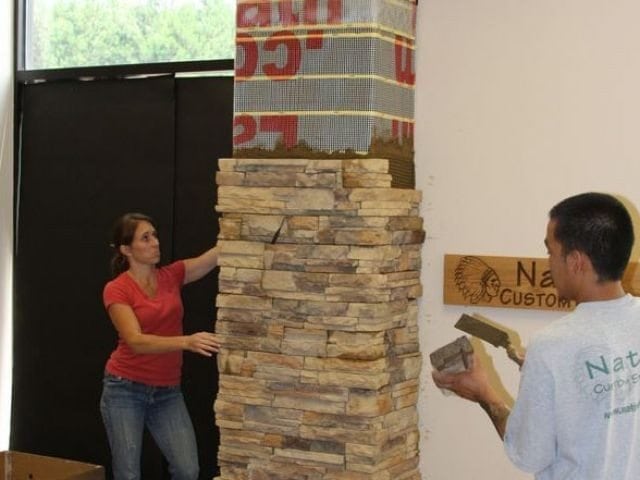
  3. If you have corner pieces, it’s important to start working from a corner.
  4. Apply adhesive to the first panel using the trowel. Make sure it covers the whole surface.
  5. Push the first panel firmly into place and use the level to make sure it really is level. Never rely on existing surfaces for this – not even the existing floor.
  6. Lay all the panels along the baseline.
  7. You may have to cut the last panel to fit. If you have corners at both ends, you will have a cut panel in the middle, in which case it’s best to cut two of the panels and butt them together for a neat fit.
  8. When you lay the second row of panels, make sure you don’t lay identical ones on top of one another. If you do this you are likely to create a visual seam.
  9. Continue to check your levels as you work.
  10. And that’s all there is to it. Simply keep laying your new simulated stone cladding until you’re done.

Contact Native Custom Stone for more information about the different stone types and colors for your next project using DIY stone panels (Go-Stone).

Filed Under: DIY, Go-Stone Panels, Tips and Tricks

Design Your New Kitchen Using DIY Stone Panels (Go-Stone)

Kitchens are an integral part of our daily lives, and whether you want to upgrade your kitchen because you plan to sell, or because you need it to work better, a well designed kitchen will always impact positively on your property investment.

Kitchen Design

Designing a new kitchen can be a challenge, but it can also be a lot of fun, particularly when you introduce special features that make it unique, like Go-Stone panels or walls.

But first of all you need to consider the basics:Custom Go-Stone Kitchen Island

  • The work triangle Where will you position your stove or hob and oven, your sink and refrigerator? Remember that these appliances should never be placed adjacent to one another and should always form a work triangle.
  • Appliances If you’re upgrading your kitchen, chances are you’ll be buying new appliances. Make sure you know exactly what these measure otherwise your new kitchen layout isn’t going to work.
  • Storage and work surfaces Cupboards and counter-tops are vital for a kitchen to work efficiently. Generally tall units, including broom cupboards, should be located at the ends of counters, and it is essential that work surfaces are positioned between appliances.
  • Plumbing Whether yours is a new kitchen or a remake, you’re going to need to ensure that water supply and drainage are connected to the sink in the most practical manner. Changing pipes and drains can be very expensive, so get a qualified plumber on board in the early stages to advise you.
  • Lighting and ventilation You need to be able to see what you are doing when you’re preparing food and cooking, and so you will need to consider both general overhead and more focused lighting that will illuminate working surfaces. In terms of ventilation, you need to take steps to ensure that the room doesn’t smell bad because the odor of past meals lingers in the air.
  • Wall and floor surfaces Whether you’re building and installing a new kitchen, or renovating and old one, the wall and floor surfaces will be paramount. Even installing new kitchen units could mean that you have to retile the floor and resurface, paint or tile walls. But you’ll also have the opportunity to introduce DIY stone panels on walls between floor and wall-hung units, on pillars, or on a feature wall elsewhere in the kitchen.

Where to Use Go-Stone DIY Stone Panels in a Kitchen

The design and style of you kitchen will determine largely where and how you can use stone panels in your kitchen effectively. A feature wall will add interest to most kitchens. Used throughout the room, you can achieve a warm, rustic look, particularly if you install characterful wooden cupboards and cabinet units. If you have space for a center island, perhaps fitted with a prep sink or hob, these fabulous faux stone panels may be used to achieve a fantastic finishing touch around the base.

Many kitchens today are open-plan, sometimes incorporating a living area that might have a fireplace or even a pub. Go-Stone panels are ideal for both these features, and will help to tie the rustic theme together.

And because there’s a choice in terms of stone finish, color and stone size, you’ll be able to achieve your own unique design without professional help.

Installing Go-Stone DIY Stone Panels in a Kitchen

Designed specifically for interior walls, Go-Stone panels are lightweight and so easy to install you’ll wonder why you’ve waited so long. You don’t need any special skills or building experience, and the tools required are minimal. Intended for DIY use, no mortar is needed, just a suitable tile adhesive.

Contact us today to place an order or get a sample.


Filed Under: Go-Stone Panels

Native Custom Stone Partners With BuildDirect to Distribute Products

Architectural-grade simulated stone panels and thin brick veneer from Native Custom Stone now available online from BuildDirect.com

Go Stone

Dawsonville, GA, March 14, 2016 – ​Georgia’s leading manufacturer of cultured stone products has partnered with one of America’s biggest online home improvement retailers to provide companies, and home owners, with easy access to their exciting eco-friendly product, Go-Stone®.

Engineered to make installation extremely easy and seamless, Native Custom Stone’s affordable Go-Stone® panels were created with the do-it-yourself market in mind. They are popular in kitchens and bathrooms, and for feature surfaces and accent walls in living areas. All you have to do is keep the panels level and stagger them for a realistic effect. No foundation required, the panels adhere to almost any substrate using the proper thin-set for interior applications, and type S mortar for exterior applications.

We are excited to partner with one of the nation’s largest online home improvement retailers. BuildDirect will open several new markets nationwide for distribution of our products.

BILLY BENNETT, OWNER OF NATIVE CUSTOM STONE

Whether you are a committed DIY enthusiast or a total novice who has never tackled a building or decorating project before, the new partnership between Native Custom Stone and BuildDirect.com will enable you to plan your project, and order the tools and materials needed, from the comfort of your living room. BuildDirect.com offers free shipping of samples if you aren’t sure what you want; and once you’ve decided, they will deliver your order to your front door.

Launched just over two years ago, Go-Stone® is made from waste rubber extracted from discarded tires, and transformed into look-alike stone panels using the latest “crumb rubber” technology. Since a large percentage (around 78) of the more than 242 million tires discarded in the US every year are illegally dumped or thrown onto landfills, this makes the product one of the most environmentally friendly options on earth.

Go-Stone® panels are packaged in units of five, totaling five square feet and with 40 vertical inches of flat finished edges. Corner pieces are packaged with four linear feet in a box. Accessory pieces intended for use around plug points, light switches and so on are also available. All may be cut to size with a drywall or wet-cut saw if required.

Installation of panels requires minimal tools and no specialist skills. In addition to a saw you’ll need a torpedo or small spirit level, a ¼” notched trowel, a tape measure, and tile adhesive. All these items are also available from BuildDirect.

The environmental bonus is that every box of Go-Stone® you purchase represents a tire that would likely have ended up in landfill.

Native Custom Stone is located in Dawsonville, Georgia. For more information about the company and Go-Stone, visit their website, http://www.nativecustomstone.com. You can pick up Go-Stone today from BuildDirect.com, HomeDepot.com and at select Home Depot locations.

Go Stone
Go Stone
Go Stone
Go Stone
Go Stone


Filed Under: Go-Stone Panels Tagged With: go-stone

The Advantages of Using Go-Stone Panels for Your Home

Update 3/11/2016 – Native Custom Stone’s Go-Stone Panels are now also available online at BuildDirect.com

Faux stone paneling has been gaining popularity for years as a great alternative to natural stone. When considering updating your home with the look of stone, consider these downfalls of natural stone:

  1. Simply put, it’s heavy. For this reason, natural stone is not one of the most DIY-friendly materials to work with. It’s difficult and expensive to transport, and even more difficult to install without help.
  2. You will need specialized tools and masonry skills to cut natural stone into pieces that fit together properly. You could rent the tools, but you would probably waste time and money by making mistakes and wasting material.
  3. Since natural stone is so heavy, it must be installed correctly. If not installed properly, it could pull away from its anchors causing serious damage to your home.
  4. Natural stone is very expensive, mostly because of the high cost of shipping. Bringing in natural stone from other locations is cost prohibitive, therefore, you may be limited to the stone that is quarried locally and isn’t exactly the style you’re looking for.

Faux stone veneers, like Go-Stone Panels, are a growing trend because they don’t have any of these disadvantages.

We developed Go-Stone as an innovative product specifically for Do-It-Yourself projects. It is:

  • gostone cherokee stairwellFifty percent lighter than natural stone making it easier and more cost-effective to purchase, ship and install.
  • Very easy to install without expensive tools or years of masonry experience. Click here to learn more about the tools and installation needed for Go-Stone Panels.
  • Environmentally friendly. Unlike many other faux stone veneers, Go-Stone is made from 87% recycled materials. Learn more in our brochure.

Go-Stone panels are perfect for updating the interior of your home. They can be used on fireplaces, in kitchens or as wall accents. Go-Stone Panels are sold exclusively at select Home Depot locations or online at HomeDepot.com.

Filed Under: DIY, Go-Stone Panels, Maintenance and Installation, manufactured stone

Ways to Incorporate Stone into Your Home’s Interior Design

Whether stone is old, newly quarried, synthetic, or made from cast concrete, it can be incorporated into the interior design of any home.

Of course you can build with stone, or use a stone veneer for walls or panels. Alternatively, you can use stone to create features and add style to any room in your home.

The Advantages of Stone Walls

There are so many stone products to choose from you’ll be spoilt for choice. But generally stone will add a natural, earthy vibe and a gorgeous texture other materials can’t provide. They help with the absorption of sound and also provide a unique pallet for adding pattern, color and texture to interior design. Better still, stone surfaces are generally exceptionally durable and easy to maintain.

Whatever you decide to use to incorporate stone into your home’s interior design scheme, you will find there is a wide range of stone types in a variety of price ranges. Some require professional installation while others are easily installed by competent DIY enthusiasts, using minimal tools.

GO-Stone Cedar Creek

Top Ten Interior Design Ideas for Incorporating Stone into Your Home

  1. Use stone around a fireplace, but don’t cover the whole wall. It will enable you to add both color and texture to the room, creating your own unique character. This is a particularly easy project using lightweight manufactured stone veneer.
  2. Build a kitchen island out of stone, or build a frame and add simulated stone cladding to make it look as if it is solid stone. Top the island with a slab of marble or granite, or tile the top with matching simulated stone tiles.
  3. Tactile stone used on a bathroom wall can be the perfect foil to high-sheen tiles or even rustic stone tiles.
  4. A conventional bath may be boxed in above ground and the sides tiled to match or contrast with the wall.
  5. For something completely different, leave a gap between tiles in your entrance hall or even your bathroom floor, and lay river stones in mortar to create a handmade pattern. Push them into the soft mortar so that they don’t protrude too much and allow the mortar to set properly before walking on it.
  6. Create the effect of exposed stone by cladding a feature wall with stone or stone veneer. It’s the perfect way to add the character of age, and will also add pattern and texture to the interior design scheme. For vivid contrast paint adjacent walls white or a very pale creamy stone color. Imaginatively done, there will be people who mistake this for original stonework.
  7. If there are pillars in your home, cladding these with stone can create the most amazing effect. If you restrict the use of stone to the pillars alone, you will benefit from visual impact.
  8. Clad the walls of a stairwell in stone and use lighting to highlight its texture. The stairs themselves may be tiled in a sympathetically matching color, or finished so that they create a contrasting effect.
  9. If there’s sufficient light inside your home, build a stone planter and introduce plants that will thrive indoors.
  10. Define a home bar area using stone both on the walls and on the bar itself. Manufactured Go-Stone panels will be ideal for this project.


Filed Under: Go-Stone Panels, installation and care

Building a Bar from Scratch and Finishing With DIY Go-Stone Panels

A home bar is a great place for entertaining. You can plan it so that it becomes the hub of your home, or so that it can be used as a hideaway where the guys (or girls) can escape out of sight and sound.

The location you choose depends on the space you have available in your home, as well as the function you want this special entertainment area to fulfill. If you don’t have much space you can tuck it in a corner; but if you want to incorporate a games area, perhaps with a pool table or home theater, you will need a dedicated room or a basement.

Go Stone

Designing a Bar From Scratch

While the dimensions of a bar are variable in terms of length, height and width are standard for practical reasons. Generally a bar top shouldn’t be wider than 16 to 20 inches (400 to 500 mm), which is about the width of a standard desk. Anything more than this is simply a waste, both in terms of materials and space, though the top should overhang the bar structure by at least eight inches (200 mm.) A bar molding will finish the top off nicely, and will help to keep drips and spills from dribbling onto the laps of those sitting at the bar.

While not all home bars incorporate a drinks rail on one side, for you or the barman to mix drinks, it’s a very useful feature. It should be separated from the rest of the bar top by a drip lip in the form of a thin strip of wood that will keep any spills from splashing on the bar top itself. Additionally, a lower counter on the barman’s side is great for preparation and also a good place to keep unwanted bits and pieces out of sight. If you want to incorporate a bar sink, this is where it should go.

The height needs to accommodate the bar stools you plan to use. Most are 30 inches (about 760 mm) tall, which is perfect for the standard bar height of 42 inches (just over a meter.)

While space might be the deciding factor in terms of the length of your home bar, you should allow 24 to 30 inches (600 to 760 mm) for each bar stool.

Foot rails should be seven to nine inches (177 to 228 mm) off the floor; these can be in the form of a metal railing (either brass or stainless steel) or timber.

Then there is the question of finishes, which of course depends partly on what you use to build the bar structure. If it’s solid wood and you’re going to leave the top wood, then you’ll need to give it a few coats of tough, hardwearing varnish. Tiles are another option; or, if it fits your budget, a good solid surface like marble, quartz or granite would be even better. Tiles and solid stone are ideal options if the bar is constructed with a material like chipboard.

You can use Go-Stone panels to finish vertical surfaces – and if there is a suitable wall behind the bar, to finish this too and create a good-looking feature wall that matches your bar.

Installing Go-Stone Panels

Go-Stone panels are ideal for any DIY build-your-own bar project. Manufactured for interior use, it is lightweight and super-easy to install. You don’t need specialized tools, masonry skills or experience, and the system is quick and clean.

Native Custom Stone

The product, which is manufactured by Native Custom Stone from 87 percent eco-friendly materials, is sold in DIY kit form. There are three finishes, Cedar Creek, Cherokee, and Coastal Blend, each of which looks just like real stone. There is enough to cover an area of five square feet (0.465 square meters) in each box. Corner pieces are packed separately, with four linear feet (1,2 meters) in a box.

The only equipment you need to install these simulated stone panels is a:

  • Steel measuring tape
  • 12 inch (about 300 mm) spirit level
  • ¼ inch notched floor trowel
  • Drywall or wet-cut saw. You can use a circular saw if you have one.

You will also need a good quality ceramic tile and stone adhesive to stick the panels onto the wall and/or bar structure.

Installation instructions start with ensuring the surface is clean and dry. It’s a good idea to cover the floor adjacent to the bar and wall you are cladding for protection. You can use cloth or rosin paper to do this.

Then start installing the panels at the bottom corner of the wall or structure. Apply the adhesive to the back of the first stone panel and set it in place, moving it firmly from side to side to ensure there are no air bubbles. The kit contains three different sized panels: alternate these for a realistic effect. The horizontal edge of the panels must be level, so use the level after setting every third stone to check that they are in fact level. You may need to cut one of the panels to ensure that the panels fit perfectly; you will need to measure the exact length. Be sure to wear safety glasses when cutting.

When you start on the second “course” of stone, make sure you stagger the panels so that you don’t end up with obvious seams running vertically up the wall or bar structure. So, if for instance you started with a 16-inch (406 mm) panel, use either an eight-inch (203 mm) or a 12-inch (305 mm) panel above it.

It really is that easy!


Filed Under: Faux Stone Paneling, Faux Stone Veneer, Go-Stone Panels, Maintenance and Installation

Using Custom Stone Veneer vs. Natural Stone for Your Project

Natural stone creates an amazing effect in homes and gardens, for walls and for feature structures including fireplaces, outdoor kitchens, water features and planters. But there’s a certain irony about this statement because you can create exactly the same effect using a custom stone veneer, and you’ll find it’s generally easier, cheaper, and much more manageable to maintain.

River Rock

While there is a certain mystique about natural stone, largely based on tradition and the age-old skills of practiced stonemasons, modern technology has enabled us to manufacture faux stone in various forms, including veneer. Custom stone veneer and other faux stone products are perfect for both construction and finishing projects. Stone veneer is also a great tool for revamping and renovating walls and other indoor and outdoor features.

Effects You Can Create Using Custom Stone Veneer

Here’s another irony: unless you have an unlimited budget for natural stone, you have many more choices in terms of the effects created by using faux stone and veneers than you do when using natural stone. The reason is simple. When you use the natural stone from the area where you live, you are limited to what stone occurs naturally. If you opt for faux stone blocks or custom stone veneer you are limited only by the range produced by an accessible manufacturer like Native Custom Stone.

The reality is that manufacturers offering manufactured stone veneer products have dozens of styles and colors. There are also numerous different finishes and sizes that will give you the opportunity to copy any effect from an elegant castle stone finish to a typical rubble effect like the traditional ashlar, commonly used in southern USA.

Alternatively, you might want something that looks as if it was built using genuine fieldstone or perhaps river rocks. No need to go into the field or seek out a river, a good quality custom stone veneer or manufactured stone will provide you with the materials you need.

Working With Stone Veneer Rather Than Natural Stone

Custom Fit Stone

Traditional stonemasons didn’t need university degrees to do their work, but they did need incredible skills that were generally passed down through the generations.

While stone can be used in the form of boulders or random blocks, unless you are building a rockery or irregular dry-stone structure, the stone will need to be cut into blocks or slabs that will slot together or enable them to be laid neatly and effectively. Natural stone is heavy and can be challenging to cut.

Stone veneer, on the other hand, is available in the form of individual units or simple panels. Interlocking panels in particular, are very easy to install without any skills at all, other than the ability to use a spirit level to ensure they are laid level. They are also lightweight and easy to handle. Furthermore, no foundations or additional structural support is required and they can be used to clad a variety of frame types, both metal and wood, or even a masonry structure.

Typically natural stone walls vary in size from about 2 to 30 ins (or 51 to 762 mm). Manufactured stone veneer, on the other hand, is substantially thinner than natural stone blocks, varying in size from about 1 to 3 ins (or 25 to no more than 76 mm), partly dependent on the texture chosen.

So if you like the effect of natural stone, explore the options offered by the Native Custom Stone range of veneer products.


Filed Under: Custom Stone Bathroom, Custom Stone Fireplace, Custom Stone Kitchen, DIY, Faux Stone Veneer, Go-Stone Panels, installation and care, Maintenance and Installation, Manufactured Stone, Tips and Advice Tagged With: building materials, custom stone, manufactured stone, manufactured stone veneer, stone veneer

Want an Easy Weekend Project? Pick up Go-Stone at Home Depot

Do it yourselfing used to be a survival trait. When something broke and you didn’t have enough money to hire a contractor, you did it yourself. Over time DIY has developed into a full blown hobby and even people that can afford to hire outside help, enjoy tinkering around on their own. The stumbling block new DIY’ers have is finding good projects to start with. Everyone makes mistakes at first so your first few projects need to be manageable. Lucky for them, there’s Go-Stone.

Jay'sFirePlaceAfterGo-Stone is a revolutionary new product from Native Custom Stone designed specifically for the do it yourselfer. It is a light weight, easy to install, stone panel system that makes it simple for you to construct:

  • Stone fireplaces
  • Custom backsplashes
  • Accent walls
  • Wet or dry bars
  • Custom projects

There are a lot of factors that make Go-Stone a do it yourselfers dream. Go-Stone is:

  • Extremely light – Go-Stone is 50% lighter than actual stone so one person can easily work with it. When working with natural stone, you always want a buddy close by in case something happens or you need a hand. With Go-Stone there is much less danger of back and neck strains through improper lifting and if you drop a piece on your foot, it will probably just hurt a lot instead of causing injury.
  • Very easy to install – When working with regular stone you have to make sure everything is securely mounted to the wall. As mentioned above, you will be dealing with a lot of weight and if mounted incorrectly, someone will get hurt. Go-Stone is so light that you can actually mount it to the wall with tile adhesive and it will be perfectly secure. Even if a piece does come loose at some point in the future, making a quick repair is a simple process.

If you are looking for a new project involving stone then you need to look into Go-Stone. It makes everything so much easier and it can be found at your local Home Depot.

Filed Under: DIY, Go-Stone Panels, Manufactured Stone, manufactured stone Tagged With: DIY, go-stone, home depot, manufactured stone, stone project

Use Go-Stone for Indoor Custom Stone Work

Do you know of any products that can help the environment, cut down on waste and beautify your home at the same time? If not, then you haven’t been introduced to Go-Stone yet. It is a new type of manufactured stone that has been designed specifically for the DIY enthusiast.

panel-stoneIf you were to try installing a new natural stone fireplace or even a backsplash for your counter, you would need to have a professional do the work. The weight and cost of the material makes it too difficult for amateurs to mess with. Manufactured stone is much easier to work with and can be used in many DIY projects but for best results it is still better to leave it to the professionals. Go-Stone is different. A few minutes of hands on time with Go-Stone and most DIY enthusiasts could be deep into their first project. What makes it different?

  • Go-Stone is about half the weight of the other materials. So, it can be held to the wall with basic tile adhesive. No special tools or compounds are needed.
  • It is extremely safe for the environment because it is made from 87% recycled materials.
  • You don’t need any specific training, tools or years of knowledge in masonry to do a top notch job with Go-Stone. No joints or mortar is needed to have professional looking results on your own.

The really amazing thing about Go-Stone is that it is indistinguishable from natural stone, yet it is created from crumbled rubber. Specifically, recycled tire rubber. So for every five square feet of Go-Stone produced, a twelve pound tire is prevented from going to the landfill. That may not sound like a big deal until you think about these statistics. Over 200 million tires are thrown out in the United States per year. Of those, about 78% are illegally dumped or taken to a landfill. So, the next time you want to improve your home the easy way, use Go-Stone and improve the environment while you’re at it.

You can pick up Go-Stone for your home at select local Home Depot locations, contact Native Custom Stone for more information.

You can download our Go-Stone installation instructions here.

Filed Under: Go-Stone Panels, Maintenance and Installation, Manufactured Stone

Go Stone Makes DIY Stone Projects Easier

Have you heard of Go-Stone yet? If you are planning any DIY projects with stone elements in them then you owe it to yourself to read more at www.HomeDepot.com. It is an Eco friendly stone panel system that was created specifically for the “Do it Yourself” crowd.

Go-Stone requires very few tools to install and it is created almost entirely from recycled materials. It is not recommended for outdoor use but Go-Stone is perfect for projects like:

  • Kitchen back splashes
  • Fireplaces
  • Accent walls
  • Bathrooms

Go-Stone is:

  • Cherokee Go Stone | Native Custom StoneLight weight – Compared to standard building materials of its type, Go-Stone is incredibly light. This makes it very safe to work with and a lot easier for a single person to install.
  • Easy to install – Some building materials like natural stone require a hefty investment just to get the tools you will need for installation. Go-Stone doesn’t require any mortar to keep it in place or grout to fill in the cracks. A quick trip to your local hardware store will get you the few simple tools you need to create a finished professional look.
  • Environment friendly – The material is made from a special blend of crumbled rubber that started life as a tire. For every five squares of Go-Stone that you purchase you will be removing one old tire from an overburdened landfill. Considering that 242 million tires are thrown away per year in the United States and fewer the 7% are recycled, it is a great way to make a difference in your environment. Plus, you get a really professionally looking new design element for your home.

This innovative stone panel system will be available in three colors and it will have compliments like electrical surrounds and water table. With a product like this, even people with no experience in home repair will have the ability to improve the look of their home with stone.  Go-Stone is available online at HomeDepot.com nationwide, contact Native Custom Stone today to find out more about this revolutionary new product.

Filed Under: Adhered Stone Veneer, Custom Stone Accents, Go-Stone Panels

  • « Previous Page
  • 1
  • 2

Cart

Find a Vendor

No results found in this location. Please try again.

No results found in this location. Please try again.

Get Directions

  show options hide options
Remove
Add Waypoint
Fetching directions......
Reset directions
Print directions

Contact Us

Stone Types

  • Castle Rock
  • Country Villa
  • Field Stone
  • Ledge Stone
  • River Rock
  • Rubble Stone
  • Stack Stone

Tech Links

  • CAD & Installation Details
  • BIM | Revit | Autocad
  • Testing & ICC-ESR Report
  • 3-Part Spec & MSDS
  • Product Warranty
  • LEED Details
  • Cleaning Instructions
  • Product Data

Resources

Native Custom Stone Lunch and Learn | Stone Installation Information Download Our Brochure | Native Custom Stone Brochure Download

Contact Info

Native Custom Stone
236 Hightower Parkway
Dawsonville, Ga 30534
Phone: (888) 823-0745
Phone: (706) 216-5545

Follow Us!

Follow Us on FacebookFollow Us on LinkedInFollow Us on Blog

Native Custom Stone, 236 Hightower Parkway, Dawsonville, Georgia 30534
Website Designed by: Interactive Search Marketing |  Sitemap  |  Privacy Policy