Manufactured stone and products like Go-Stone are rapidly growing in popularity, especially with DIY’ers. Manufactured stone is extremely easy to work with, and it looks indistinguishable from natural stone. It is sometimes called cast stone because it’s fabricated using casts made from natural stone and concrete. It is often used for architectural features like:
- Building facings
- Ornamentation
- Trim
- Garden ornaments
Why do more and more people use manufactured stone every day?
 Manufactured stone veneers have the look of expensive natural stone without all of the downsides. Manufactured stone is durable and can last just as long as natural stone but it:
- Costs much less than natural stone. The price of natural stone has become artificially inflated over time because it is now associated with wealth and elegance. Manufactured stone can give you the same look and feel of natural stone, but it only costs a fraction of the price.
- Is much easier to work with. Manufactured stone is much easier to move around and install because it doesn’t weigh nearly as much as a natural stone. That means you don’t need extra materials to support it or expensive tools to cut it. Plus, it drastically lowers the chance you will be injured by it so you can save on doctor bills as well.
- Manufactured stone comes in a wide selection of colors and types . One of the biggest drawbacks to using the natural stone is its weight. It costs so much to ship it that most people will only be able to afford the stone quarried locally. Manufactured stone can look exactly like rocks mined from the heart of Siberia and it won’t cost you more than any other style.
Is manufactured stone vulnerable to damage or decay?
No, it is extremely durable and resistant to damage from the elements just like natural stone but your home isn’t. If a professional doesn’t install the manufactured stone, then you could have trouble with water pooling or draining towards your foundation instead of away. This problem can snowball fairly quick because you won’t be able to see the state of the wood behind your beautiful, pristine manufactured stone.
To ensure your new manufactured stone wall doesn’t cause you costly problems in the future, you will need to seal it against water. The experts at Native Custom Stone have found that Natural Shield is a perfect choice for the job. It works on:
- Manufactured Stone
- Brick
- Pavers
- Stucco
- Natural Stone
Natural Shield will protect your manufactured stone from freeze damage, stains, biological growth, water damage, cracking and dirt accumulation.
What to do if your manufactured stone has a few stains
 Manufactured stone is nearly maintenance free, but the operative word is “Nearly”. Every two or three months you should give your veneer a quick cleaning to keep it looking its best.
If the manufactured stone needs more than a quick rinse, don’t worry. The process is very simple, and you will be done before you know it. Just follow these five steps:
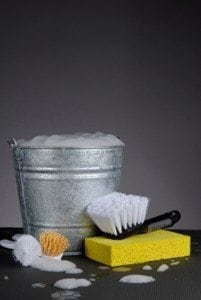
- Mix a cup or less of mild detergent with a few gallons of water. Never use harsh cleaners because they could cause the stone to fade. Some industrial strength cleaners are even strong enough to eat away at the stone.
- Give the stone a pre-rinse to loosen up any dirt or debris that may be clinging to the surface.
- Scrub the stone gently with a stiff bristle brush. Start with the dirtiest places, like where mud or dust has become caked on the stone. Remember to use a circular motion and clean your brush often or you will just spread the dirt around.
- Rinse your area thoroughly! Doing so is very important because you have to make sure all of the detergent has been rinsed from the manufactured stone.
- Now just let it air dry and you are done for another few months.
What to do if you got mortar on your manufactured stone veneer
Getting mortar on your manufactured stone veneer happens quite a bit. Since manufactured stone is so much easier to work with than normal stone, DIY enthusiasts have been tackling the installation more and more. It may seem to be an easy afternoon project, but you can damage a veneer by doing simple things like:
- Incorrectly placing the stones
- Attempting the install in overly humid conditions
- Wiping or digging into mortar that is still wet
- Accidentally getting mortar onto the face of your veneer
If you do make a mistake and get mortar on your manufactured stone, all is not lost. You can correct the problem if you act quickly and follow these seven steps:
- Gather the equipment you will need for the job: water, dish detergent and two stiff brushes that are not wire and rags.
- If the mortar is still fresh, then you will have to wait for it to dry completely. In most environments, this will take a full day and night.
- Mix up a bucket full of warm water and dish detergent. There is one trick to this step that is you cannot have bubbles in the mixture. Keep mixing until all the bubbles disappear then set it aside for now.
- Using one of your stiff brushes, start wiping it across the mortar that you want to remove from your manufactured stone. It may help to put the brush at an angle, so you are wiping at the contact point between the mortar and the manufactured stone. You should continue this step until you get as much mortar off as possible.
- Now use one of the rags to remove all the dust that has accumulated on the surface of the veneer.
- Take your second brush and dip it into your water/dish detergent mixture. Use the same technique as before to remove the rest of the mortar and give the other parts of the exposed stone a good scrub while you are at it.
- Give the stone another once over with regular water and look for any residual mortar. It has probably all been removed by now but if you do still see some, just repeat step five again.
How to repair the cracks in your manufactured stone
Manufactured stone is a surprisingly strong and durable material, but nothing lasts forever. Even natural stone can be chipped and cracked over time. Damage over time can’t be entirely avoided, but with a little elbow grease, it can be easily fixed.
First you will need to gather a few tools:
- Broom
- Trowel
- Cold Chisel
- Wire Brush
- Hammer
- Grout Bag
- Mortar Mix
Once you have everything, you will need for the job, follow this procedure:
 Find the first stone you want to replace. Use the cold chisel to chip carefully away the grout so that the stone comes loose. The best way is to hold the chisel at a 45-degree angle, pointing inward toward the stone you are removing. Once you have removed the grout, lightly tap the hammer around the edge of the stone to loosen it. If it still doesn’t budge, you may need to start chipping away at the stone itself.
- Once the stone has been removed you should see, the wire meshes it was attached to. Carefully use the wire brush to remove as much debris as you can without pulling the mesh away from the wall.
- When the hole is clear, measure it. If you have another stone of the correct size, then you are ready to move on. If you don’t, you may need to rent a wet saw to cut one to fit.
- Mix the mortar in a bucket until it becomes a paste.
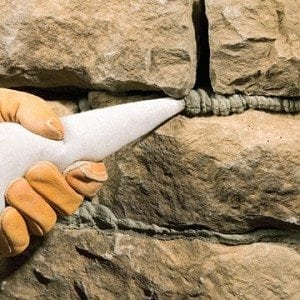
- Put a thin coating of the mortar directly onto the wire mesh then apply a thicker coat, about a half inch, onto the back of the stone. Press the stone firmly into place and use the grout bag to fill in around the edges.
- Move on to the next piece and follow the same steps.
If you run into any questions or you feel like you need a professional to help you with the project, please call us at 888-823-0745.


Follow Us!